Part 1: Create API Tools for Inventory Operations
In this first part of the lab, you'll build the foundational tools that give your Inventory Management Agent the ability to interact with real business systems. Think of these tools as the "skills" your agent needs to do its job—just like a human inventory specialist needs access to warehouse systems, purchase orders, and shipment tracking.
The key to building effective agent tools is flexibility. Unlike traditional integrations that follow rigid, predefined paths, agentic tools should support optional parameters that allow the agent to intelligently decide which data to retrieve based on the business context. This role-based design is what enables a single agent to handle multiple related tasks autonomously.
In this part, you will create five API tools:
- Query Inventory Levels - Check current stock quantities across warehouses
- Validate Purchase Order - Verify PO details against business rules
- Track Shipment Status - Monitor inbound deliveries
- Update Inventory Record - Adjust stock quantities when needed
- Get Supplier Information - Retrieve supplier details for reordering
Each tool represents a specific capability that an Inventory Management Specialist would need. By keeping tools focused but flexible, your agent can intelligently combine them to solve complex problems—just like a human employee would use multiple systems to complete their work.
Get Access to the Inventory Management API
Before you can create your agent tools, you need to get access to the Inventory Management API through the Boomi API Academy portal. This process will provide you with an API key and base URL that you'll use throughout this lab.
-
Navigate to the API Academy portal here: https://aiplatformcoe-l6qlay.portal.na.controlplane.boomi.com/academy.
-
If you don't have a Boomi account:
- Click Continue as Guest.
- Click APIs.
- Click Inventory Management.
- Click Get Access.
- Fill out the information and click Create Account.
-
If you do have a Boomi account:
- Click Login with Boomi Platform.
-
Once logged in, create an application to access the API:
-
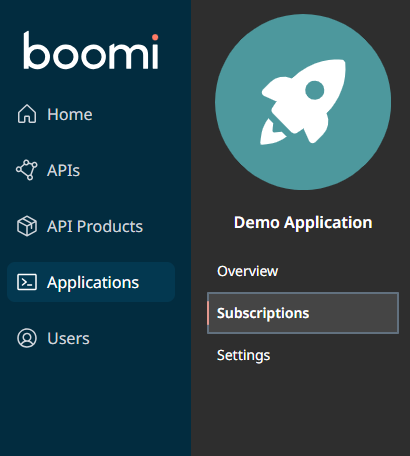
Click Applications in the left sidebar.
-
Click Create New Application.

-
Give your application a name (e.g.,
[builderInitials] Inventory Agent).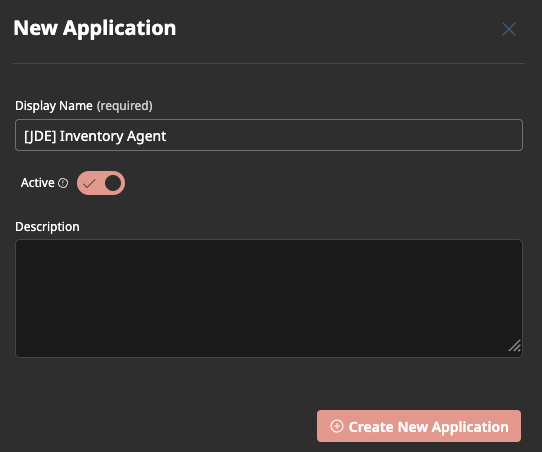
-
Click Create New Application.
-
-
Subscribe to the Inventory Management API:
-
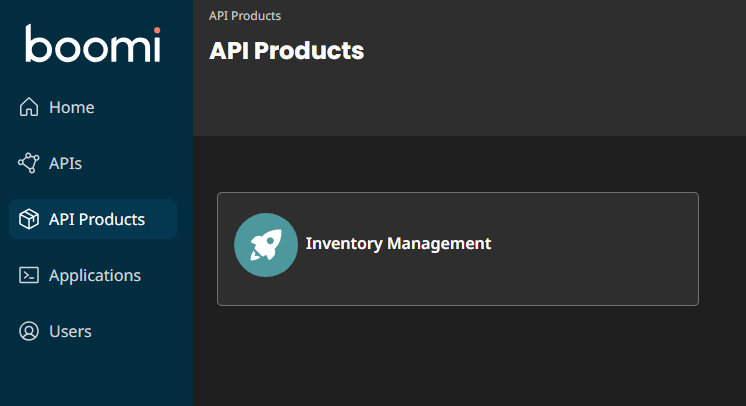
Click API Products in the left sidebar.
-
Click the Inventory Management API product card.
-
Click Plans.
-
Click Subscribe.
-
Find and select your application (
[builderInitials] Inventory Agent) using the Search... box. -
Click Subscribe.
-
-
Retrieve your API credentials:
-
Click Applications in the left sidebar.
-
Find and select your application (
[builderInitials] Inventory Agent) using the Search... box. -
Click Subscriptions tab.
-
Click Secrets.

-
Copy the API Product Key and save it somewhere accessible (you'll need it for every tool).
-
Copy the Inventory Management API (Base URL) and save it (you'll need this, too).
Keep These Credentials HandyYou'll use the same API key and base URL for all five tools you create. Consider saving them in a text file so you can easily copy and paste them as you build each tool.
-
Access Agentstudio
Let's start by navigating to Boomi Agentstudio where you'll create your tools.
-
Login to the Boomi Platform: https://platform.boomi.com.
-
Navigate to Agentstudio by selecting the Agentstudio icon in the top right corner.
noteThis will open Agentstudio in a new window. Make sure pop-ups are enabled in your browser.
-
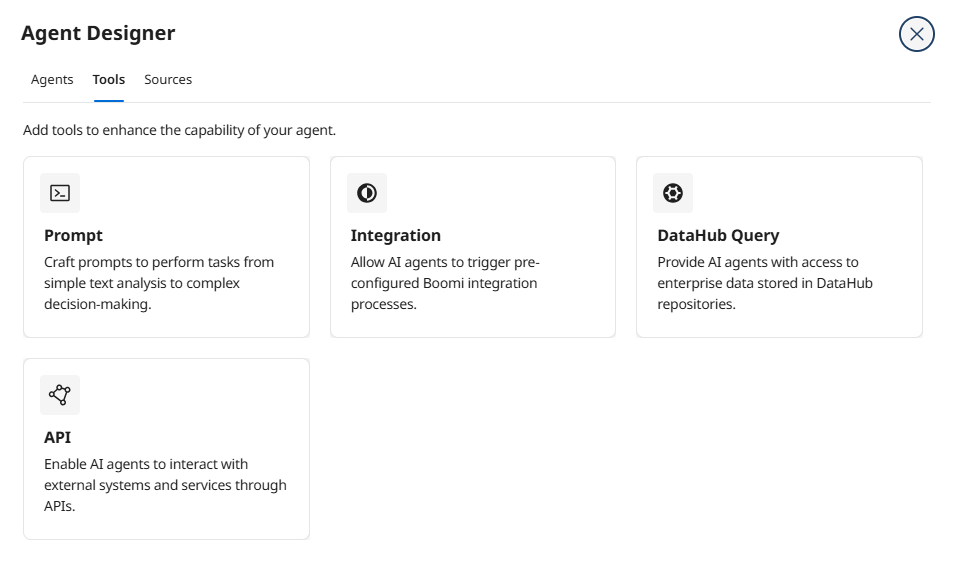
Click the Tools button on the left side of the screen.

Now you're ready to create your first API tool!
Tool 1: Query Inventory Levels
This tool allows your agent to check current stock levels across different warehouses and product categories. The optional parameters give the agent flexibility—it can check all inventory, filter by warehouse, or search for specific product categories depending on what it needs to know.
Optional parameters are crucial for role-based agents. Instead of creating separate tools for "check all inventory," "check warehouse A," and "check product category X," you create ONE flexible tool that the agent can use in multiple ways. This is the difference between task-based and role-based design.
-
Click Create New Tool.

-
Hover API Tool and click Add Tool.
-
Enter the following tool details:
-
Tool Name:
[builderInitials] Query Inventory -
Description:
Retrieve current inventory levels across warehouses with optional filtering by location or product category.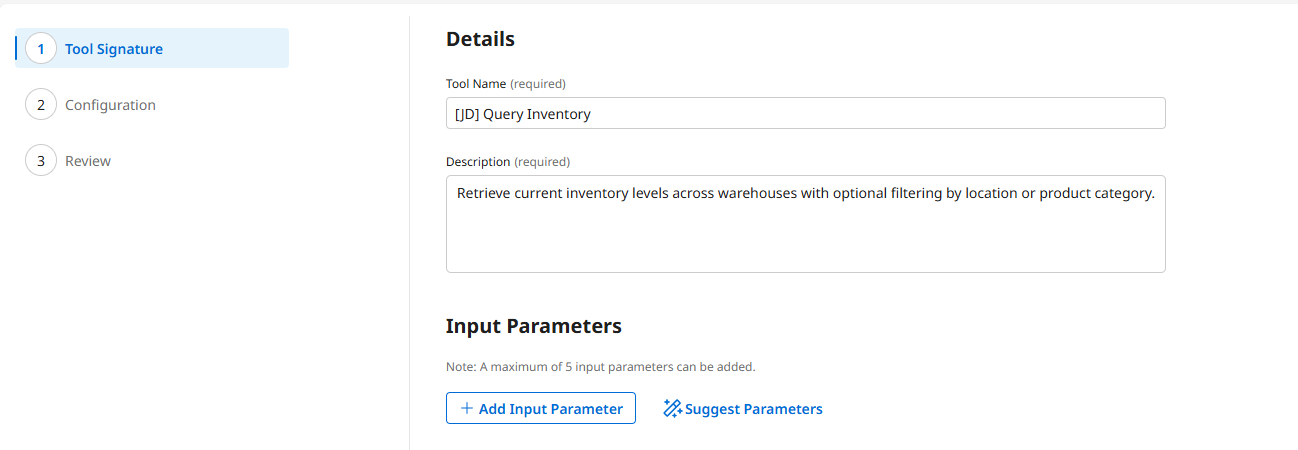 Why This Description Matters
The description tells your agent WHEN and HOW to use this tool. Be specific about what data it returns and any optional filtering capabilities. The AI model uses this description to decide if this tool is appropriate for the current task.
-
-
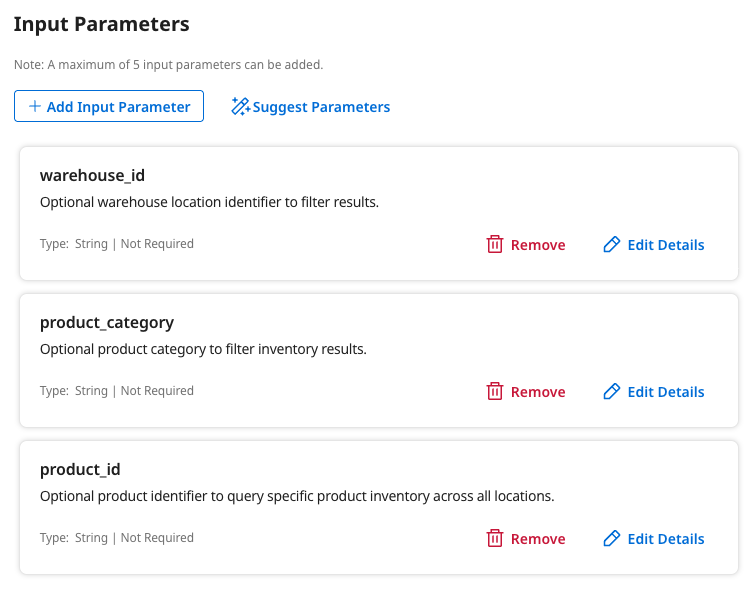
Click + Add Input Parameter.
-
Configure the warehouse_id parameter:
-
Name:
warehouse_id -
Description:
Optional warehouse location identifier to filter results. -
Type: String
-
Required: Off
Why Make This Optional?Sometimes the agent needs to check inventory across ALL warehouses (for a global view), and sometimes it needs to focus on a specific location (when investigating a stock-out). Making this parameter optional gives the agent the flexibility to decide based on context.
-
-
Click Add Input Parameter.
-
Click + Add Input Parameter again.
-
Configure the product_category parameter:
- Name:
product_category - Description:
Optional product category to filter inventory results. - Type: String
- Required: Off
- Name:
-
Click Add Input Parameter.
-
Click + Add Input Parameter again.
-
Configure the product_id parameter:
- Name:
product_id - Description:
Optional product identifier to query specific product inventory across all locations. - Type: String
- Required: Off
- Name:
-
Click Add Input Parameter.
-
Click Save & Continue.
-
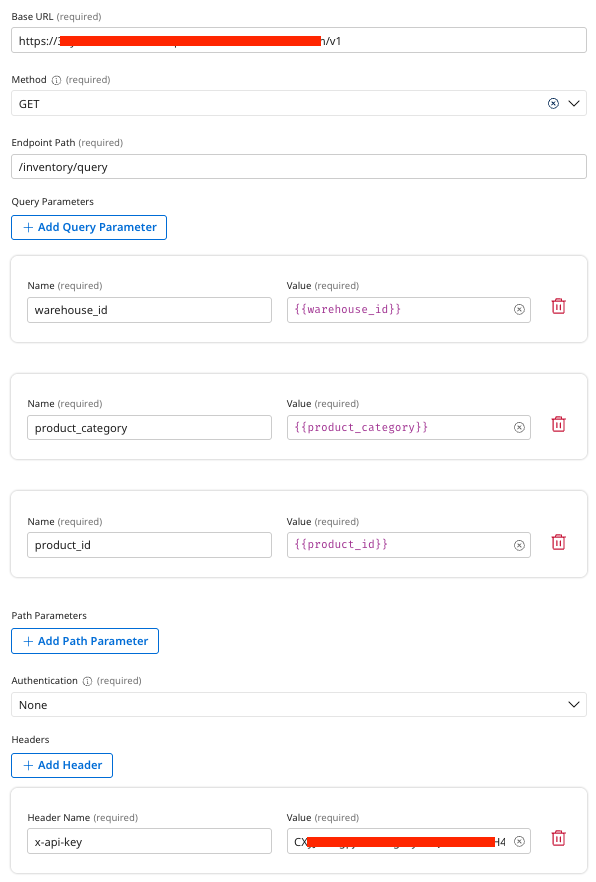
Configure the API connection. Select Add Manually and enter the following:
-
Endpoint Base URL: Paste the Inventory Management API (Base URL) you copied from the API Academy portal
-
Method: GET
-
Endpoint Path:
/inventory/query -
Query Parameters:
-
warehouse_id:{{warehouse_id}} -
product_category:{{product_category}} -
product_id:{{product_id}}Understanding Query ParametersThe
{{warehouse_id}}query parameter syntax tells the agent to dynamically insert the parameter value when it calls this tool. If the agent doesn't provide a value, the API will simply return all records—perfect for optional parameters!
-
-
Authentication: None
-
Click + Add Header:
-
Header Name:
x-api-key -
Value: Paste the API Product Key you copied from the API Academy portal
Understanding API Key AuthenticationThe
x-api-keyheader authenticates your requests to the Inventory Management API. This is a common pattern for API security—the header passes your credentials with each request without exposing them in the URL.
-
-
-
Click Save & Continue.
-
Click Deploy Tool, then confirm by clicking Deploy.
Great job! You've created a flexible API tool that your agent can use in multiple ways. This is the foundation of role-based agent design.
Tool 2: Validate Purchase Order
This tool enables your agent to verify purchase order details against business rules and data quality checks. It's essential for ensuring that only valid, properly formatted POs are processed by your inventory system.
-
Click Create New Tool.
-
Hover API Tool and click Add Tool.
-
Enter the following tool details:
-
Tool Name:
[builderInitials] Validate Purchase Order -
Description:
Verify purchase order details including supplier information, quantities, pricing, and approval status.Why Validation MattersIn traditional integrations, you'd build rigid validation logic that fails on any error. With an agent, validation becomes intelligent—the agent can identify WHAT'S wrong, WHY it matters, and even suggest fixes or escalate to a human when needed.
-
-
Click + Add Input Parameter.
-
Configure the po_number parameter:
-
Name:
po_number -
Description:
Purchase order number to validate. -
Type: String
-
Required: On
Why This Parameter is RequiredUnlike the previous tool's optional parameters, a PO number is REQUIRED because you can't validate a purchase order without knowing which one to check. Required parameters ensure the agent always provides critical information.
-
-
Click Add Input Parameter.
-
Click + Add Input Parameter.
-
Configure the check_budget parameter:
-
Name:
check_budget -
Description:
Optional flag to include budget approval validation in the check. -
Type: Boolean
-
Required: Off
Smart DefaultsOptional boolean parameters default to false when not provided. This means the agent can do a quick validation by default, but can choose to perform more thorough checks (like budget approval) when the business context requires it.
-
-
Click Add Input Parameter.
-
Click Save & Continue.
-
Configure the API connection. Click Add Manually and enter:
- Endpoint Base URL: Paste the API Base URL you copied from the API Academy portal
- Method: POST
- Endpoint Path:
/inventory/validatePO - Query Parameters:
po_number:{{po_number}}check_budget:{{check_budget}}
- Authentication: None
- Click + Add Header:
- Header Name:
x-api-key - Value: Paste the API Product Key you copied from the API Academy portal
- Header Name:
-
Click Save & Continue.
-
Click Deploy Tool, then confirm by clicking Deploy.
You're building momentum! Notice how each tool focuses on a specific capability but remains flexible through optional parameters.
Tool 3: Track Shipment Status
This tool gives your agent the ability to check the real-time status of inbound shipments. This is crucial for proactive inventory management—instead of waiting for delivery problems to impact operations, your agent can identify delays early and take action.
-
Click Create New Tool.
-
Hover API Tool and click Add Tool.
-
Enter the following tool details:
-
Tool Name:
[builderInitials] Track Shipment -
Description:
Monitor inbound shipment status and estimated delivery dates for purchase orders.Proactive vs. ReactiveTraditional systems REACT to problems after they occur. An agent with shipment tracking can PROACTIVELY identify delays and notify stakeholders before they impact operations. This is a perfect example of the value agents bring over rigid integrations.
-
-
Click + Add Input Parameter.
-
Configure the tracking_number parameter:
- Name:
tracking_number - Description:
Optional shipment tracking number to query. - Type: String
- Required: Off
- Name:
-
Click Add Input Parameter.
-
Click + Add Input Parameter.
-
Configure the po_number parameter:
-
Name:
po_number -
Description:
Optional purchase order number to find associated shipments. -
Type: String
-
Required: Off
Multiple Ways to TrackNotice that BOTH parameters are optional? This gives the agent incredible flexibility. It can search by tracking number if it has one, or by PO number to find ALL shipments for that order, or even call with NO parameters to get all active shipments. One tool, multiple use cases!
-
-
Click Add Input Parameter.
-
Click Save & Continue.
-
Configure the API connection. Click Add Manually and enter:
- Endpoint Base URL: Paste the API Base URL you copied from the API Academy portal
- Method: GET
- Endpoint Path:
/inventory/trackShipment - Query Parameters:
tracking_number:{{tracking_number}}po_number:{{po_number}}
- Authentication: None
- Click + Add Header:
- Header Name:
x-api-key - Value: Paste the API Product Key you copied from the API Academy portal
- Header Name:
-
Click Save & Continue.
-
Click Deploy Tool, then confirm by clicking Deploy.
You're more than halfway through! Each tool you create expands your agent's capabilities.
Tool 4: Update Inventory Record
This tool allows your agent to adjust inventory quantities when needed—for example, when receiving shipments, correcting count discrepancies, or processing returns. This is where your agent moves from "read-only analyst" to "active participant" in your business processes.
Tools that CHANGE data (like updates and deletes) require extra care. This is why you'll add guardrails to your agent in Part 2 to ensure it only makes approved changes and escalates unusual situations to humans.
-
Click Create New Tool.
-
Hover API Tool and click Add Tool.
-
Enter the following tool details:
- Tool Name:
[builderInitials] Update Inventory - Description:
Adjust inventory quantity for a specific product and warehouse location with reason tracking.
- Tool Name:
-
Click + Add Input Parameter.
-
Configure the product_id parameter:
- Name:
product_id - Description:
Product identifier for the inventory item to update. - Type: String
- Required: On
- Name:
-
Click Add Input Parameter.
-
Click + Add Input Parameter.
-
Configure the warehouse_id parameter:
- Name:
warehouse_id - Description:
Warehouse location identifier. - Type: String
- Required: On
- Name:
-
Click Add Input Parameter.
-
Click + Add Input Parameter.
-
Configure the quantity_change parameter:
-
Name:
quantity_change -
Description:
Amount to adjust inventory by (positive for additions, negative for subtractions). -
Type: Integer
-
Required: On
Positive and Negative ValuesBy using a single "quantity_change" parameter that accepts both positive and negative numbers, you create one flexible tool instead of separate "add inventory" and "remove inventory" tools. Again, this is role-based design in action!
-
-
Click Add Input Parameter.
-
Click + Add Input Parameter.
-
Configure the reason parameter:
-
Name:
reason -
Description:
Optional reason code or description for the inventory adjustment. -
Type: String
-
Required: Off
Audit TrailThe optional "reason" parameter enables audit tracking. Your agent can provide context when it makes changes, creating a clear trail for compliance and troubleshooting. This is governance by design!
-
-
Click Add Input Parameter.
-
Click Save & Continue.
-
Configure the API connection. Click Add Manually and enter:
- Endpoint Base URL: Paste the API Base URL you copied from the API Academy portal
- Method: POST
- Endpoint Path:
/inventory/update - Query Parameters:
product_id:{{product_id}}warehouse_id:{{warehouse_id}}quantity_change:{{quantity_change}}reason:{{reason}}
- Authentication: None
- Click + Add Header:
- Header Name:
x-api-key - Value: Paste the API Product Key you copied from the API Academy portal
- Header Name:
-
Click Save & Continue.
-
Click Deploy Tool, then confirm by clicking Deploy.
Just one more tool to go! This last tool will round out your agent's capabilities.
Tool 5: Get Supplier Information
The final tool retrieves supplier details that your agent needs when evaluating purchase orders or planning reorders. This includes contact information, lead times, pricing tiers, and reliability metrics.
-
Click Create New Tool.
-
Hover API Tool and click Add Tool.
-
Enter the following tool details:
-
Tool Name:
[builderInitials] Get Supplier Info -
Description:
Retrieve supplier details including contact information, lead times, and performance metrics.Synthesizing TruthRemember: agents synthesize truth from multiple sources. Your agent might use this supplier tool TOGETHER with inventory levels and shipment tracking to make intelligent reorder recommendations. It's thinking holistically, not just executing steps.
-
-
Click + Add Input Parameter.
-
Configure the supplier_id parameter:
- Name:
supplier_id - Description:
Optional supplier identifier to retrieve specific supplier information. - Type: String
- Required: Off
- Name:
-
Click Add Input Parameter.
-
Click + Add Input Parameter.
-
Configure the product_category parameter:
-
Name:
product_category -
Description:
Optional product category to find suppliers who provide those items. -
Type: String
-
Required: Off
Flexible Queries AgainYour agent can query by supplier ID (when it knows which supplier to check), by product category (when finding suppliers for a specific type of item), or with no parameters (to get all active suppliers). This flexibility enables complex reasoning!
-
-
Click Add Input Parameter.
-
Click Save & Continue.
-
Configure the API connection. Click Add Manually and enter:
- Endpoint Base URL: Paste the API Base URL you copied from the API Academy portal
- Method: GET
- Endpoint Path:
/inventory/suppliers - Query Parameters:
supplier_id:{{supplier_id}}product_category:{{product_category}}
- Authentication: None
- Click + Add Header:
- Header Name:
x-api-key - Value: Paste the API Product Key you copied from the API Academy portal
- Header Name:
-
Click Save & Continue.
-
Click Deploy Tool, then confirm by clicking Deploy.
Excellent work! You've now created a complete toolbox for your Inventory Management Agent. Each tool is focused, flexible, and designed to work together.
What You've Built
Take a moment to appreciate what you've accomplished. You've created five API tools that give your agent the capabilities of a skilled inventory specialist:
- Query Inventory - The agent can check stock levels with flexible filtering
- Validate Purchase Order - The agent can verify POs against business rules
- Track Shipment - The agent can monitor inbound deliveries proactively
- Update Inventory - The agent can adjust quantities with audit tracking
- Get Supplier Information - The agent can retrieve supplier data for intelligent decisions
Notice the key design principles you applied:
- Optional Parameters: Most parameters are optional, giving the agent flexibility to use each tool in multiple ways
- Role-Based Design: Instead of building separate tools for every possible task, you built flexible tools that work together
- Clear Descriptions: Each tool and parameter has a detailed description that helps the agent understand WHEN and HOW to use it
- Governance Readiness: Tools that modify data include audit fields like "reason" to maintain compliance
In Part 2, you'll bring these tools to life by attaching them to an intelligent agent that knows how to use them!