Activity 1: Create Tools for Your Quote Specialist Agent
To build a true digital colleague, you need to equip it with tools that allow it to research and reason—not just perform rigid tasks. In this activity, you'll build two flexible tools that allow your Quote Specialist Agent to "see" into your systems:
- Parts DataHub Tool: Gives the agent a unified view of parts data across the enterprise.
- PIM Classification Tool: Allows the agent to look up pricing and availability details.
Unlike traditional integrations where inputs are hardcoded, we will design these tools with optional parameters and clear descriptions. This allows the agent to decide how and when to use them based on the context of the customer's request—a key principle of Architecting for Agents.
In this activity, you will complete the following:
- Building the Parts DataHub Tool (The "Research" capability)
- Building the PIM API Tool (The "Pricing" capability)
Building the Parts DataHub Tool
-
Select the AI button in the top right.
 note
noteThis will open in a new window.
-
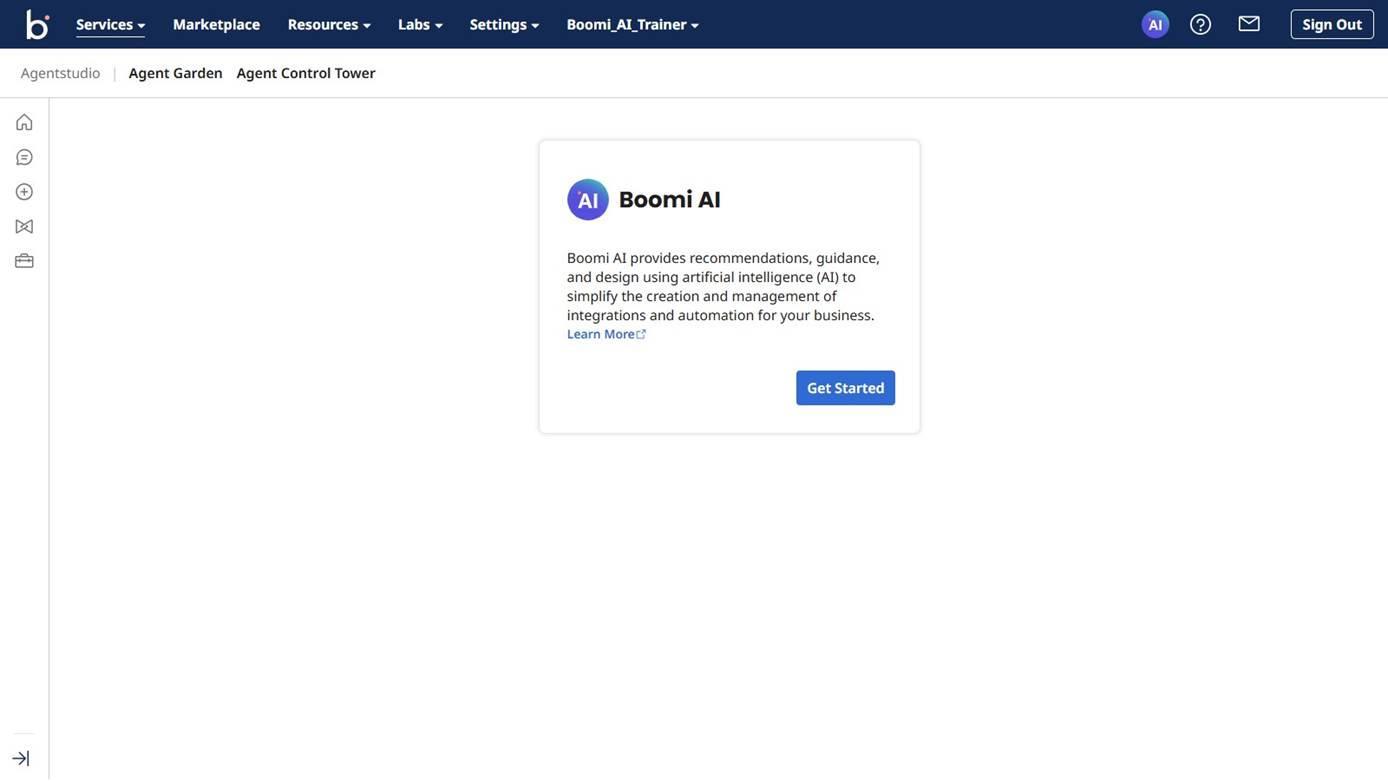
If this is your first time accessing Agentstudio, it will look like this:
-
Select Get Started.
-
Accept the Terms and Conditions.
noteMake sure to use the same account throughout your work for Integration and Agentstudio.
-
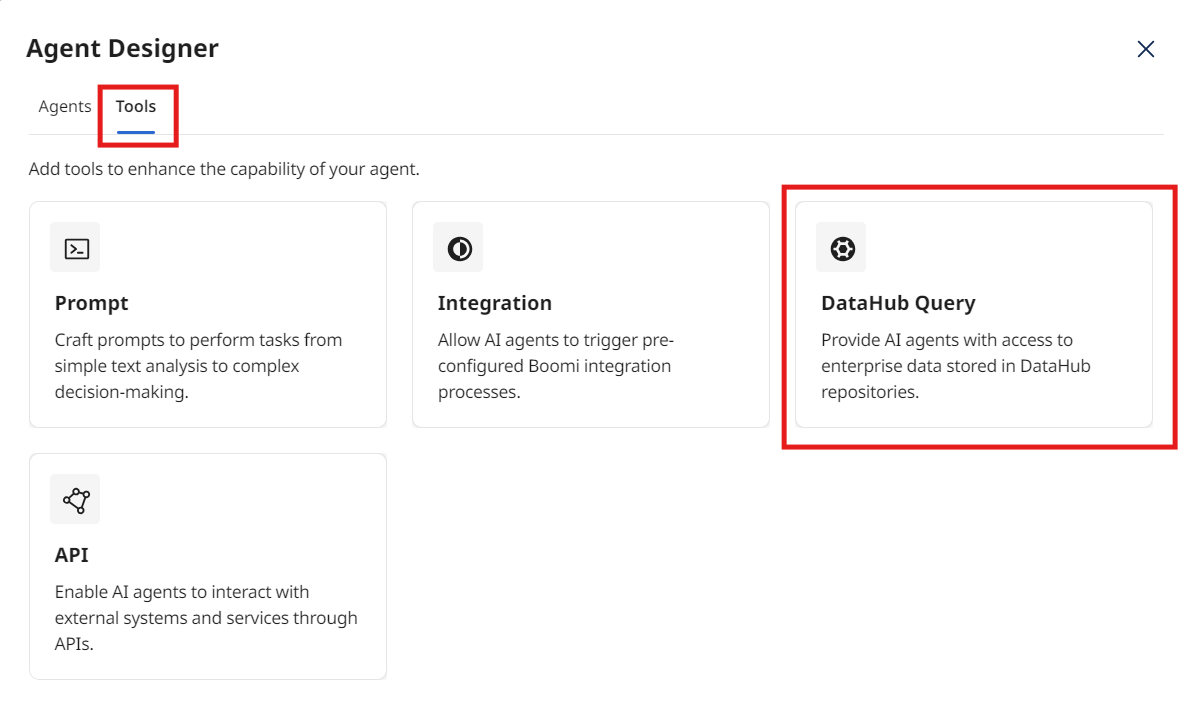
Select Agent Designer from the left navigation.

-
Select the Tools tab.
-
Select Create New Tool.
-
Select the DataHub Query Tool.
-
Select Add Tool.
-
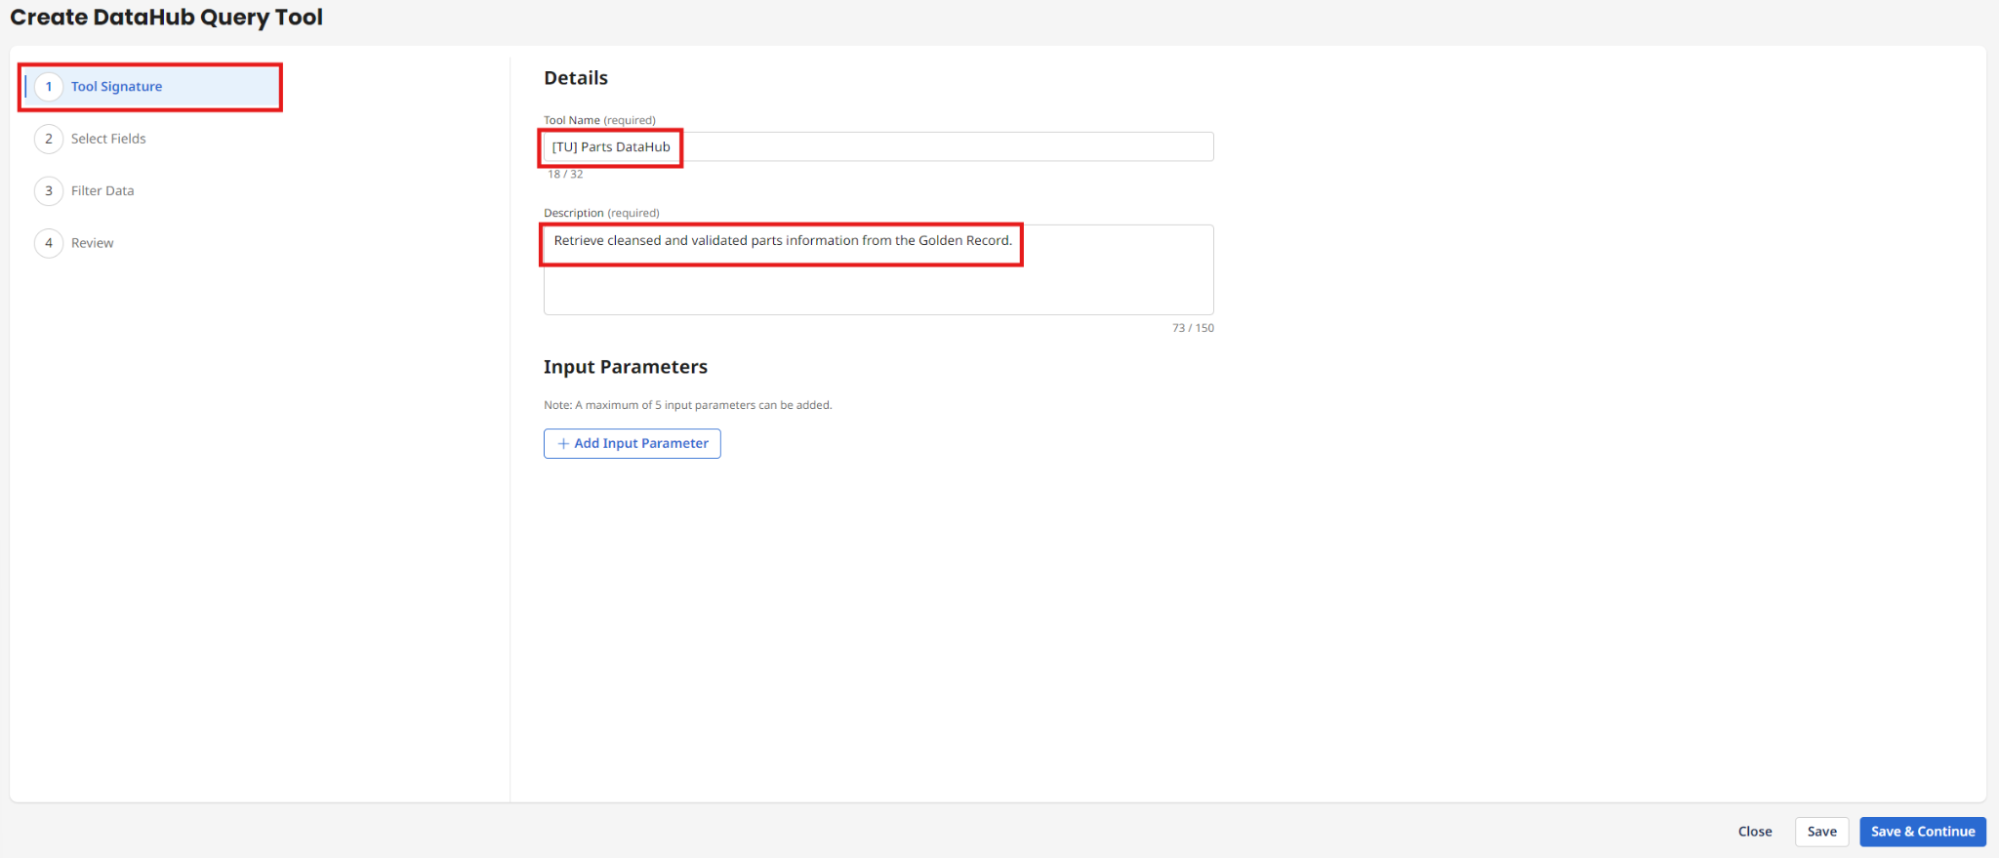
Enter the following:
- Tool Name:
[builderInitials] Parts DataHub - Description:
Retrieve cleansed and validated parts information from the Golden Record.
- Tool Name:
-
Select + Add Input Parameter.
-
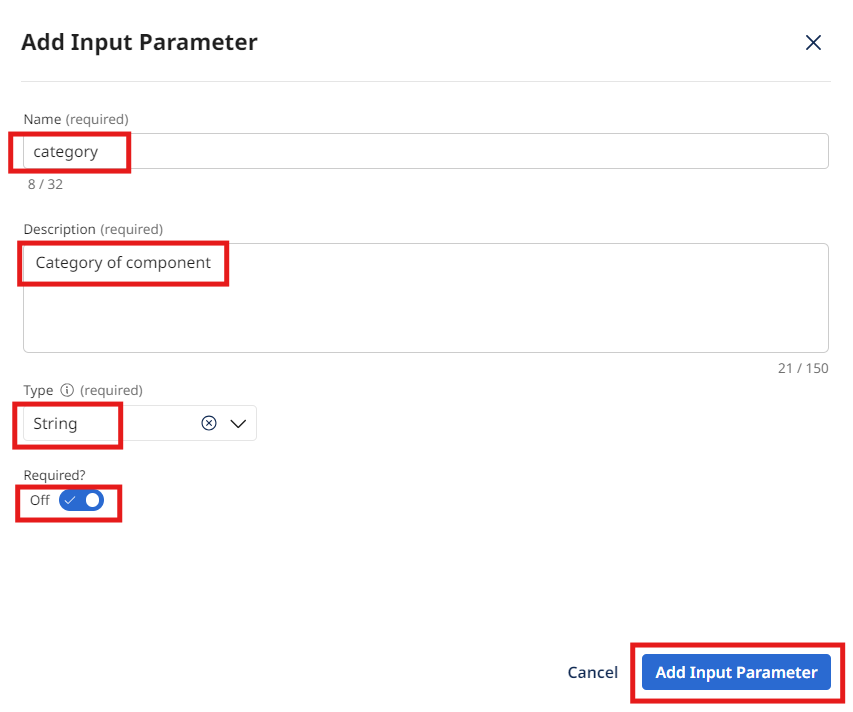
Enter the following:
- Name:
category - Description:
Category of component - Type: String
- Required: Checked
- Name:
-
Select Add Input Parameter.
-
Select + Add Input Parameter.
-
Enter the following:
- Name:
class - Description:
Classification of component - Type: String
- Required: Checked
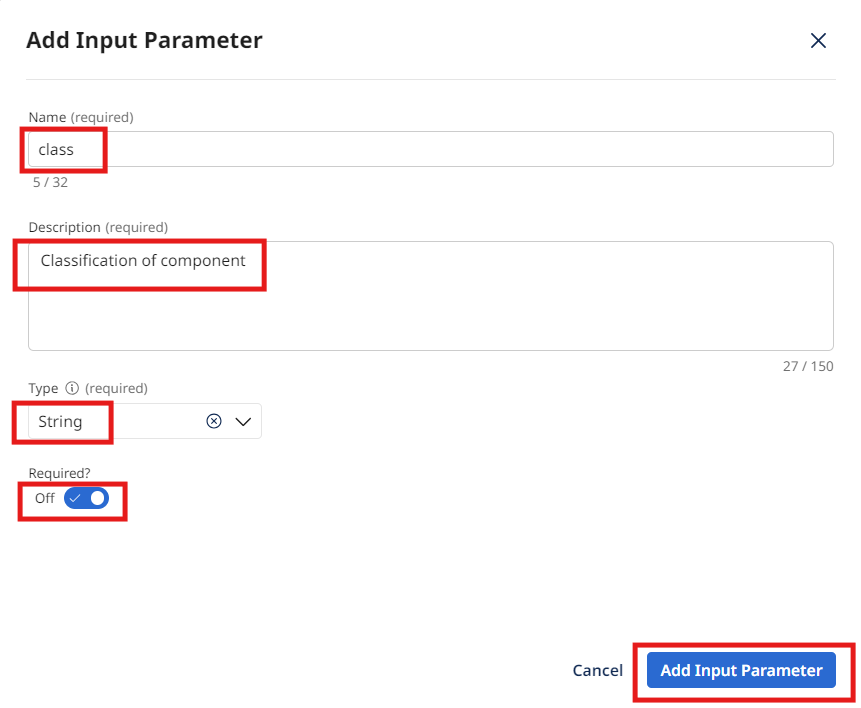
- Name:
-
Select Add Input Parameter.
-
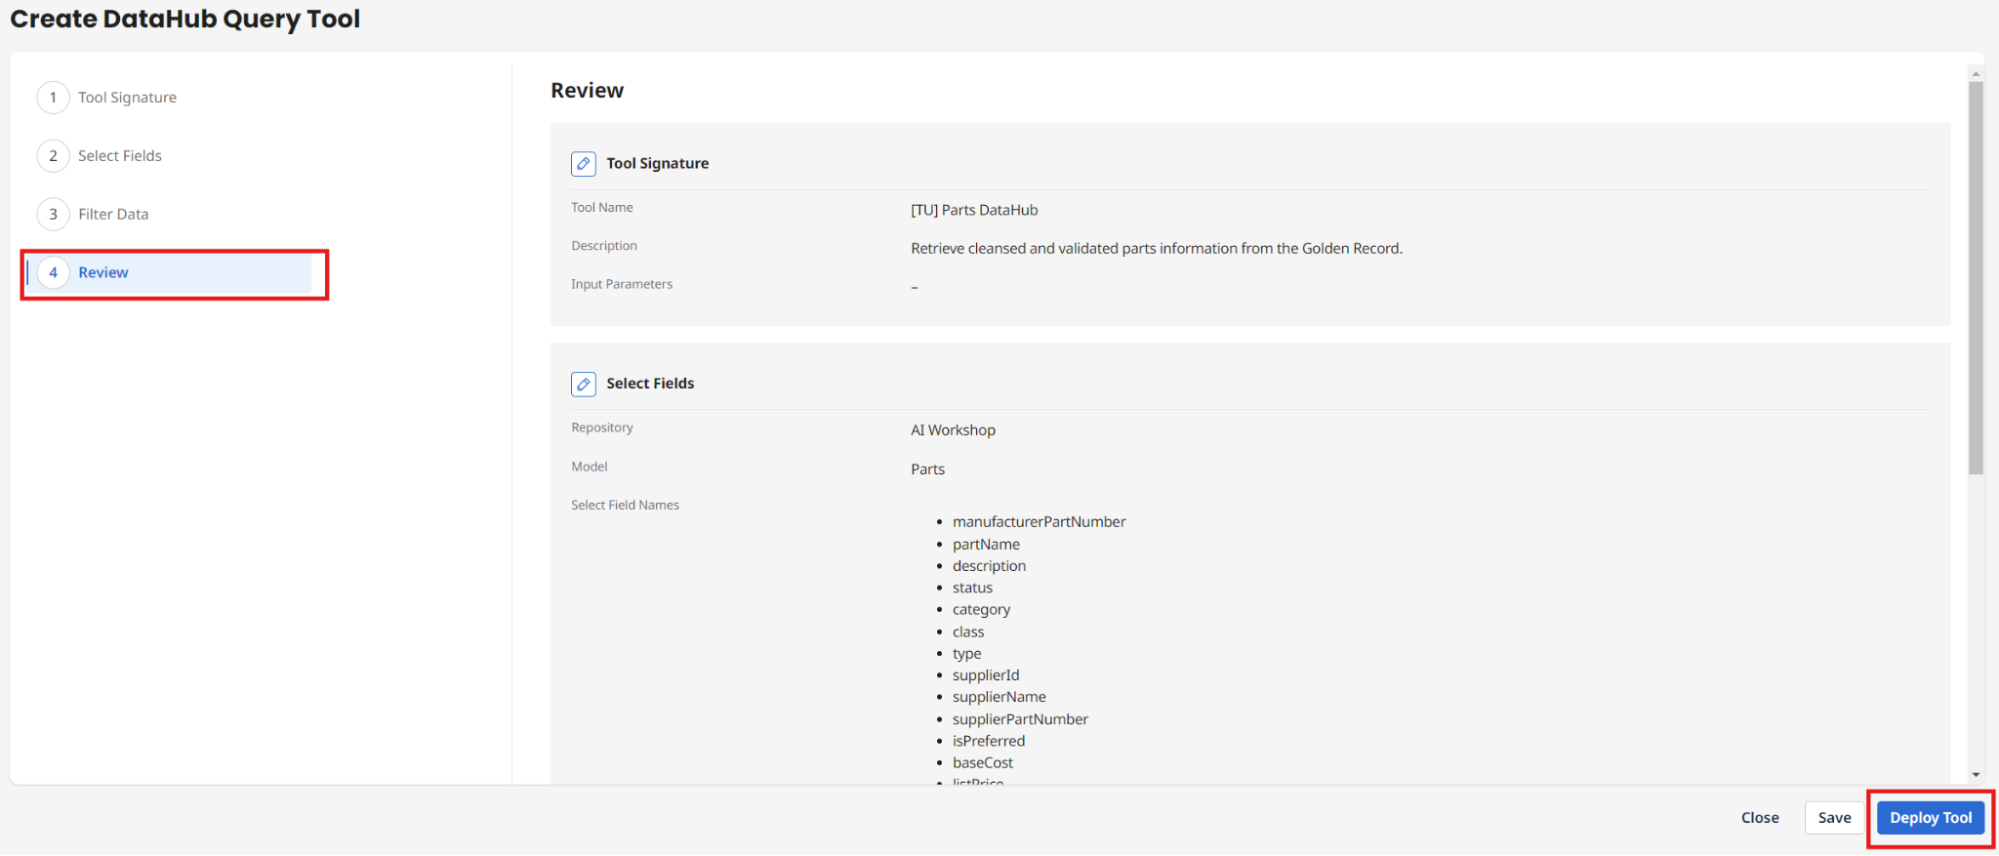
Select Save & Continue.
-
Select the following fields under the Select Fields section:
- Repository: AI Workshop
- Model: Parts
- Field Name: [Check All] with the option to only allow the agent to see the fields you want it to see
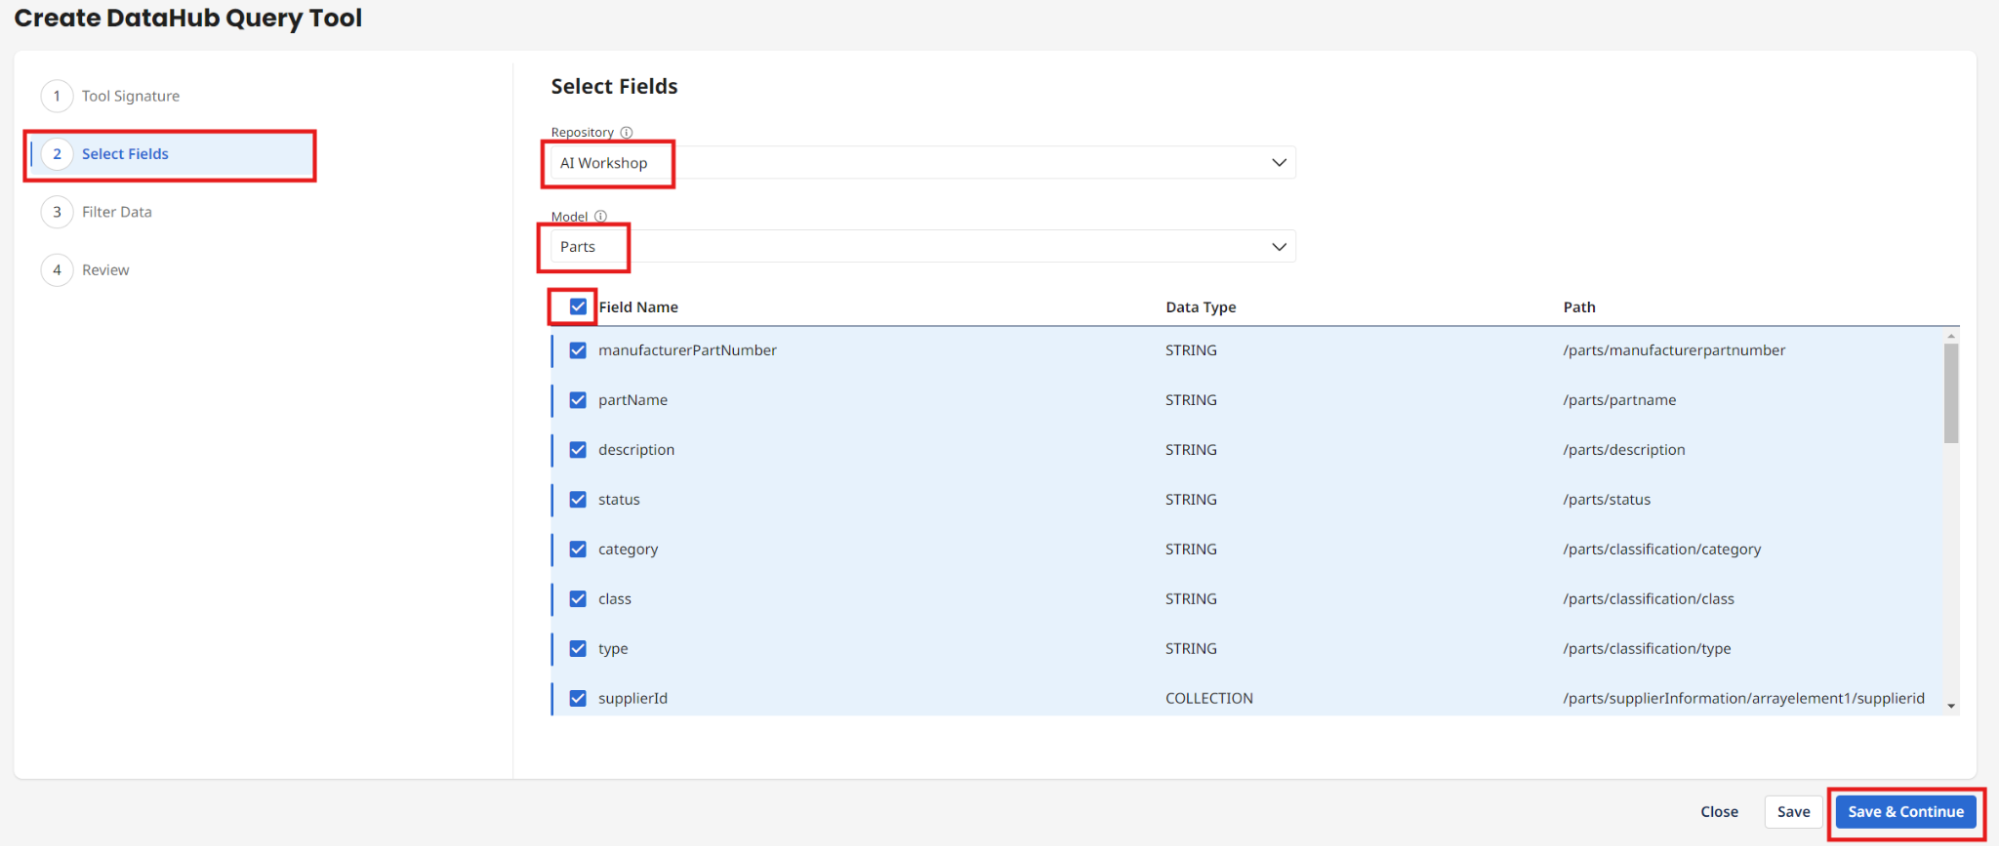
-
Select Save & Continue.
-
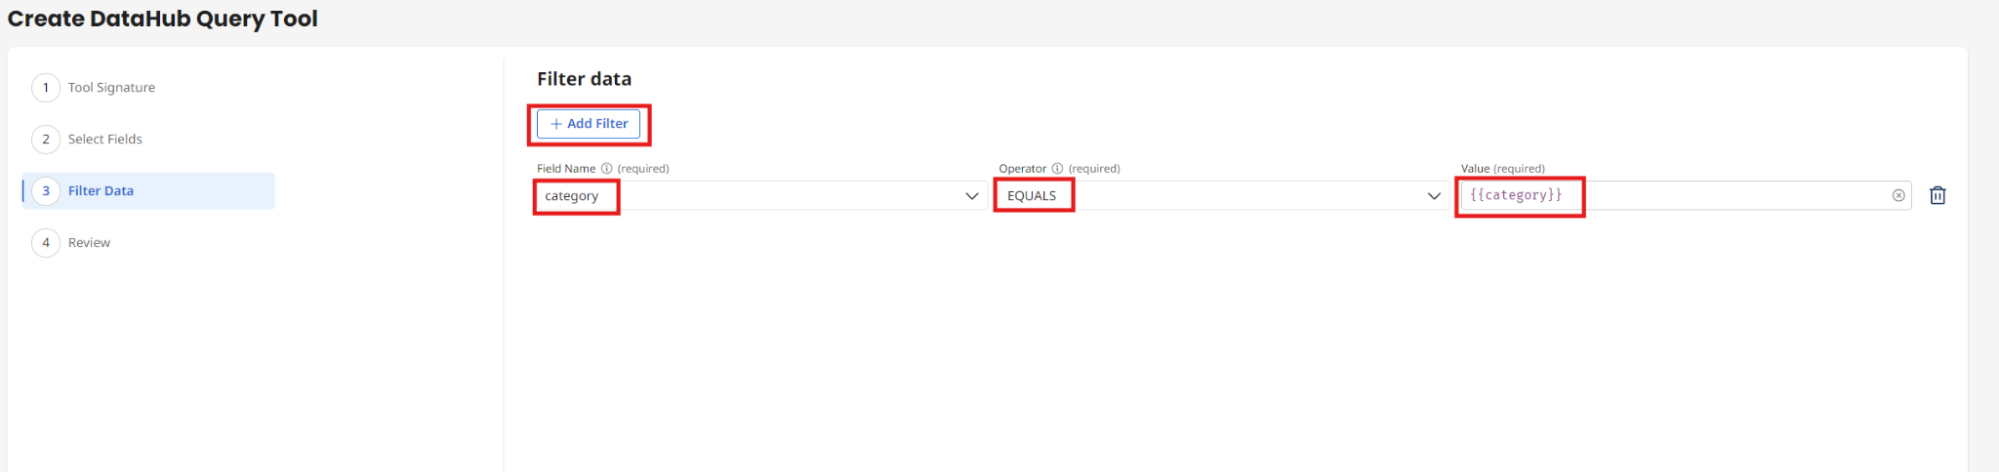
Select + Add Filter and enter the following:
- Field Name: category
- Operator: EQUALS
- Value:
{{category}}
-
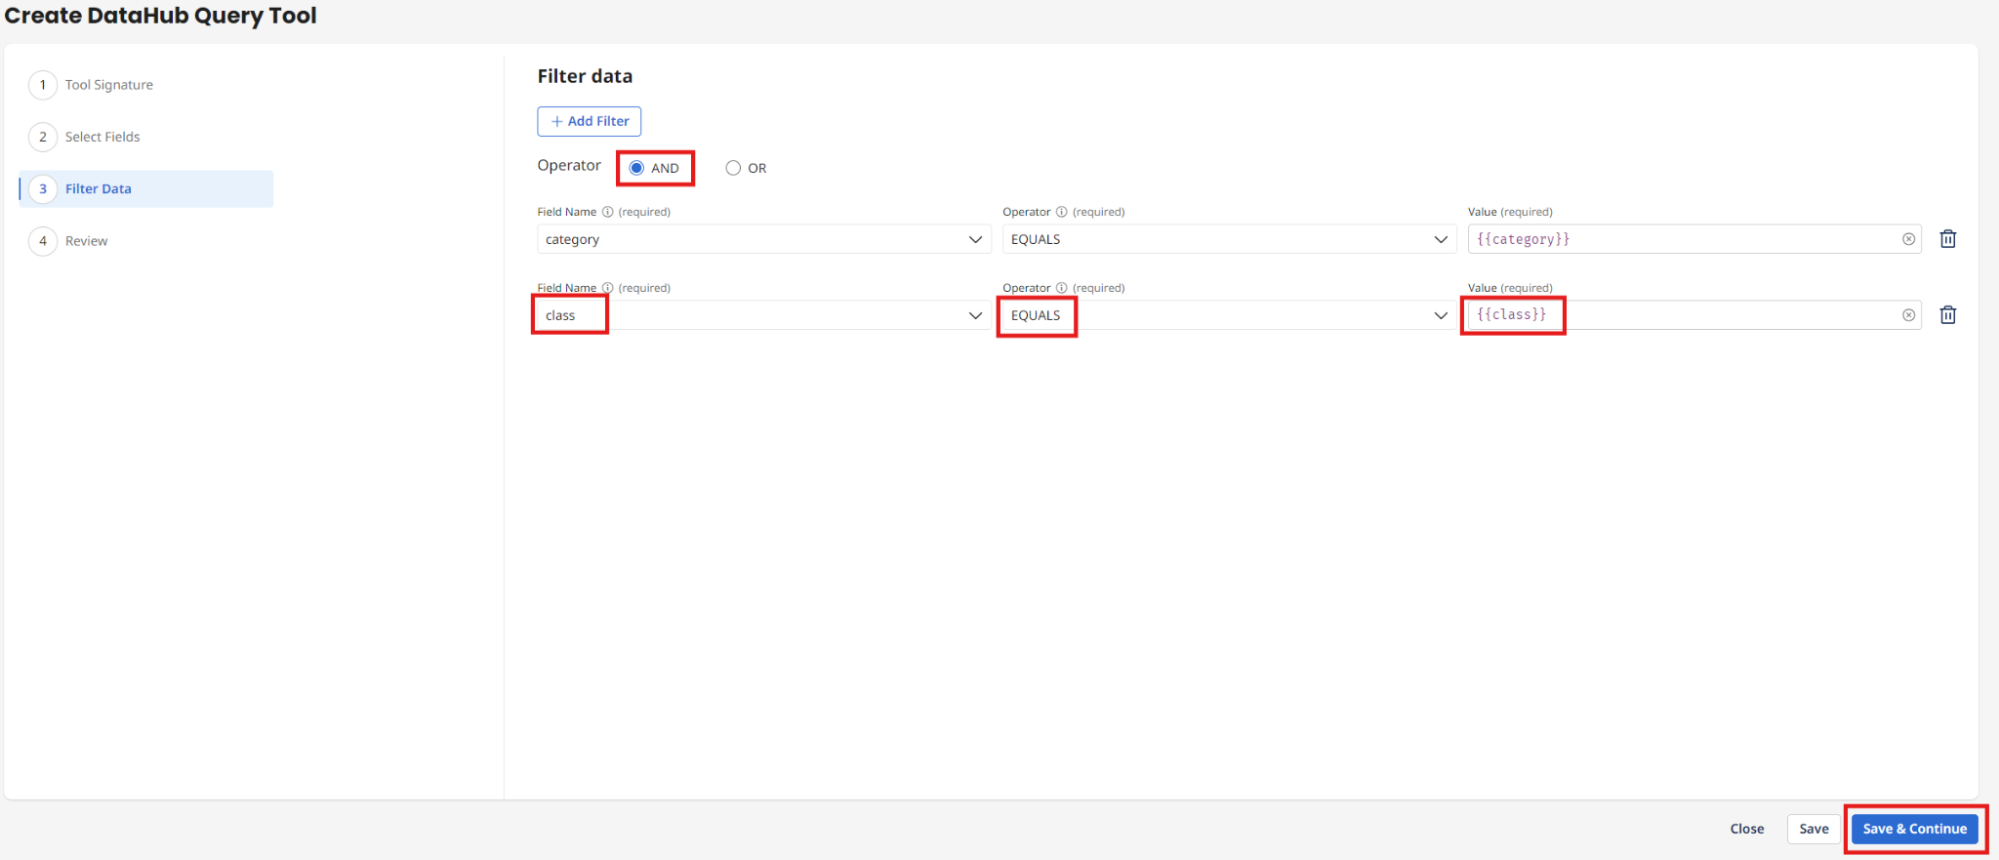
Select + Add Filter again and enter the following:
- Operator: AND
- Field Name: class
- Operator: EQUALS
- Value:
{{class}}
-
Select Save & Continue.
-
Select Deploy Tool.
-
Select Deploy.
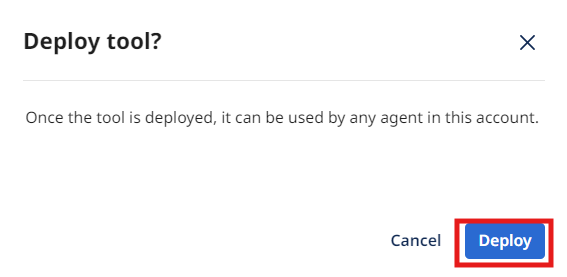
Congratulations, you have successfully deployed your first AI Agentstudio Tool!
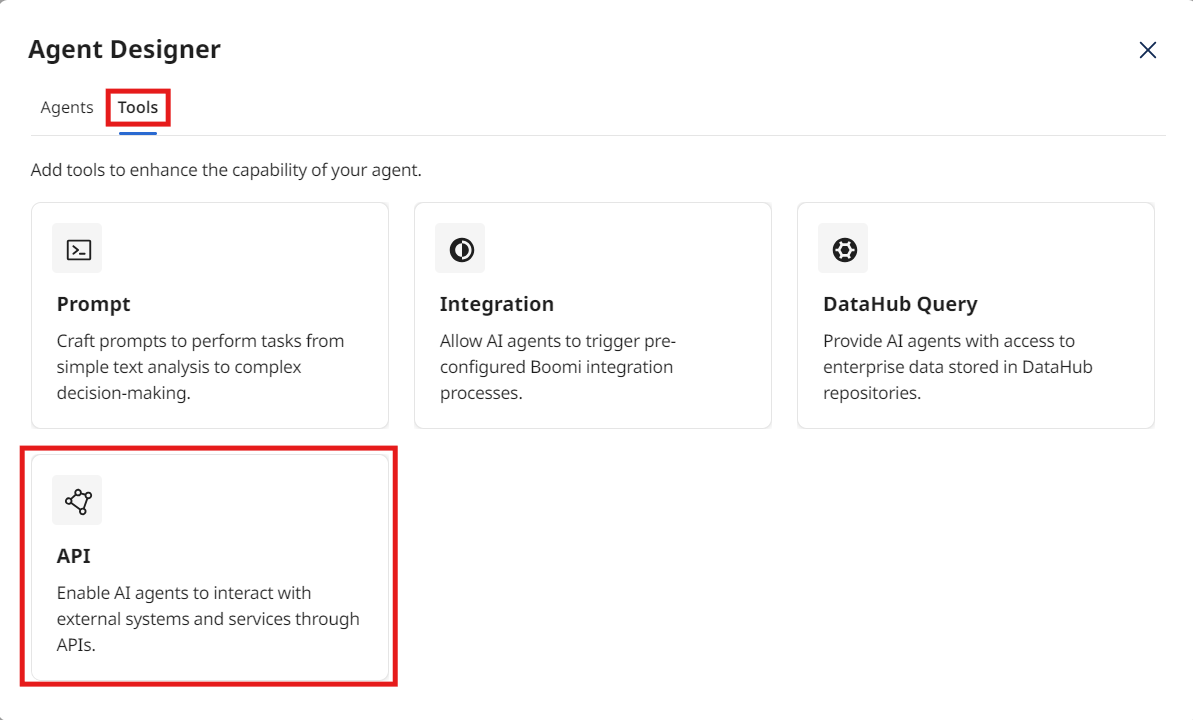
Building the PIM Classification API Tool
-
Select Create New Tool.
-
Select the API Tool.
-
Select Add Tool.
-
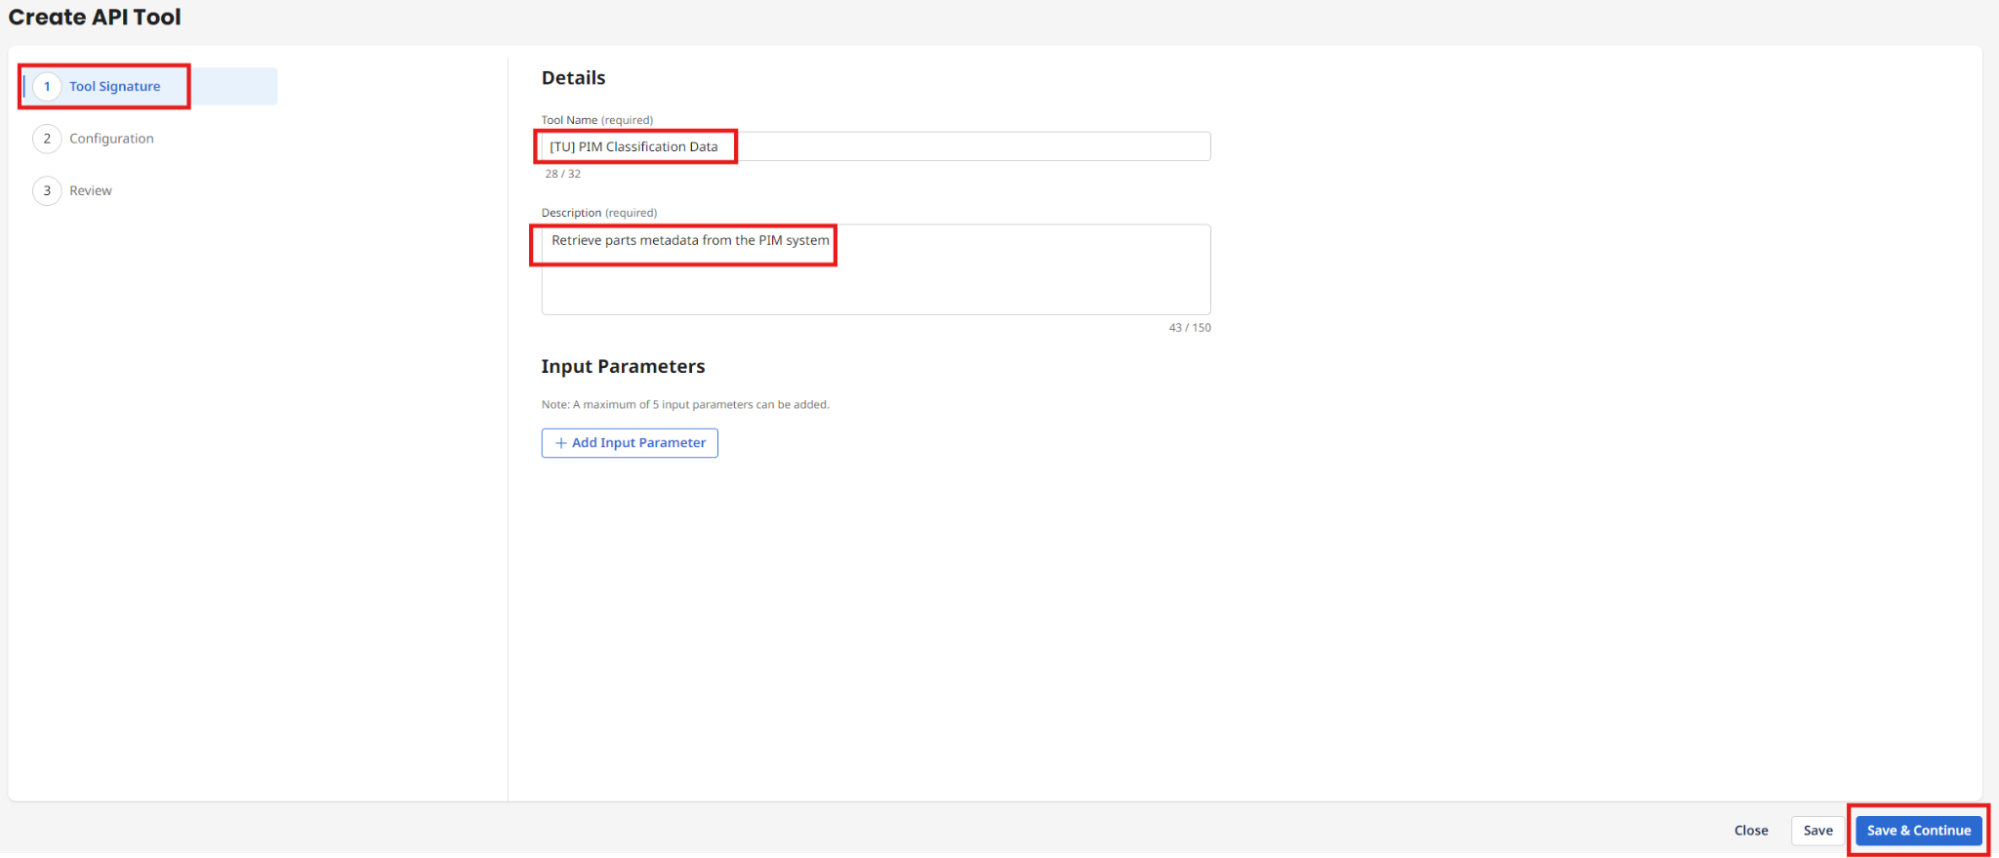
Enter the following:
- Tool Name:
[builderInitials] PIM Classification Data - Description:
Retrieve parts metadata from the PIM system
- Tool Name:
-
Select Save & Continue.
-
Choose Add Manually under the Configuration:
- Base URL:
https://c04-usa-east.integrate.boomi.com - Method: GET
- Endpoint Path:
/ws/rest/pim/parts - Basic Authentication:
- Username:
boomi_joel_davenport-XBUHTV.LSK9ET - Password:
127dcae6-015c-4f3c-8494-184785aaff0b
- Username:
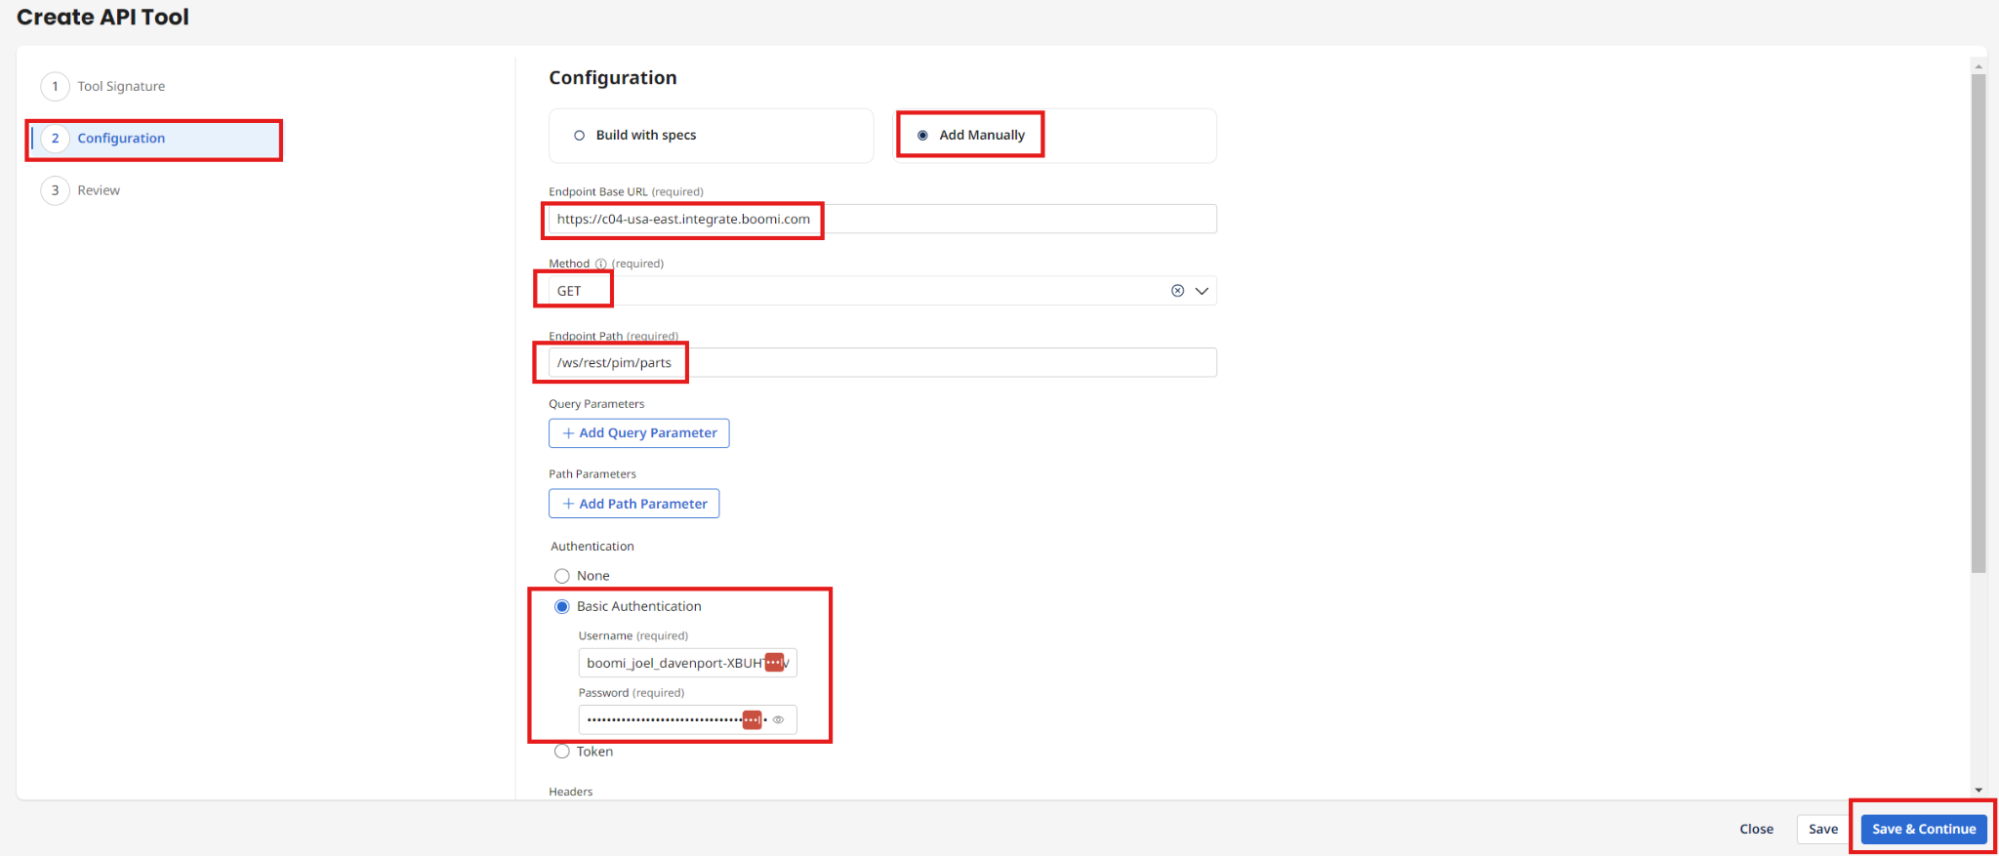
- Base URL:
-
Select Save & Continue.
-
Select Deploy Tool.
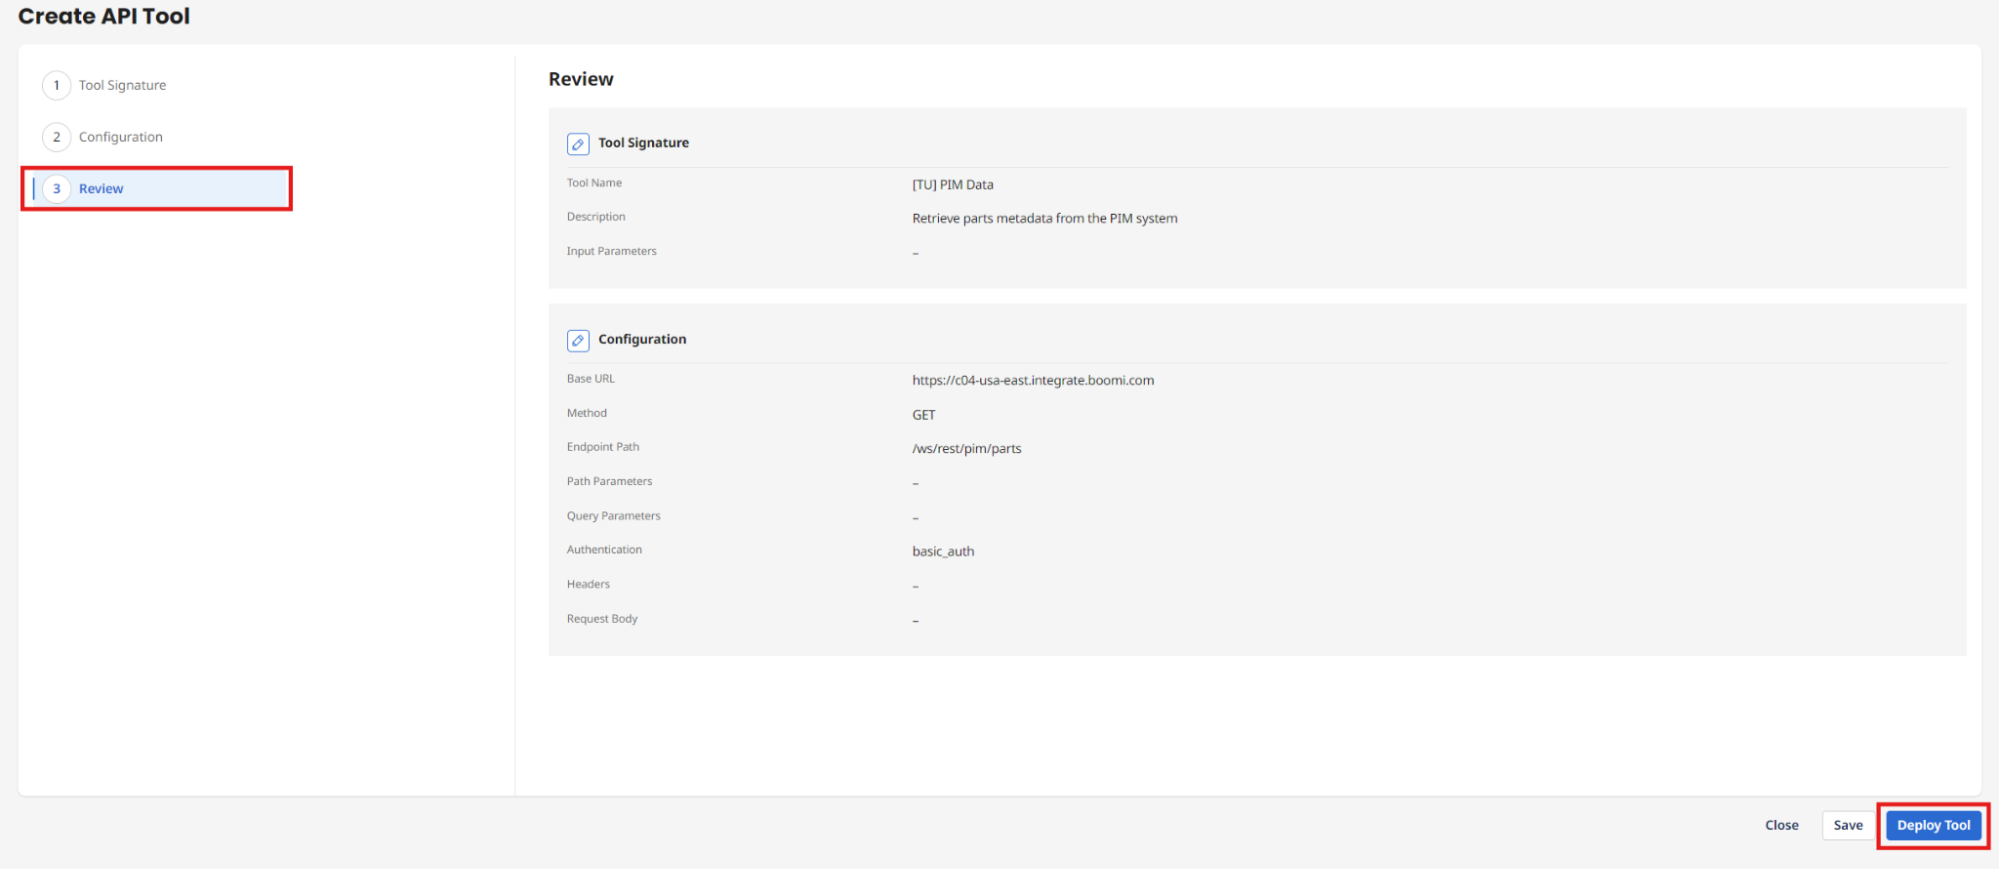
-
Select Deploy.
Congratulations, you have successfully deployed your second AI Agentstudio Tool and are ready to create your first AI Agent!