Activity 3: Embed Your Agent into Business Processes
Now that you have a functioning Quote Specialist, it's time to give it a job. In this activity, you will embed your agent into a Boomi Integration process, demonstrating the Integration Layer vs. Reasoning Layer architecture.
- Integration Layer: Handles the high-speed data movement, connectivity, and event listening (e.g., receiving a BOM via API).
- Reasoning Layer: The Agent acts as the "brain" that processes complex, unstructured data and makes decisions.
By separating these concerns, you allow the integration to handle the "plumbing" while the agent handles the "thinking"—creating a robust, scalable architecture.
In this activity, you will complete the following:
- Creating a Platform API Token
- Invoke the AI Agent Programmatically (Connecting the Brain to the Body)
Creating a Platform API Token
Before you can programmatically invoke your AI Agent from an integration process, you need to create a Platform API Token. This token authenticates your integration with the Boomi platform and enables secure communication with your deployed agent.
Treat your Platform API Token with the same level of security as a password. Store it securely and never share it publicly or commit it to version control systems.
-
Log in to your Boomi platform account.
-
Click on your platform ID in the top right corner and navigate to Settings.
-
From the left-hand menu, under User Settings, click Platform API Tokens.
-
Click Add New Token.
-
Enter a name for your new token (e.g.,
Quote Specialist Agent Token) and click Generate Token.Token Name RequirementsEach token must have a unique name with a maximum of 100 characters.
-
Once generated, copy the token to your clipboard using one of the following methods:
- Click the Copy to Clipboard icon to copy the token string without exiting.
- Click the Copy to Clipboard & Close button to copy the token string and exit the dialog.
-
Store your new API token in a secure location, treating it with the same level of security as a password.
Save Your TokenMake sure to copy and save your token immediately. For security reasons, you won't be able to view the full token value again after closing the dialog. If you lose your token, you'll need to generate a new one.
-
Your new token is now generated and can be viewed on the Platform API Tokens page.
You now have a Platform API Token that you'll use to authenticate your integration process when invoking your AI Agent programmatically.
Invoke the AI Agent Programmatically
-
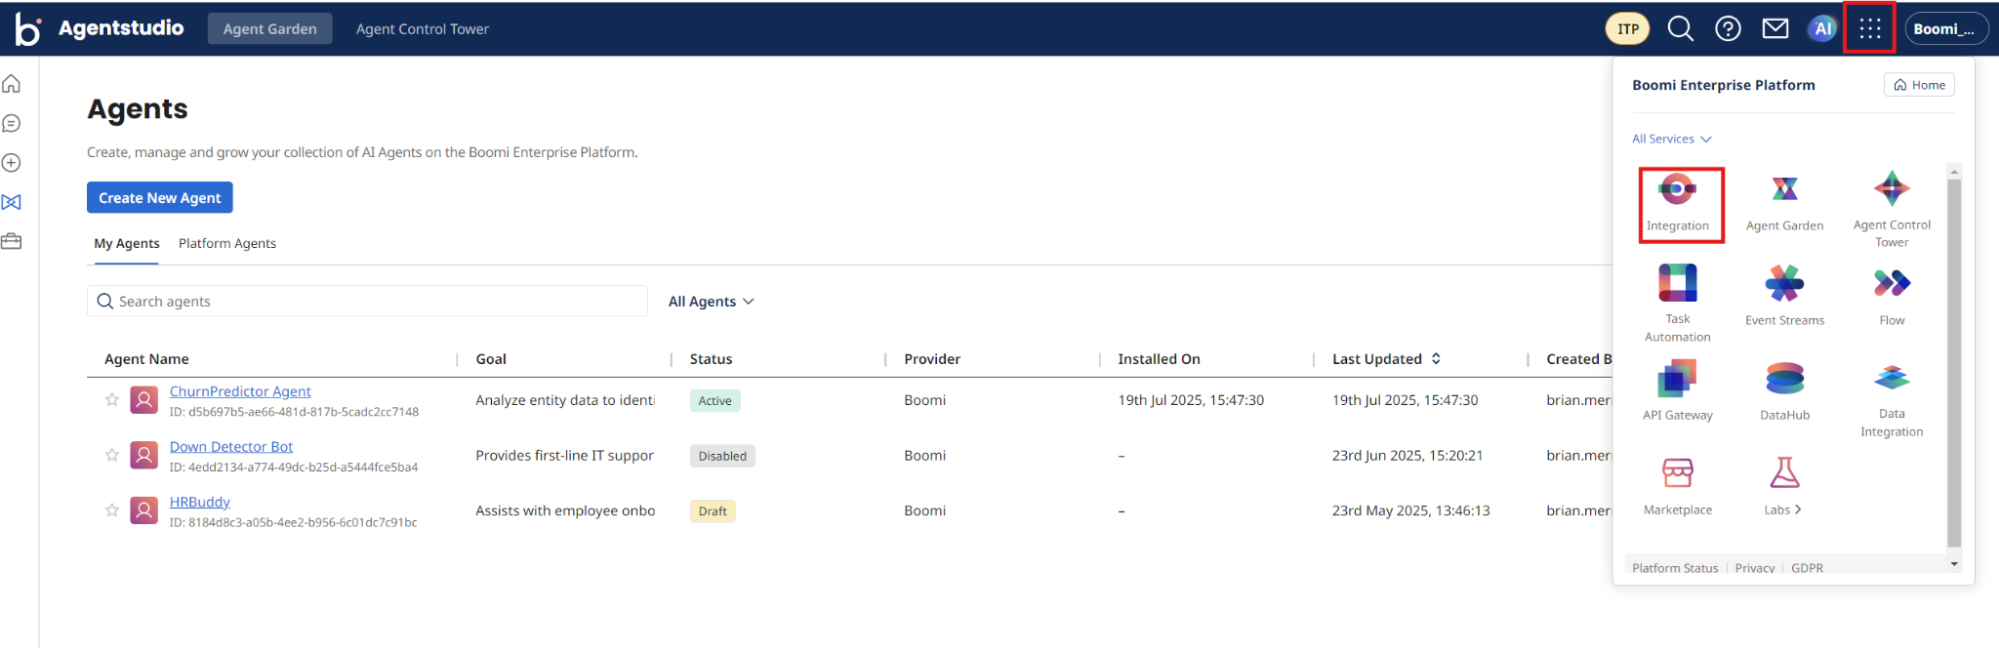
Return to Boomi Integration by navigating to Integration under the menu next to the AI icon.
-
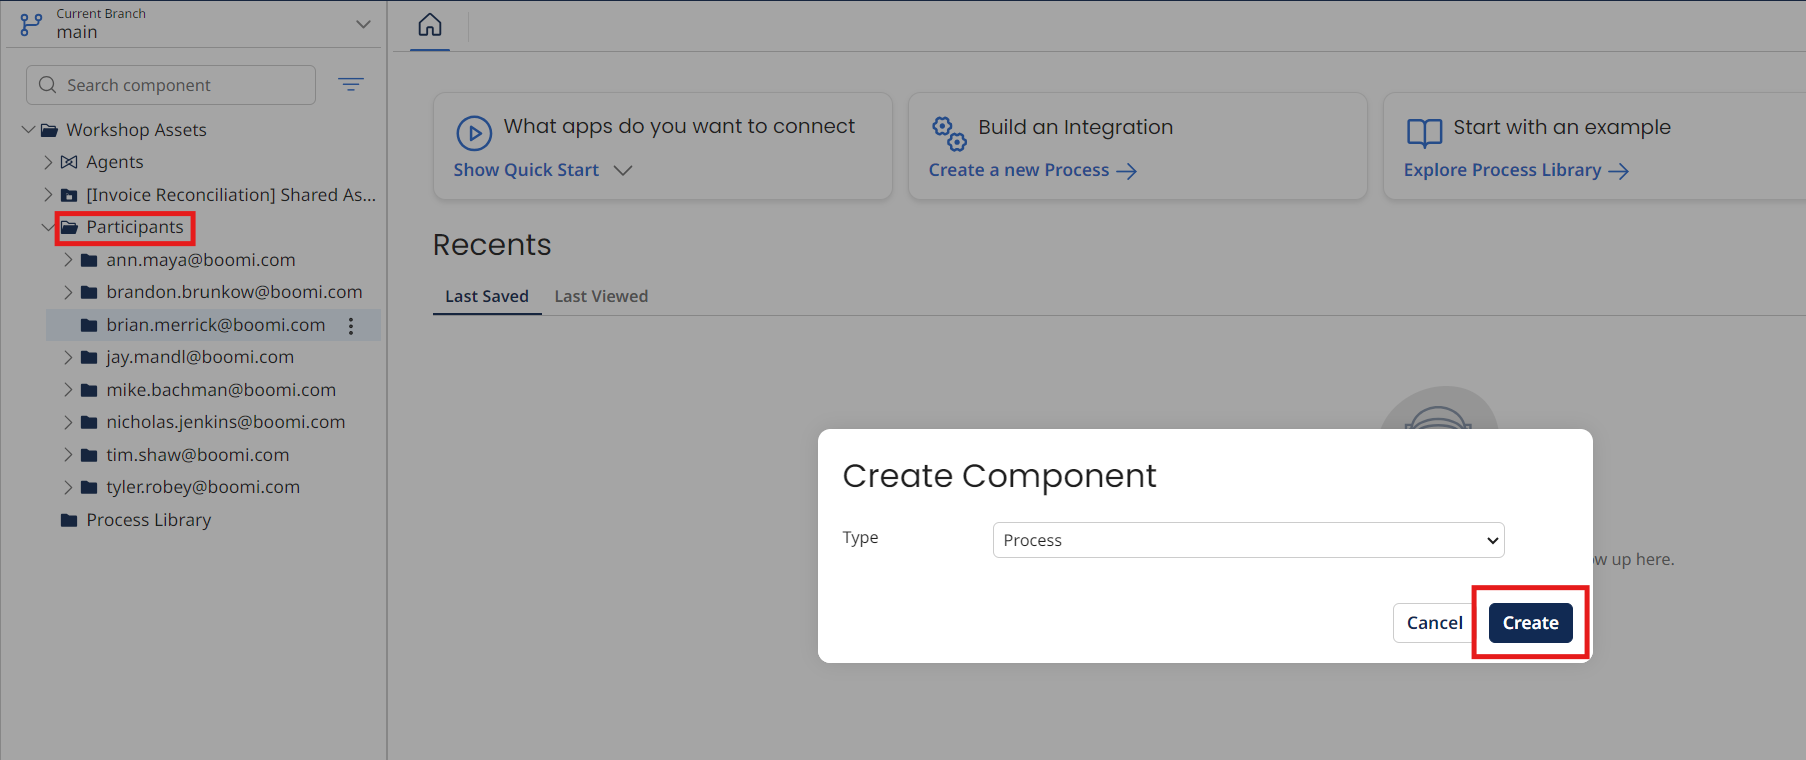
Locate the folder with your email under Workshop Assets → Participants.
-
Select the three dots to the right of the folder name and select New Component → Process → Create.
-
Choose Data Passthrough as the Type and Make the recommended changes for me link. Select OK to close the dialog.

-
Select the + icon and search for
message.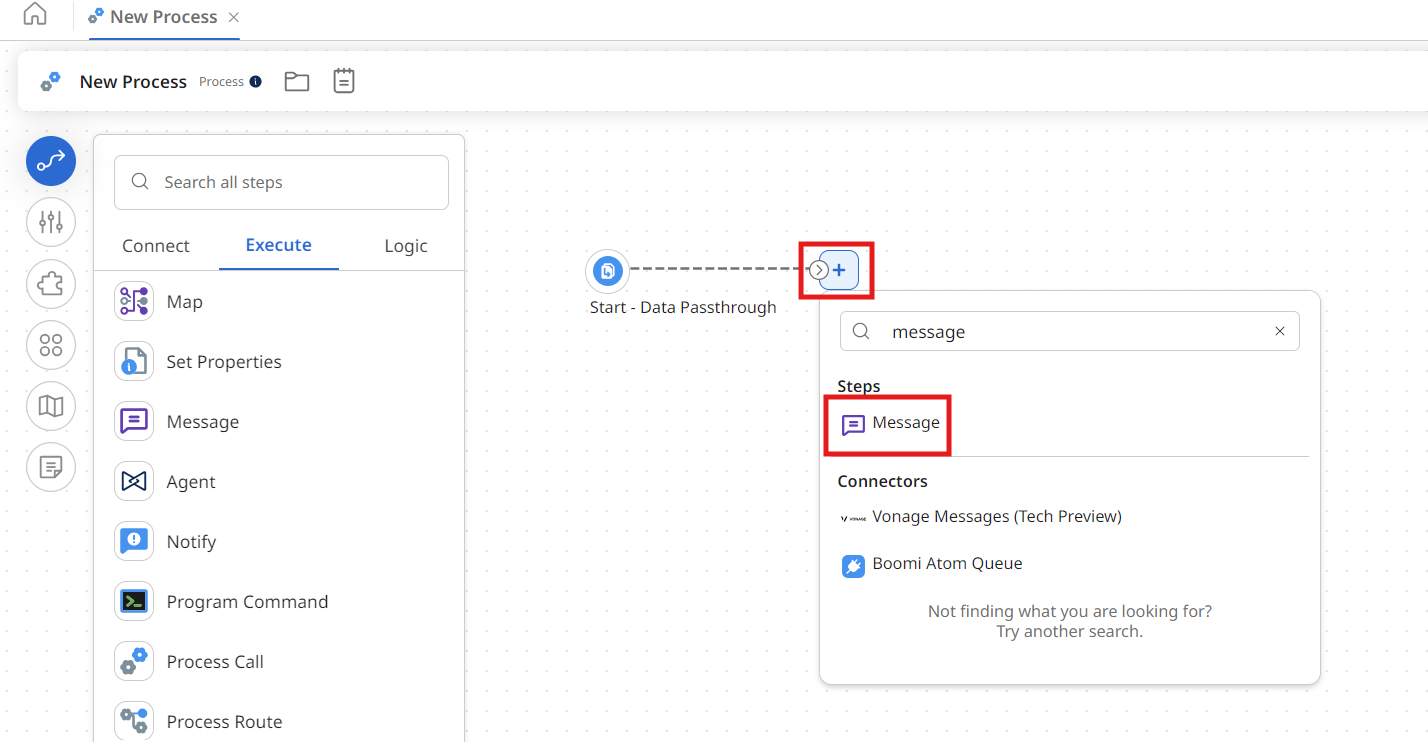
-
Select the Message step and enter the following text:
For each item in this BOM, identify a category and class mapped to the results from the PIM Classification tool. Use the Parts DataHub tool to retrieve the category and class results. Map each item in the BOM to the closest part in the Parts dataset from the PIM DataHub model. Finally, output a result in CSV format for a quote of the BOM. If there is not a match based on the Parts master data, output highlights that explicitly. Here is the BOM in XML format:

<BOM>
  <Header>
    <BOMNumber>BOM-1001</BOMNumber>
    <ProjectName>Warehouse Lighting Retrofit</ProjectName>
    <Revision>Rev A</Revision>
    <DateCreated>2025-08-08</DateCreated>
    <PreparedBy>Engineering</PreparedBy>
    <Currency>USD</Currency>
  </Header>
  <Items>
    <Item>
      <LineNumber>0010</LineNumber>
      <ManufacturerPartNumber>CAB-THHN-12AWG-BLK</ManufacturerPartNumber>
      <Description>12 AWG THHN Building Wire, Black, 500 ft Spool</Description>
      <Quantity>3</Quantity>
      <UnitOfMeasure>Spool</UnitOfMeasure>
    </Item>
    <Item>
      <LineNumber>0020</LineNumber>
      <ManufacturerPartNumber>LHB-150W-5K-V2x</ManufacturerPartNumber>
      <Description>150 W LED High Bay Light Fixture, 5000 K</Description>
      <Quantity>24</Quantity>
      <UnitOfMeasure>Each</UnitOfMeasure>
    </Item>
    <Item>
      <LineNumber>0030</LineNumber>
      <ManufacturerPartNumber>ENC-NEMA4x-24x24x8</ManufacturerPartNumber>
      <Description>NEMA 4 Steel Enclosure, 24 x 24 x 8 in</Description>
      <Quantity>2</Quantity>
      <UnitOfMeasure>Each</UnitOfMeasure>
    </Item>
    <Item>
      <LineNumber>0040</LineNumber>
      <ManufacturerPartNumber>ABC-5HP-480V-3P</ManufacturerPartNumber>
      <Description>5 HP Variable-Frequency Drive, 480 V 3-Phase</Description>
      <Quantity>1</Quantity>
      <UnitOfMeasure>Each</UnitOfMeasure>
    </Item>
    <Item>
      <LineNumber>0050</LineNumber>
      <ManufacturerPartNumber>FUS-KTLM-10B</ManufacturerPartNumber>
      <Description>Class CC Fuse, 10 A, 600 V AC</Description>
      <Quantity>50</Quantity>
      <UnitOfMeasure>Each</UnitOfMeasure>
    </Item>
  </Items>
  <Totals>
    <TotalLineItems>5</TotalLineItems>
  </Totals>
</BOM>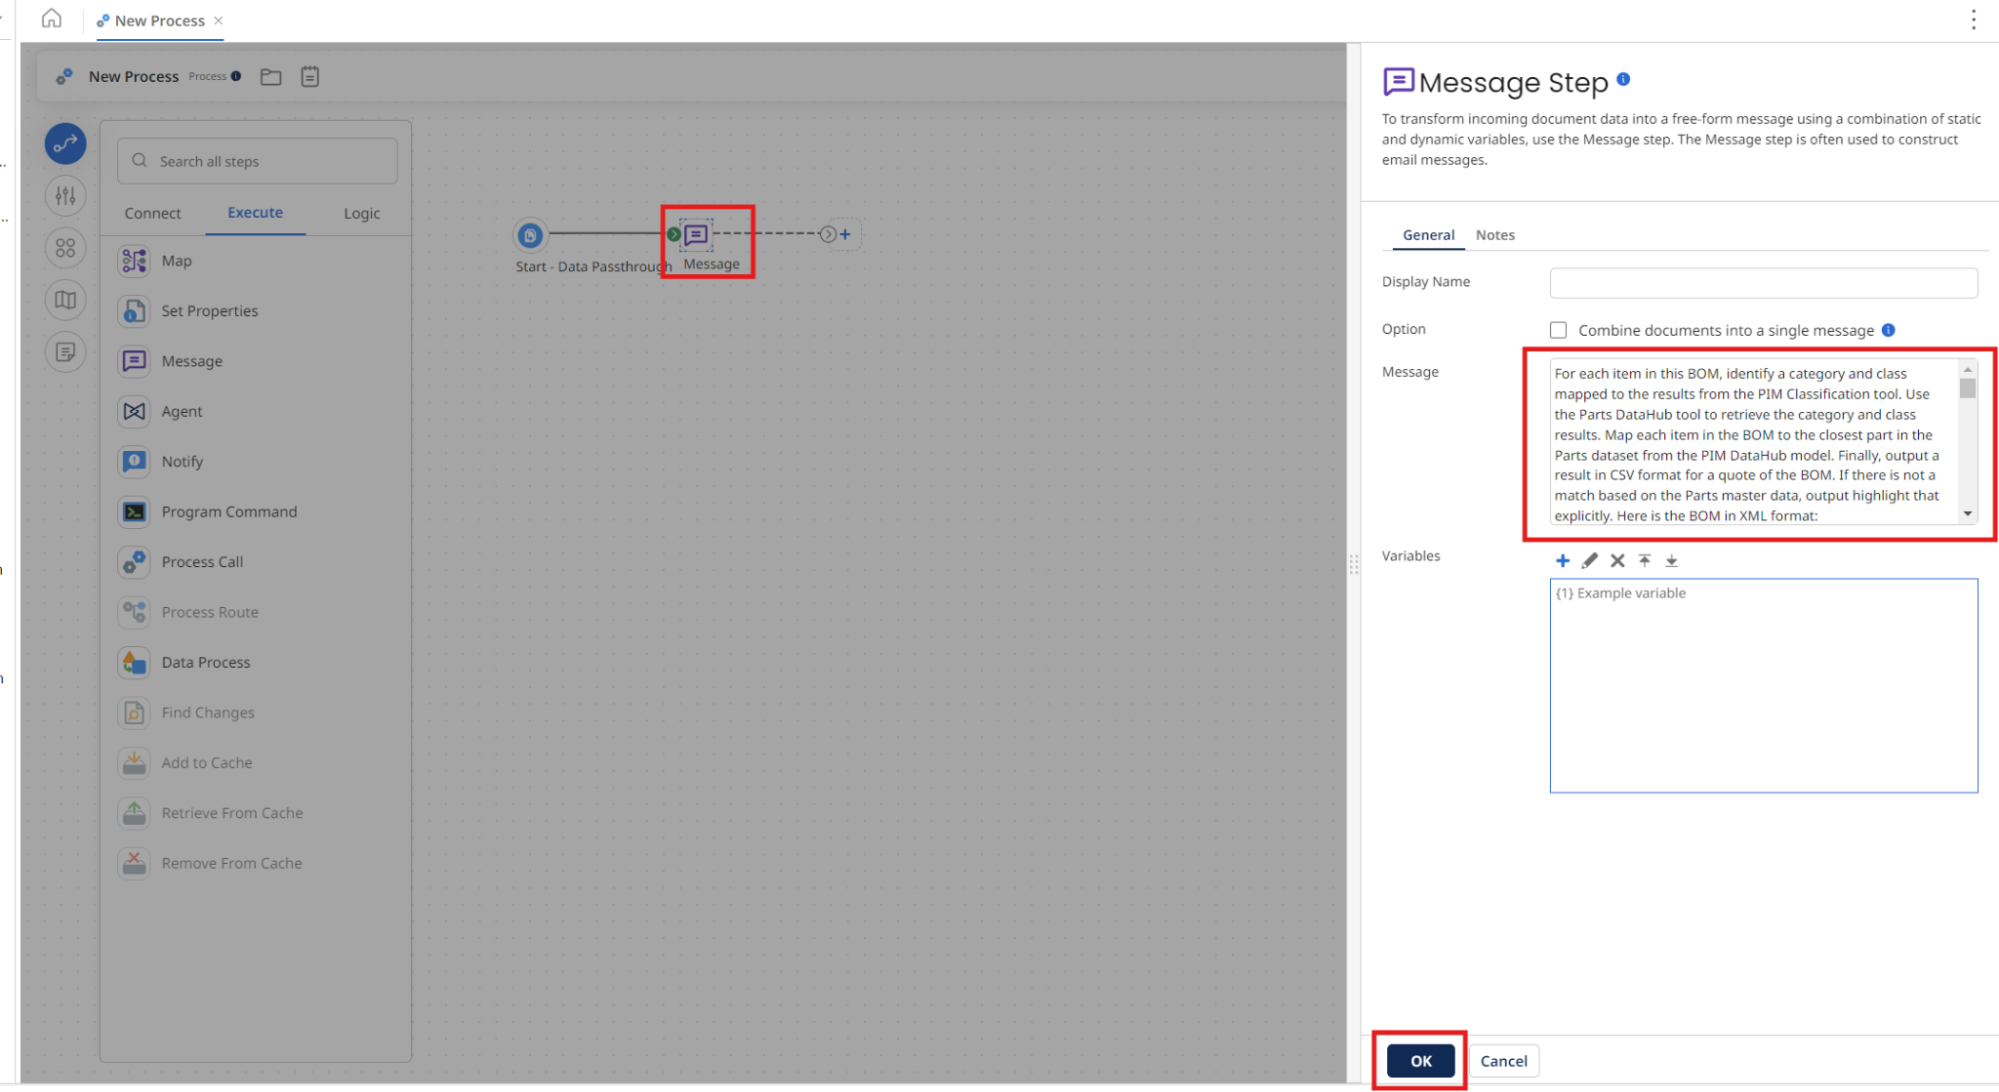
-
Select OK.
-
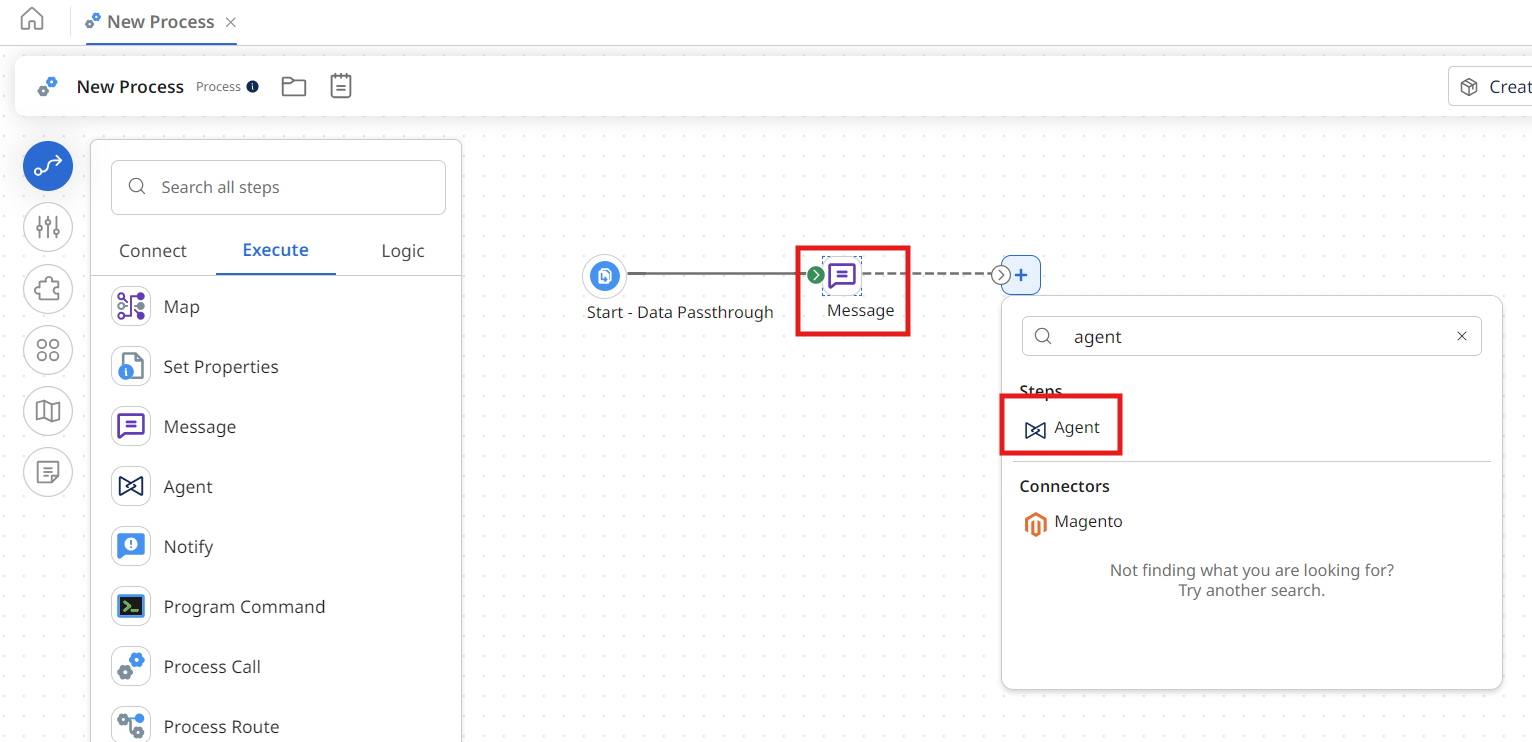
Select the + icon and search for
agent. -
Select the Agent icon.
-
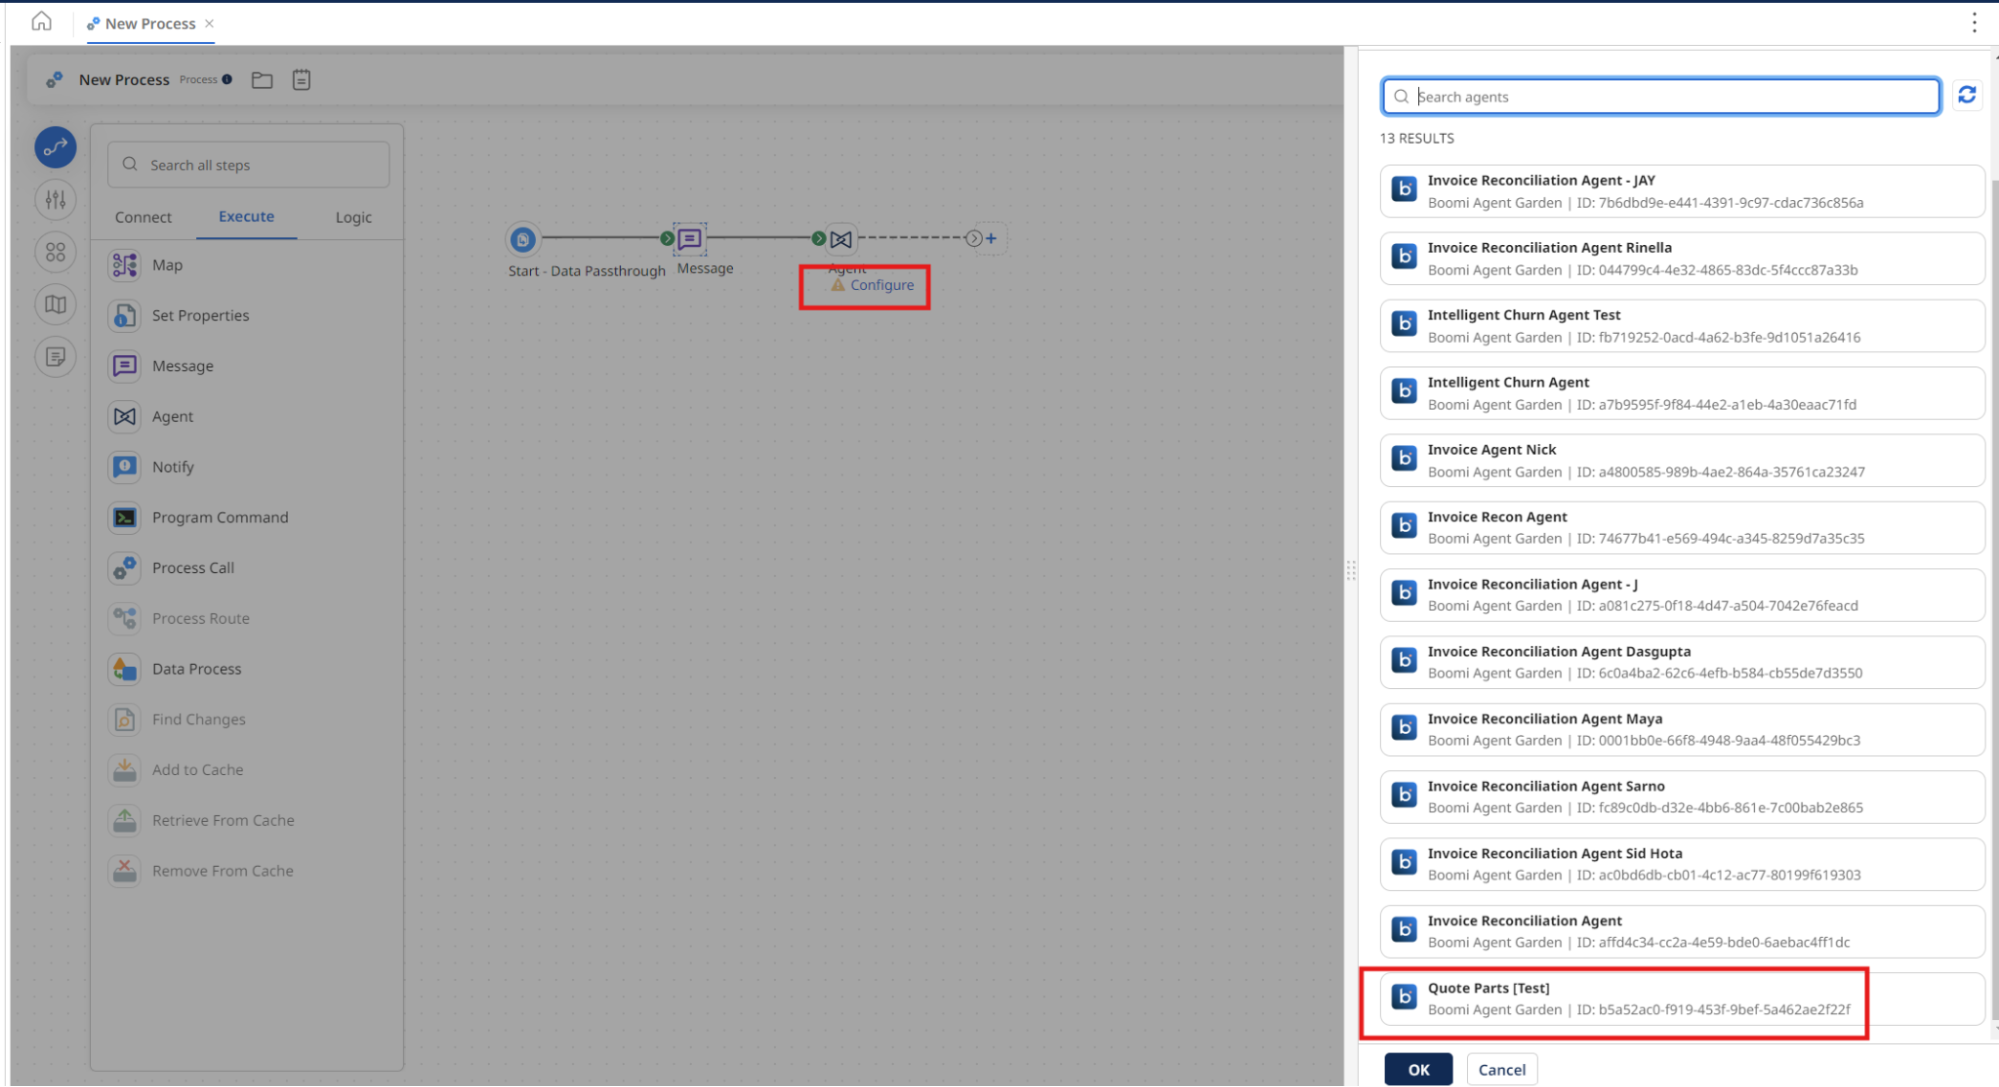
Select Configure under the Agent.
-
Select Configure, Price, Quote [builderInitials].
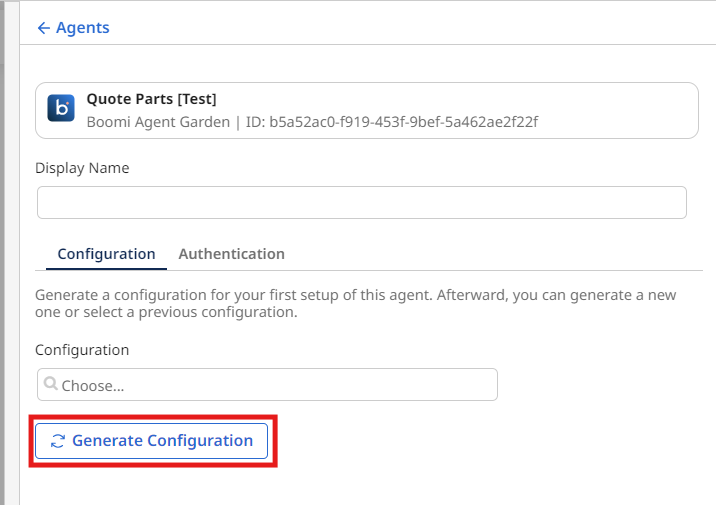
-
Select Generate Configuration.
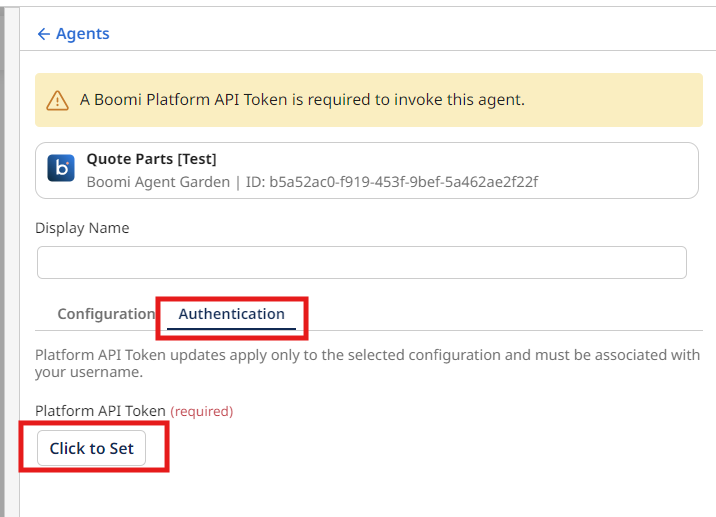
-
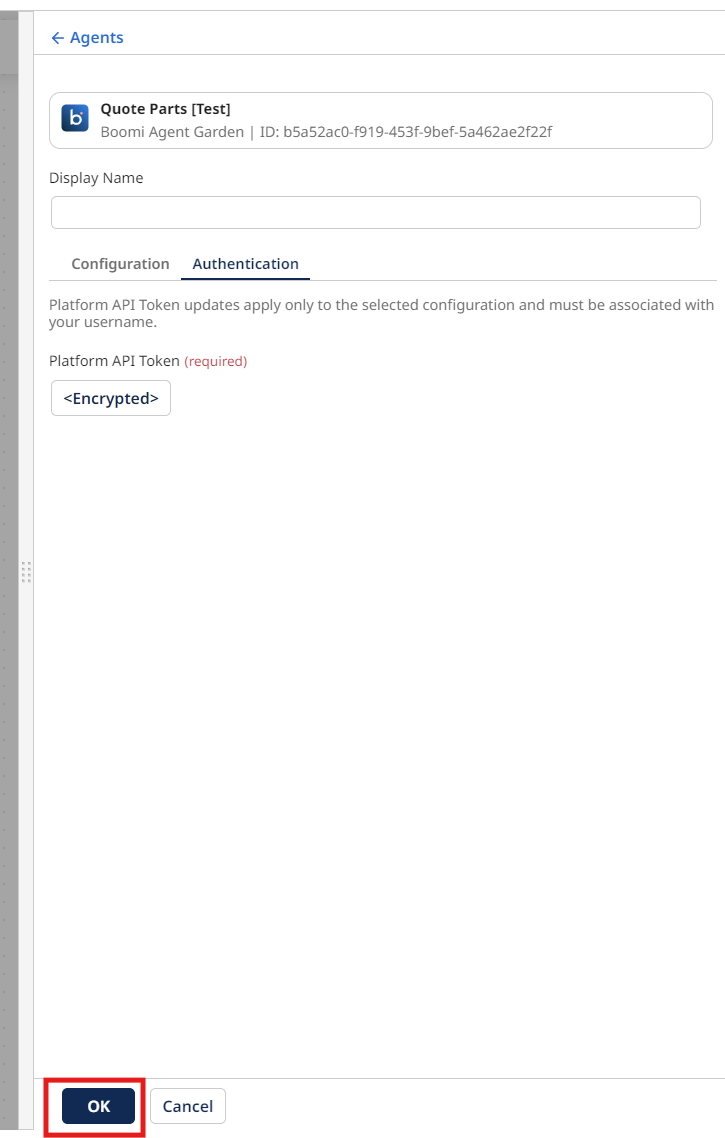
Select the Authentication tab to enter the Platform API Key below:
- Platform API Token: Paste the token you created at the beginning of this activity.
-
Select OK.
-
Add a Stop step to the end of the canvas and rename the process
Configure, Price, Quote Agent Step.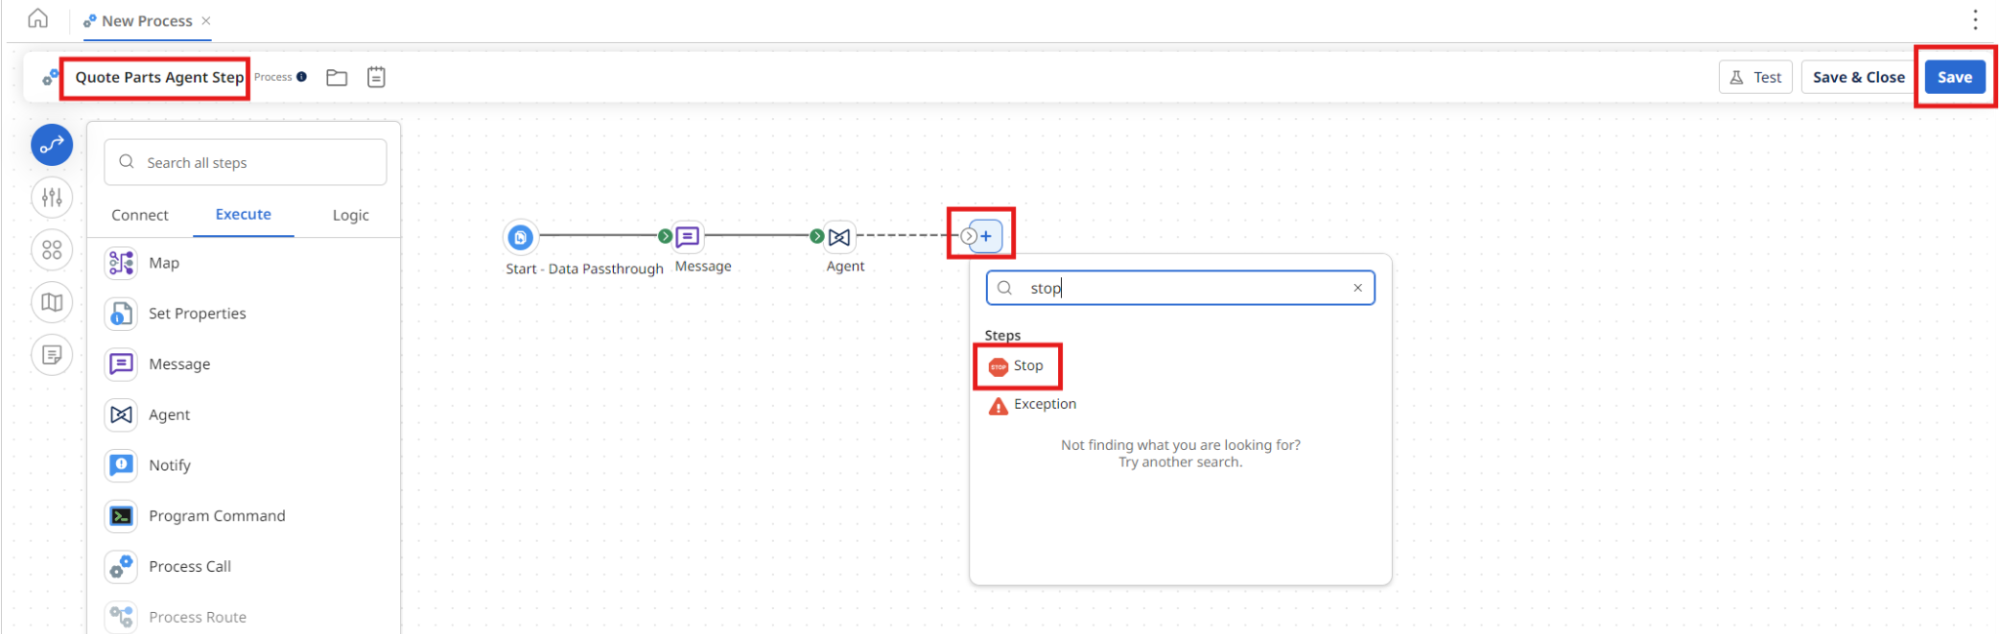
-
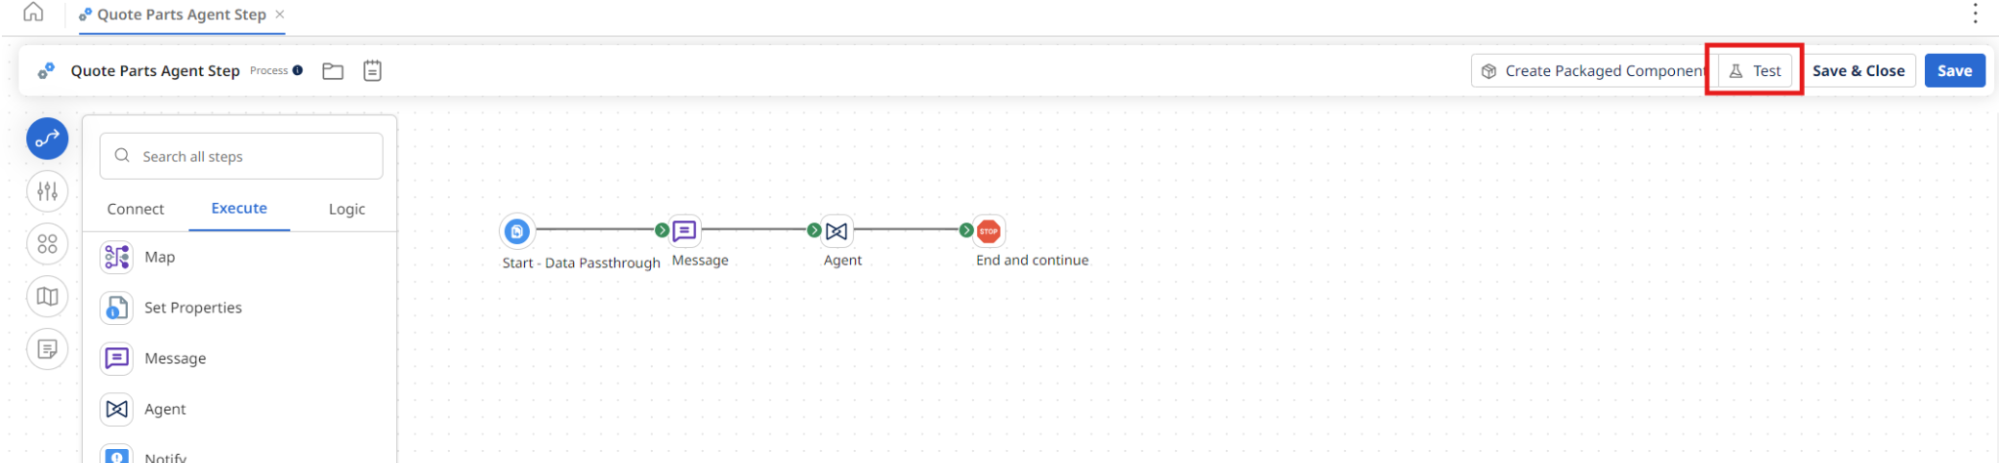
Select Save on the canvas.
-
Select Test.
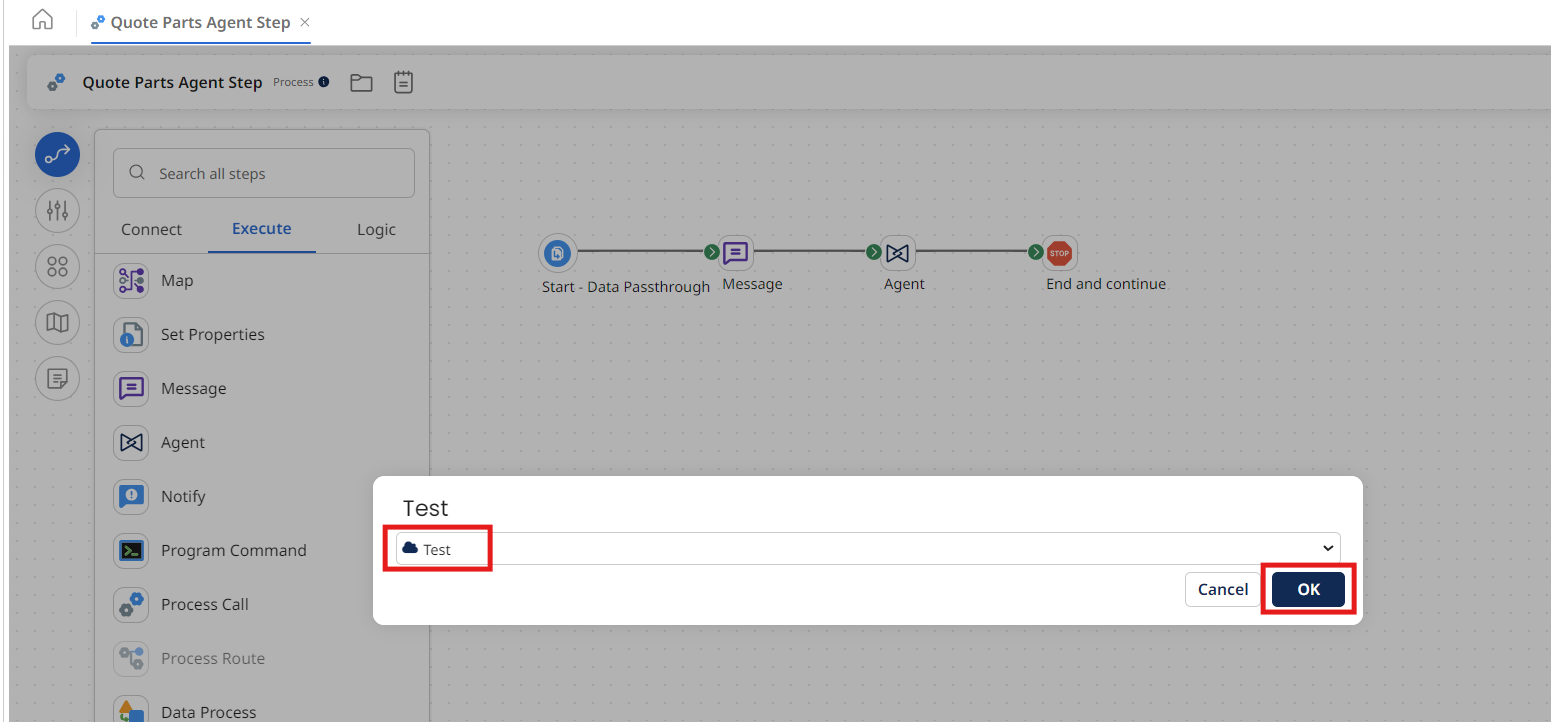
-
Select the Test from the beginning of the lab.
-
Select OK.
-
Wait for the process to complete execution and select the Stop step.
-
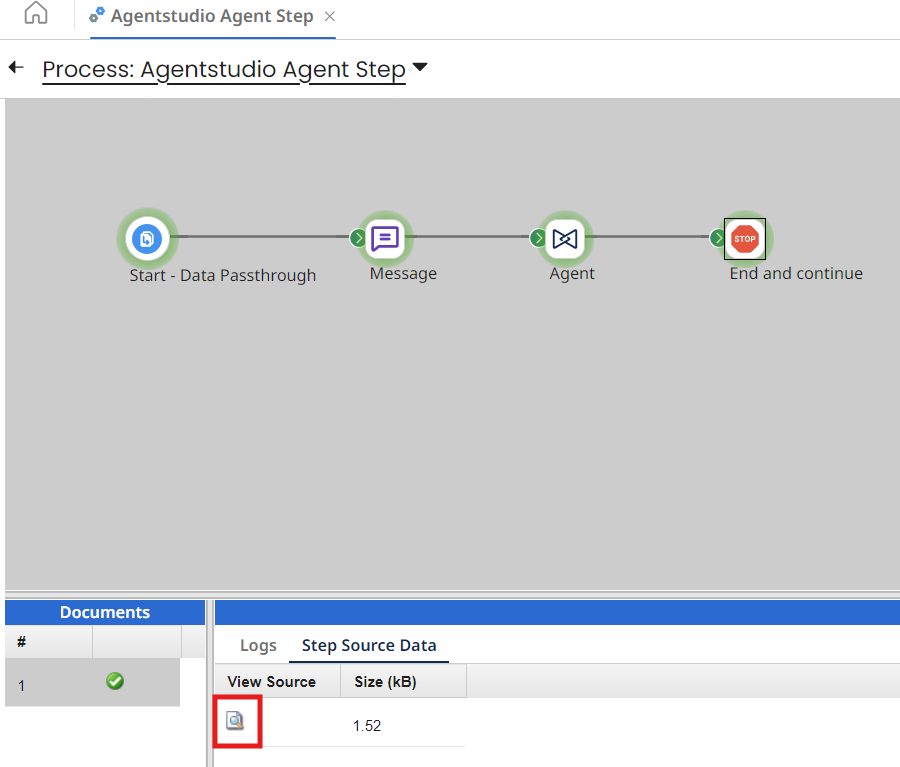
Select Step Source Data.
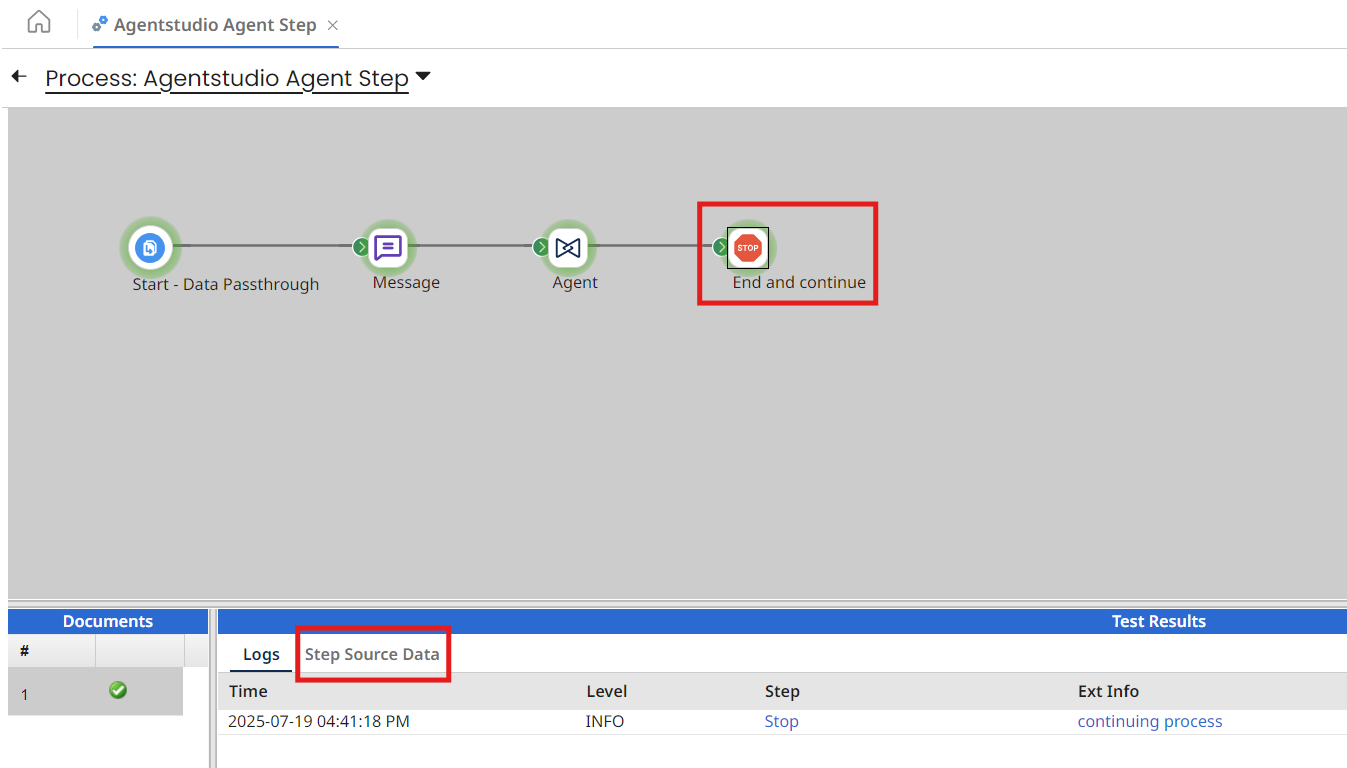
-
Select the paper icon to view the results.
-
Scroll to the bottom and view the JSON payload.
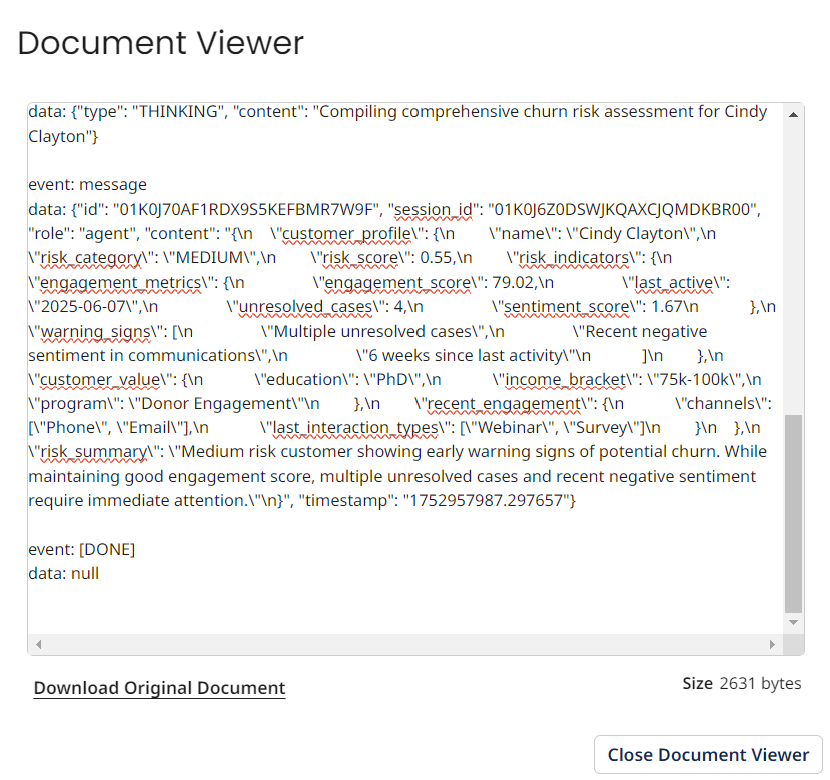
You've successfully built a Configure, Price, Quote AI Agent solution that can programmatically classify parts, match them against master data, and generate accurate quotes—transforming a manual, error-prone quoting process into intelligent automation that accelerates sales cycles and improves accuracy!