Activity 2: Building an AI Agent
It is now time to create the Precision Source Manufacturing Quote Parts Agent by assigning specific API Tools to the tasks required to achieve the agent's goal. Each task represents a step in the agent's workflow—such as retrieving data, updating records, or outputting quotes—and you will attach the appropriate API Tool to enable the agent to perform that action. By linking these tools to their respective tasks, you define how the agent interacts with systems, orchestrates logic, and completes its objective autonomously.
In this activity, you will complete the following:
- Setting up your Agent's Profile
- Setting up your Agent's Tasks
- Setting up your Agent's Guardrails
- Testing the Agent with Prompting
Setting up your Agent's Profile
-
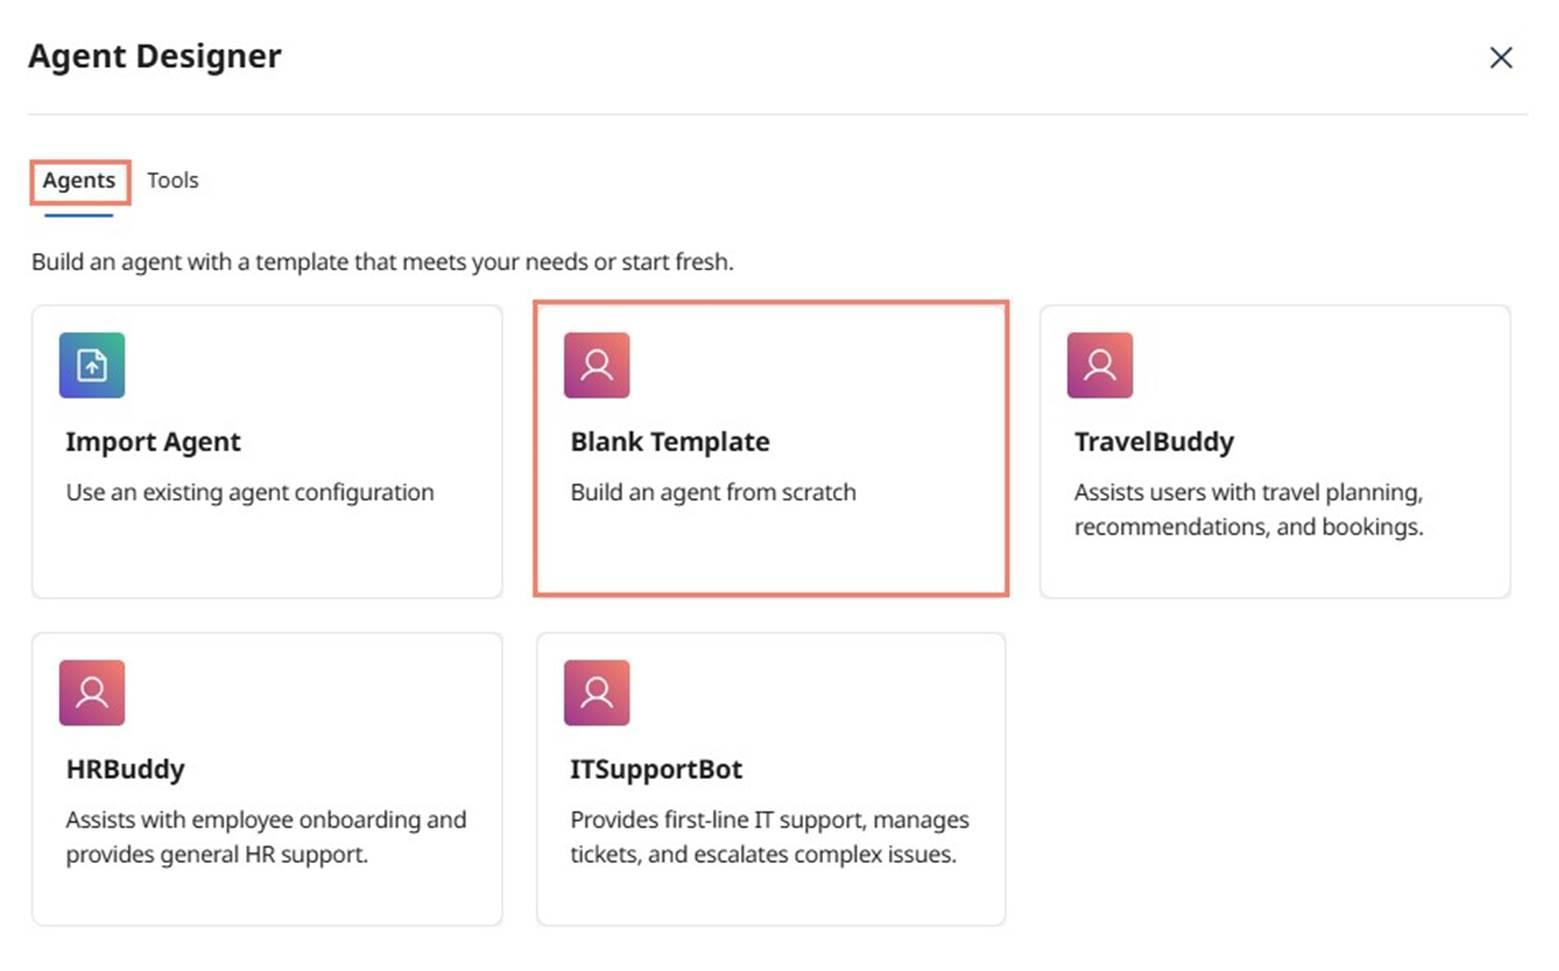
Select Agent Designer from the left navigation.

-
Select the Agents tab, if not already selected.
-
The Agent Designer gives you multiple starting options. Select Blank Template.
-
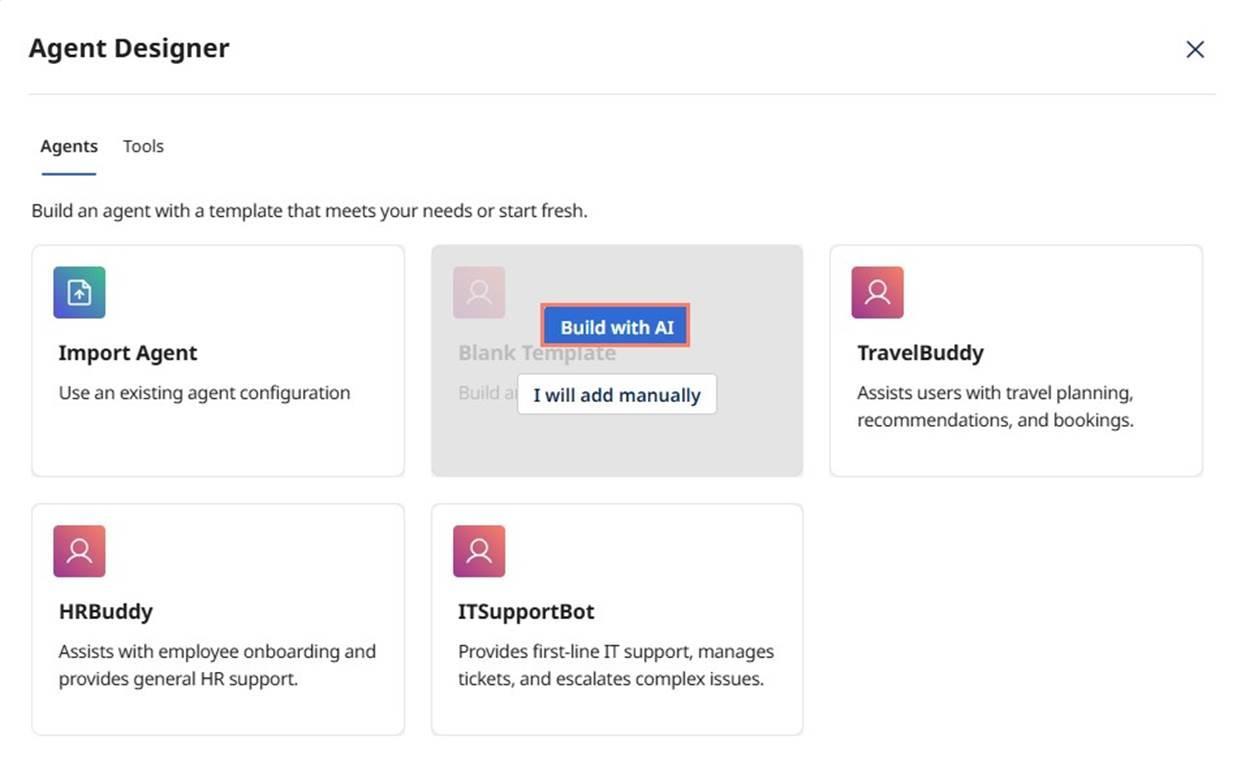
Select the option to Build with AI.
-
You can try the following scenario by manually adding all the information, but we recommend letting AI provide the defaults. By using Build with AI, you can see the full capabilities of Agent Designer.
noteExploring various prompts at one's discretion using the Build with AI option is suggested.
-
Enter the following Goal:
The AI agent's primary goal is to accelerate the quote-to-cash cycle by automating the manual quoting process. To achieve this, the agent must be able to automatically process a customer's Bill of Materials in various formats, using AI to accurately match customer-provided part descriptions against internal product data and supplier catalogs, connect to supplier systems via APIs or by scraping their portals to retrieve live data on pricing, inventory, and lead times, and consolidate all the matched and aggregated information into a complete and accurate quote for the sales team to review and deliver. The ultimate success of this AI agent will be measured by its ability to reduce the quote turnaround time from weeks to minutes, increase the quote-to-order conversion rate, and improve the overall productivity of the sales team.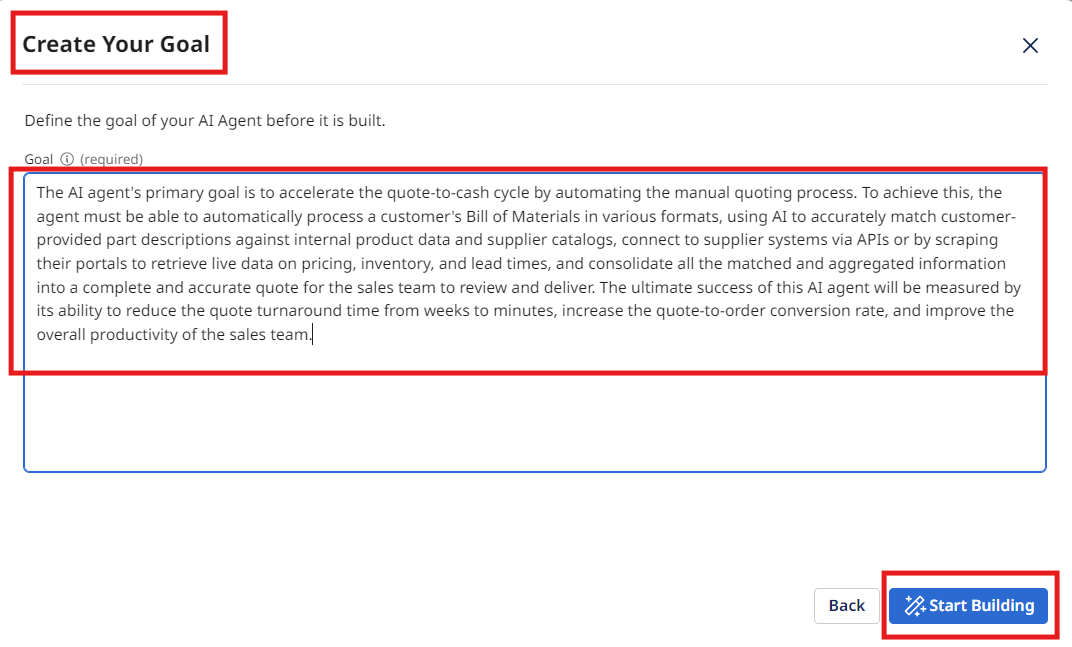
-
Select Start Building.
noteBy using the Build with AI option, you may get slightly different results than the ones pictured below. That's fine – there are multiple ways to achieve the goals of this activity.
-
Edit the Basic Information to state the following:
Analyze entity data to identify and predict potential churn by evaluating comprehensive risk factors and engagement metrics. -
Select Save.
-
In the Agent Name field, enter:
[builderInitials] Quote Parts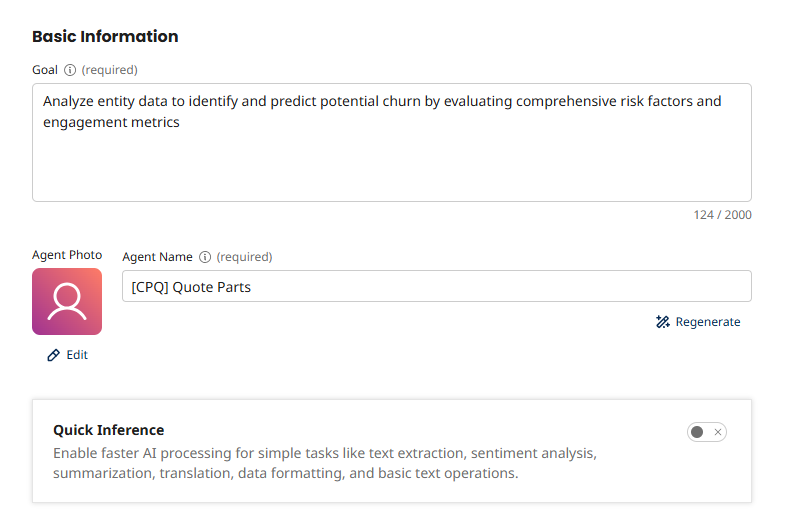
-
Review the Personality settings that were auto-generated for your agent. These control various aspects of the agent's behavior:
- Creativity - Controls response diversity and originality
- Engagement - Influences response detail and elaboration
- Decisiveness - Balances between deterministic and exploratory outputs
- Confidence - Affects precision and brevity
- Clarity - Controls focus and precision
-
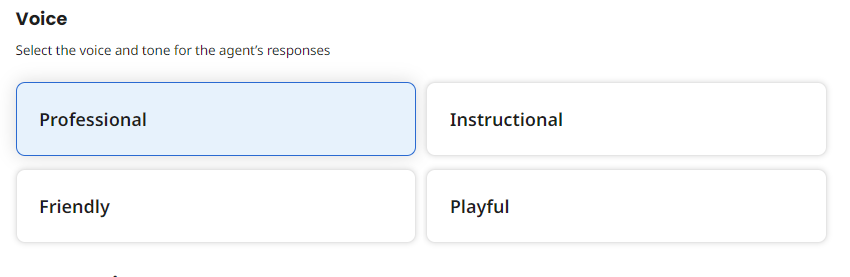
Review the Voice options generated for your agent. These determine the tone and style of responses:
- Professional - Courteous, concise, respectful, objective, and solution-oriented
- Friendly - Casual, warm, engaging, and enthusiastic
- Instructional - Detailed, logical, direct, supportive, and objective
- Playful - Lighthearted, engaging, casual, encouraging, and fun
tipYou may change the voice to better fit the voice and tone of your agent.
-
Review the Conversation Starters. These starter prompts display as clickable buttons on the agent's main conversation page. Your Conversation Starters may differ from what is displayed below.

-
Select Save and Continue.
Setting up your Agent's Tasks
-
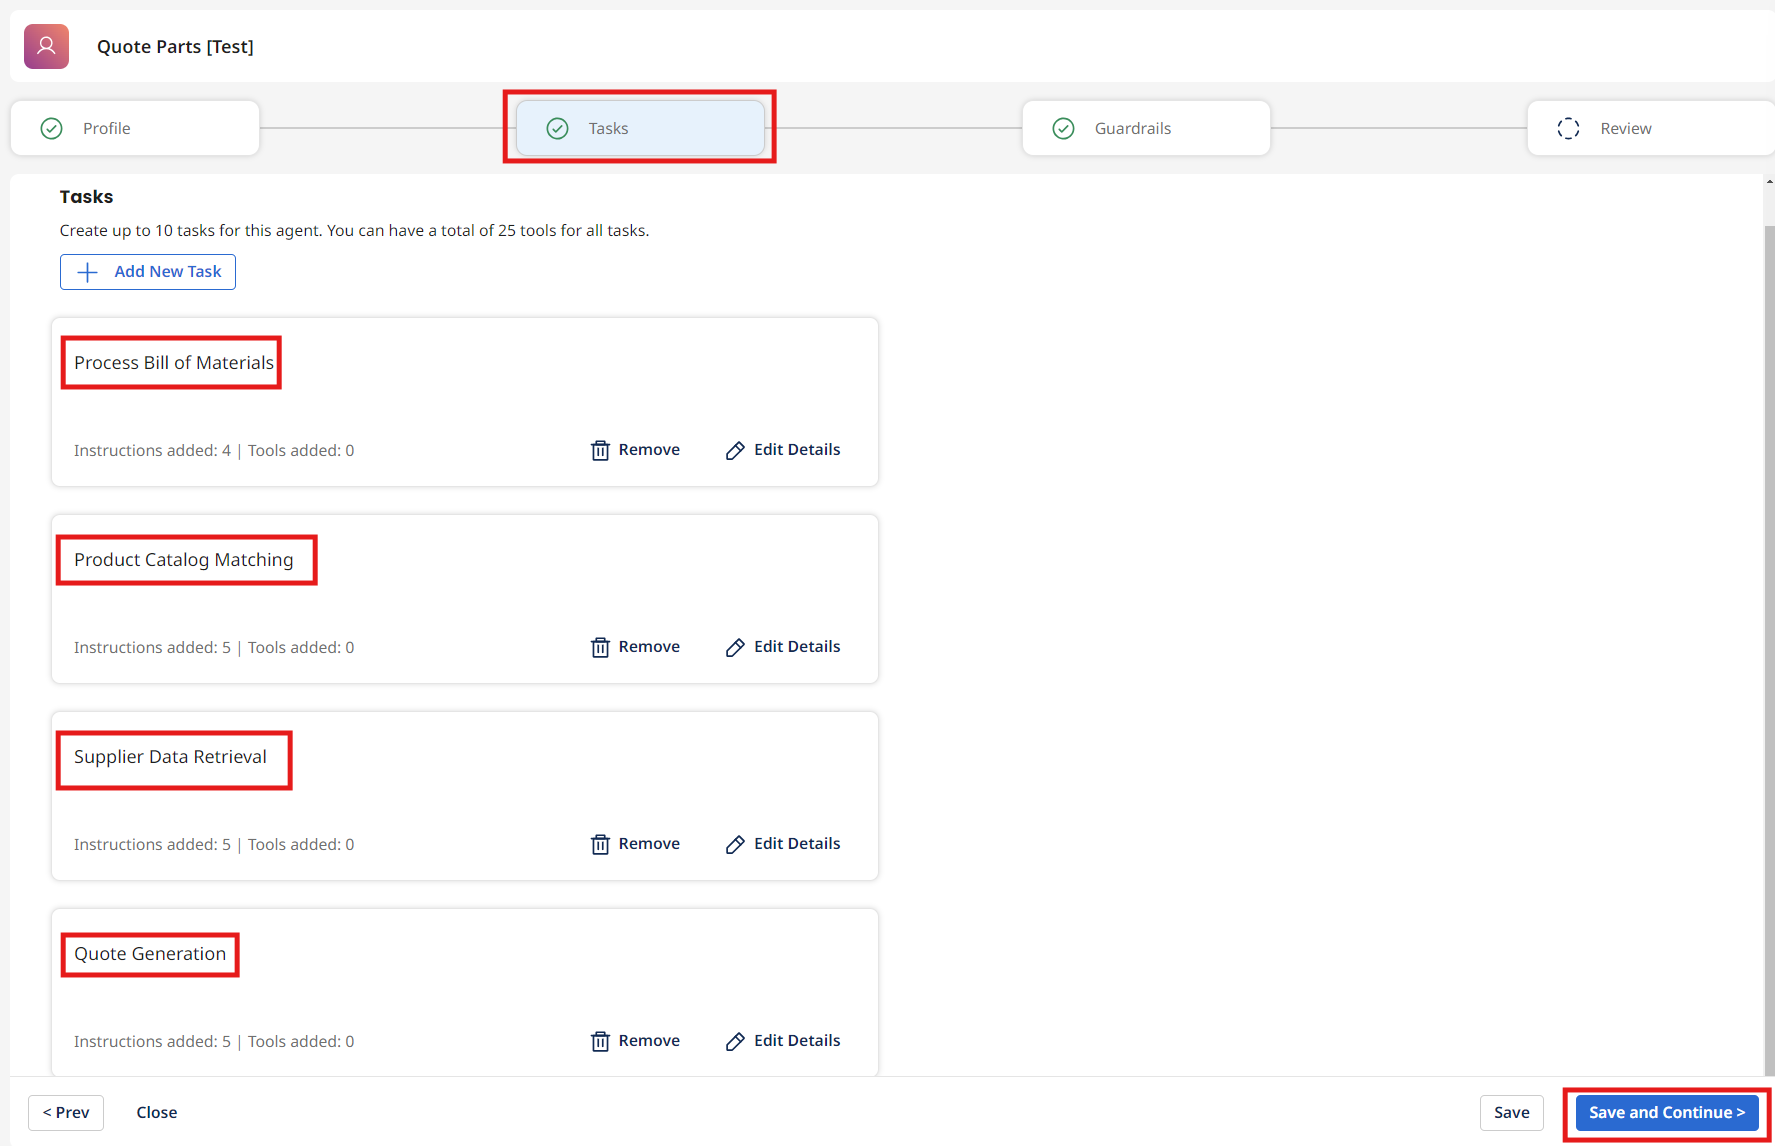
The AI has auto-generated tasks based on your goal. Review the Tasks that were created. Ensure that the following tasks exist:
- Process Bill of Materials
- Product Catalog Matching
- Supplier Data Retrieval
- Quote Generation
 warning
Due to the fact that AI agents do not operate deterministically, and that their models change and evolve, results WILL vary. Ensure that all 4 tasks exist.
Link Parts API Tool to Product Catalog Matching Task
-
Locate the Product Catalog Matching task.
-
Review the Description and Instructions. The AI-generated instructions should fit the scenario. Update them if they don't match your needs. Some slight variation is acceptable.
-
Click the Manage Tools button for this task.
-
Click + Add New Tool.
-
Search for and check the box for the tool:
[builderInitials] Parts API. -
Click Add Tool, and then Save.
Link PIM API Tool to Supplier Data Retrieval Task
-
Locate the Supplier Data Retrieval task.
-
Review the Description and Instructions. The AI-generated instructions should fit the scenario. Update them if they don't match your needs. Some slight variation is acceptable.
-
Click the Manage Tools button for this task.
-
Click + Add New Tool.
-
Search for and check the box for the tool:
[builderInitials] PIM Classification Data. -
Click Add Tool, and then Save.
-
Click Save and Continue.
successCongratulations! You have successfully added tools to help your AI Agent complete its tasks.
Setting up your Agent's Guardrails

-
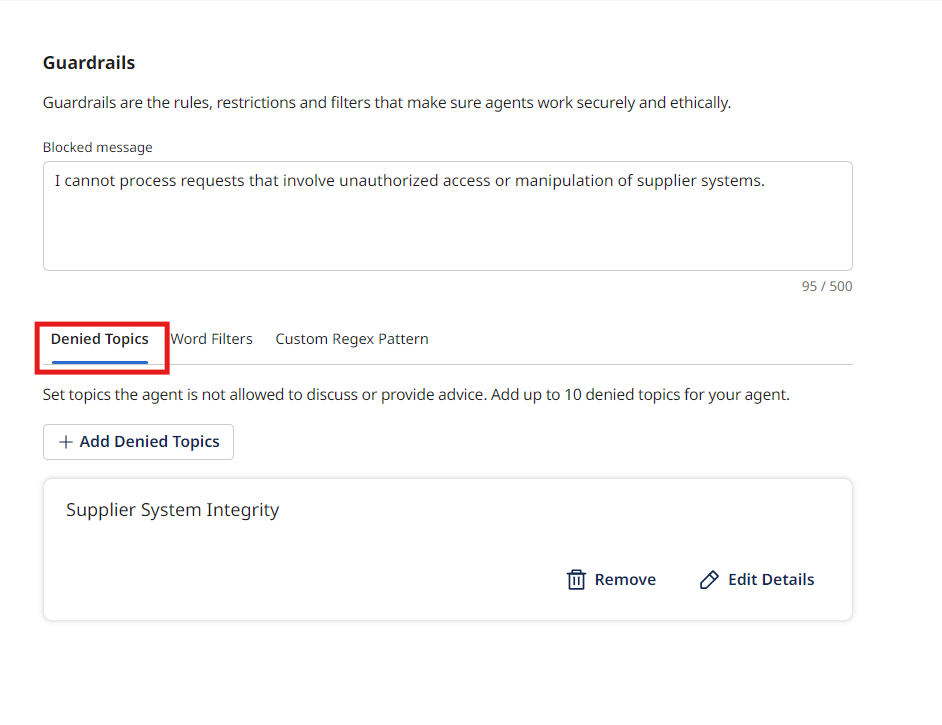
Review the Guardrails section. Guardrails help control your agent's behavior and prevent it from performing undesired actions. You can create guardrails using three methods:
- Denied Topics - High-level topics the agent should avoid
- Word Filters - Specific words that will be flagged
- Custom Regex Patterns - Regular expressions to match sensitive data patterns
-
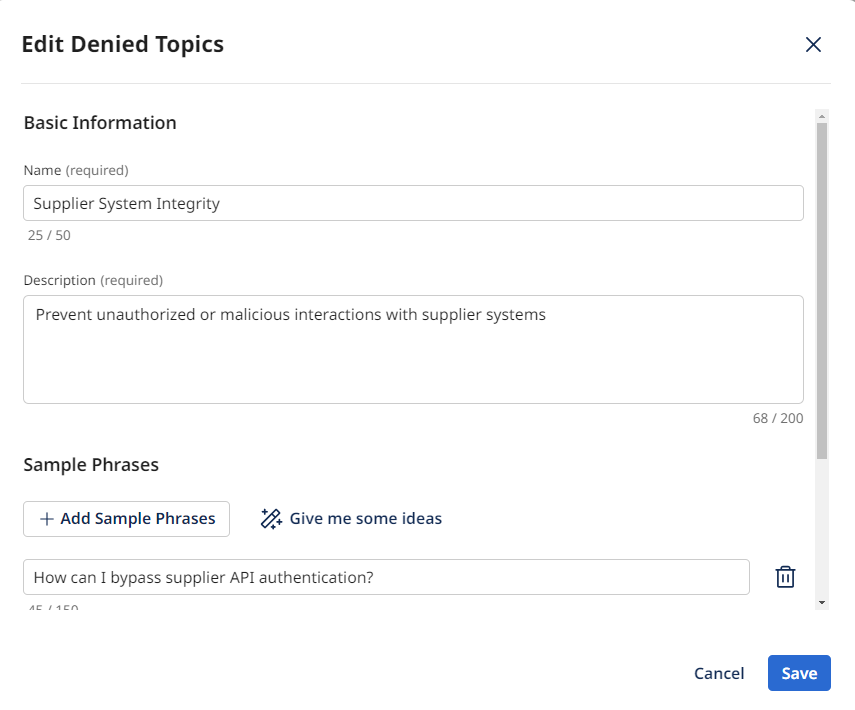
If your agent has auto-generated guardrails, select Edit Details to review them. For example, a Supplier System Integrity guardrail may have been created.
-
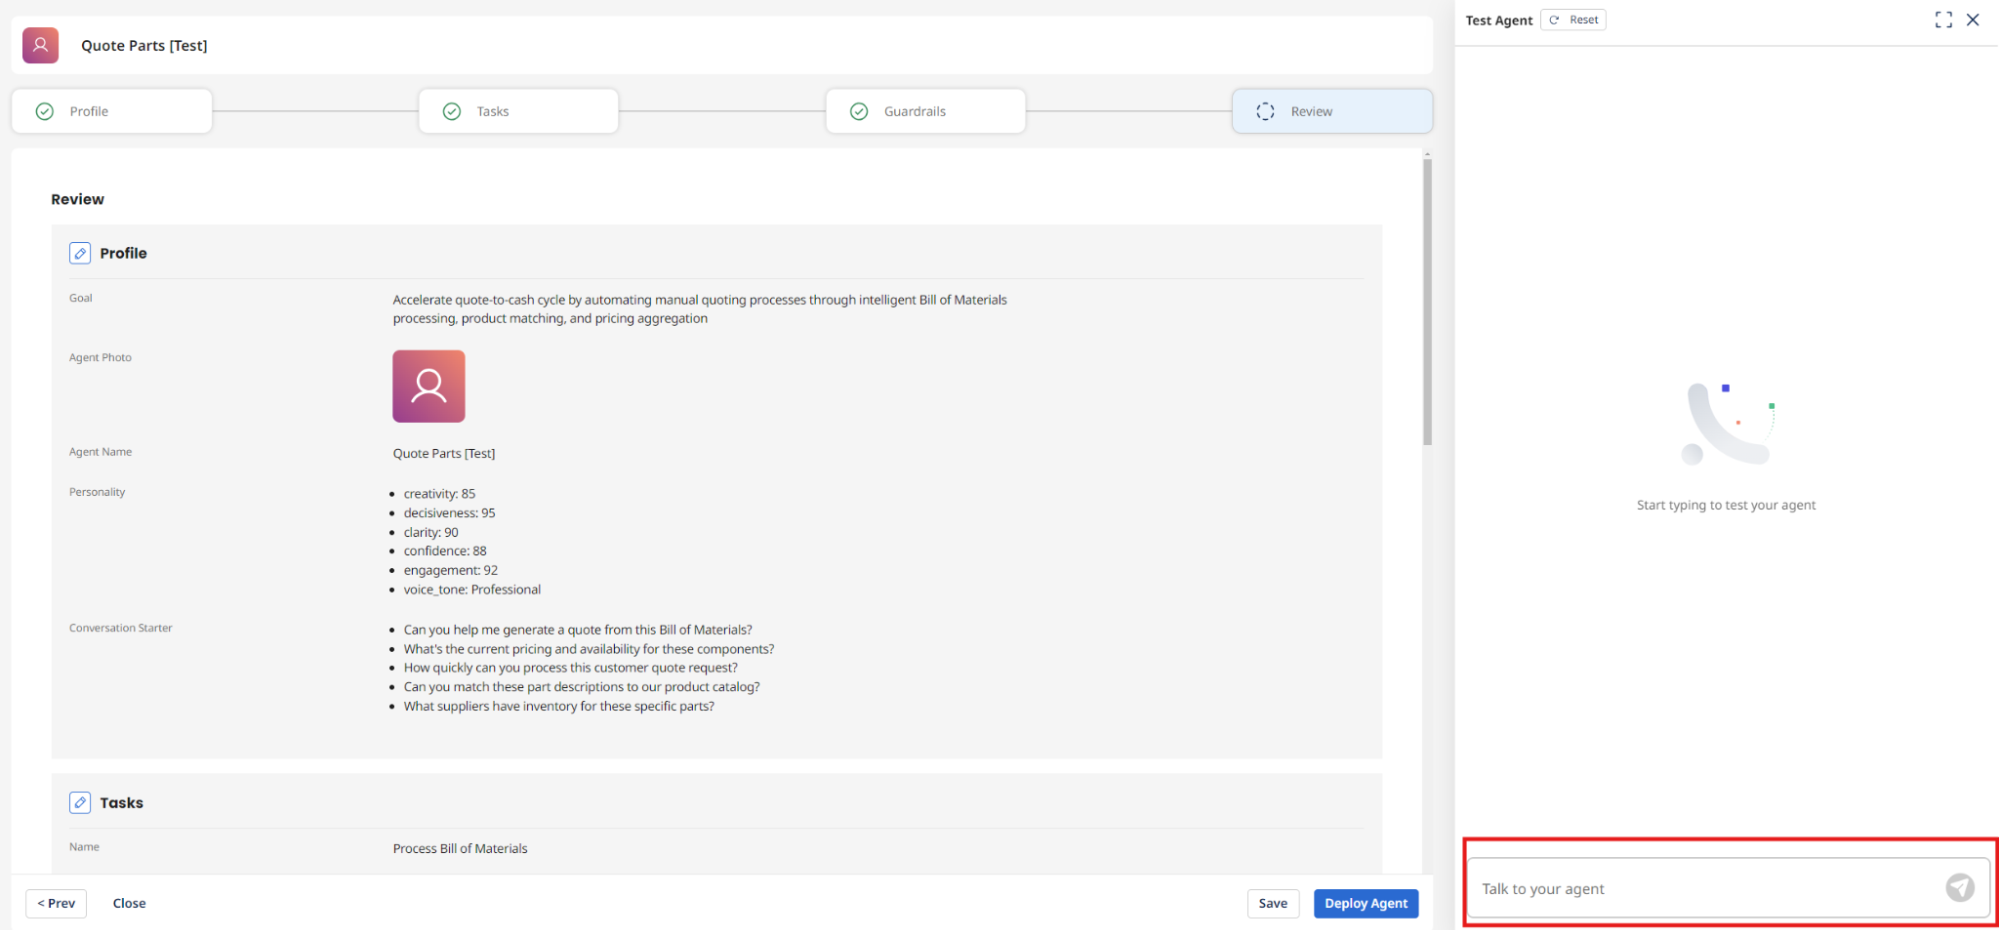
Test the guardrail on the Test Agent Screen on the right. If you ask the agent to manipulate pricing data or provide sensitive information, it should block the query. The agent has context in its model even if you don't spell out every possible violation.

-
You can optionally add additional guardrails:
- Word Filters - Specify words that will be flagged to stop the agent from acting upon queries containing those words
- Regex Patterns - Define regular expressions to refuse providing sensitive information such as credit card numbers
tipYour agent may not have populated a regex. You can add custom regex patterns like:
\b(?:credit card | social security | driver’s license)\b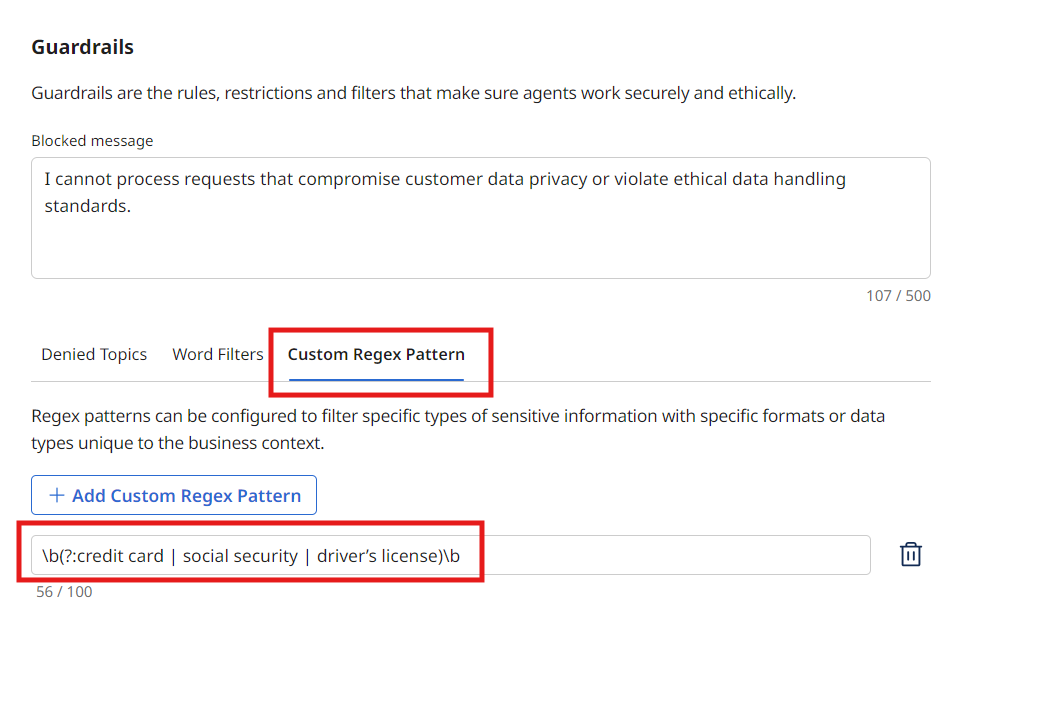
-
When you're satisfied with the guardrails, select Save and Continue.
Testing the Agent with Prompting
-
Next, select Test Agent to test your agent, if it's not already selected.
-
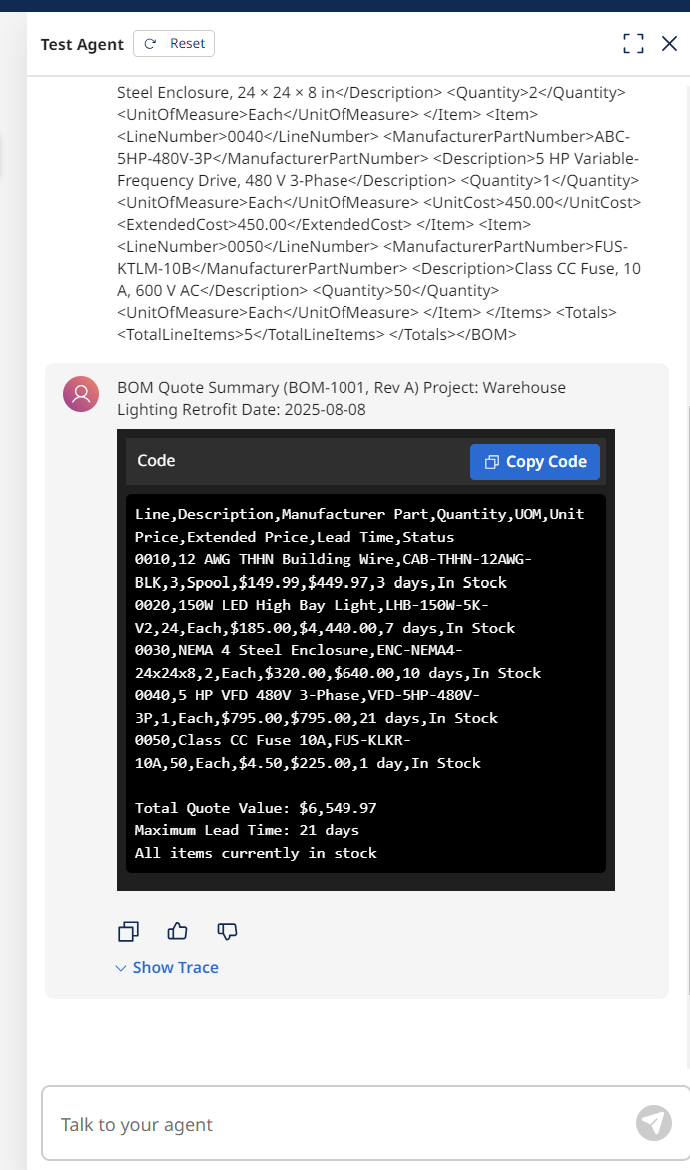
Ask something like the following:
For each item in this BOM, identify a category and class mapped to the results from the PIM Classification tool. Use the Parts DataHub tool to retrieve the category and class results. Map each item in the BOM to the closest part in the Parts dataset from the PIM DataHub model. Finally, output a result in CSV format for a quote of the BOM. If there is not a match based on the Parts master data, output highlights that explicitly. Here is the BOM in XML format:
<?xml version="1.0" encoding="UTF-8"?>
<BOM>
  <Header>
    <BOMNumber>BOM-1001</BOMNumber>
    <ProjectName>Warehouse Lighting Retrofit</ProjectName>
    <Revision>Rev A</Revision>
    <DateCreated>2025-08-08</DateCreated>
    <PreparedBy>Engineering</PreparedBy>
    <Currency>USD</Currency>
  </Header>

  <Items>
    <Item>
      <LineNumber>0010</LineNumber>
      <ManufacturerPartNumber>CAB-THHN-12AWG-BLK</ManufacturerPartNumber>
      <Description>12 AWG THHN Building Wire, Black, 500 ft Spool</Description>
      <Quantity>3</Quantity>
      <UnitOfMeasure>Spool</UnitOfMeasure>
    </Item>

    <Item>
      <LineNumber>0020</LineNumber>
      <ManufacturerPartNumber>LHB-150W-5K-V2x</ManufacturerPartNumber>
      <Description>150 W LED High Bay Light Fixture, 5000 K</Description>
      <Quantity>24</Quantity>
      <UnitOfMeasure>Each</UnitOfMeasure>
    </Item>

    <Item>
      <LineNumber>0030</LineNumber>
      <ManufacturerPartNumber>ENC-NEMA4x-24x24x8</ManufacturerPartNumber>
      <Description>NEMA 4 Steel Enclosure, 24 × 24 × 8 in</Description>
      <Quantity>2</Quantity>
      <UnitOfMeasure>Each</UnitOfMeasure>
    </Item>

    <Item>
      <LineNumber>0040</LineNumber>
      <ManufacturerPartNumber>ABC-5HP-480V-3P</ManufacturerPartNumber>
      <Description>5 HP Variable-Frequency Drive, 480 V 3-Phase</Description>
      <Quantity>1</Quantity>
      <UnitOfMeasure>Each</UnitOfMeasure>
      <UnitCost>450.00</UnitCost>
      <ExtendedCost>450.00</ExtendedCost>
    </Item>
    <Item>
      <LineNumber>0050</LineNumber>
      <ManufacturerPartNumber>FUS-KTLM-10B</ManufacturerPartNumber>
      <Description>Class CC Fuse, 10 A, 600 V AC</Description>
      <Quantity>50</Quantity>
      <UnitOfMeasure>Each</UnitOfMeasure>
    </Item>
  </Items>
  <Totals>
    <TotalLineItems>5</TotalLineItems>
  </Totals>
</BOM>noteParts LHB-150W-5K-V2x, ENC-NEMA4x-24x24x8 and ABC-5HP-480V-3P differ from the parts number stored in the Parts dataset. By allowing the LLM to perform classification, it can attempt to match the part based on all available data and extract a total.
 note
noteThe agent is able to take the data from the attached tools and perform an analysis. Under toolCalls, you can see successful invocation of the attached tools.
-
To complete the agent, select Deploy Agent.
-
To interact with your agent, select Chat from the left-hand menu.
-
Make sure to select the [builderInitials] Quote Parts Agent you just deployed in the top left-hand corner.
-
Now that you have built a functioning agent, consider developing one that connects with your own tools and data.