Part 1: Create Tools for Your Customer Support Agent
In this first part of the lab, you'll build the foundational tools that give your Customer Support Agent the ability to interact with real business systems. But before we dive into the mechanics of creating tools, let's understand a fundamental shift in how we approach automation.
The Evolution: From Task-Based to Role-Based Design
For 20 years, integration professionals have built reliable, predictable "assembly lines" for data—connecting System A to System B with rigid, defined processes. This is the Integration Mindset: structured, task-focused automations that excel at executing a single, specific workflow.
Agentic systems represent the next evolution. Instead of building a narrow automation to "look up a product code," we're designing an agent to fill the role of a "Customer Support Specialist"—a digital colleague who can handle multiple related problems autonomously.
Traditional Integration: Builds a solution to perform a single, low-level task. Example: "Create an integration that parses an email for a product code and calls the catalog API."
Agentic Design: Designs an agent to fill a high-level role in the business. Example: "Design a Customer Support Agent that has the skills, access, and authority to resolve a customer's problem, whatever it may be."
When you architect for a role, you give the agent a "toolbox" of capabilities and a goal. The agent then reasons and plans its own sequence of actions to achieve that goal—just like a human employee would.
The Power of Optional Parameters
A key principle of role-based agent design is flexibility. Unlike traditional integrations that require specific, rigid inputs, agent tools should support optional parameters that allow the agent to intelligently decide which data to retrieve based on the business context.
Instead of creating separate tools for "search product by code," "search product by category," and "get product with compatibility info," you create ONE flexible tool with optional parameters. The agent can then use this single tool in multiple ways depending on what it needs to accomplish. This is the difference between task-based and role-based design.
In this part, you will create four API tools that demonstrate this principle:
- Get Product Information - Retrieve product specs, troubleshooting guides, and compatibility info
- Query Order Status - Check order and shipment status with flexible search options
- Update Customer Information - Modify customer contact details
- Search Knowledge Base - Find troubleshooting articles and documentation
Plus one Integration tool:
- Update Case with Comment - Write proposed resolutions back to the CRM
Each tool is focused but flexible—giving your agent the autonomy to solve multiple, related problems.
Get Access to the Customer Support API
Before you can create your agent tools, you need to get access to the Customer Support API through the Boomi API Academy portal. This process will provide you with an API key and base URL that you'll use throughout this lab.
-
Navigate to the API Academy portal:
https://aiplatformcoe-l6qlay.portal.na.controlplane.boomi.com/academy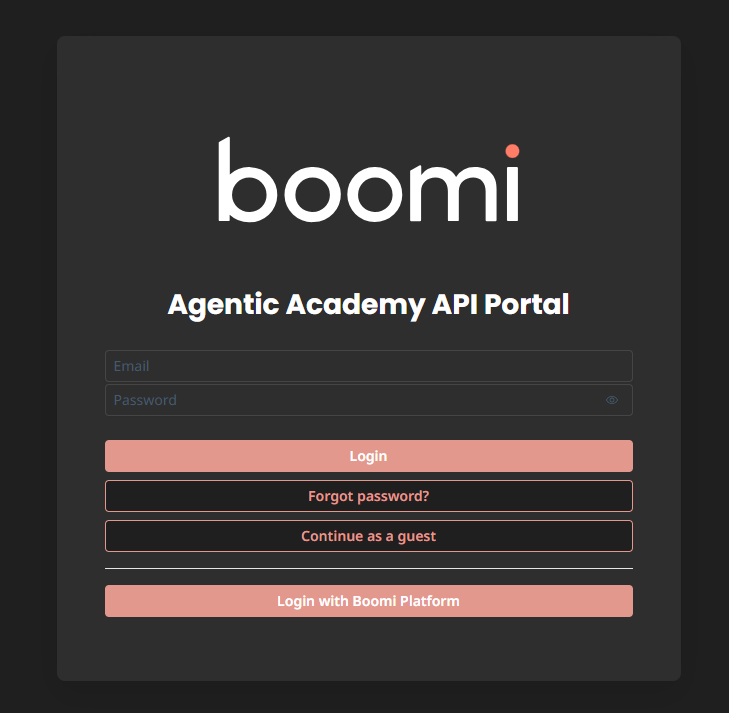
-
If you don't have a Boomi account:
- Click Continue as Guest.
- Click APIs.
- Click Customer Support.
- Click Get Access.
- Fill out the information and click Create Account.
-
If you do have a Boomi account:
- Click Login with Boomi Account.
-
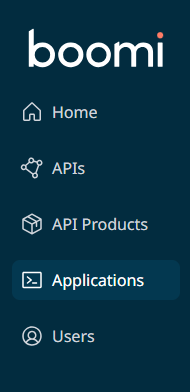
Once logged in, create an application to access the API:
-
Click Applications in the left sidebar.
-
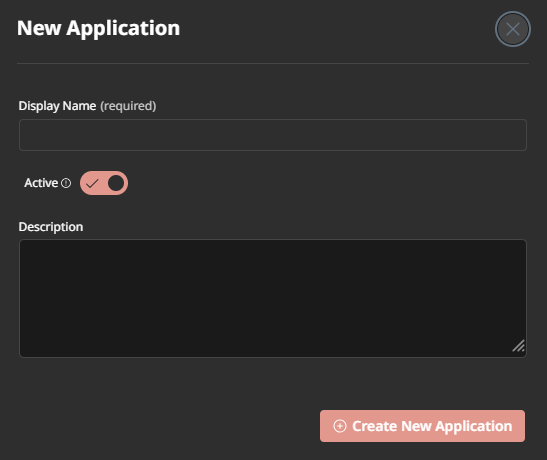
Click Create New Application.

-
Give your application a name (e.g.,
[builderInitials] Customer Support Agent). -
Click Create New Application.
-
-
Subscribe to the Customer Support API:
-
Click API Products in the left sidebar.

-
Click the Customer Support API product card.
-
Click Plans.
-
Click Subscribe.
-
Choose your application from the Search... box.
-
Click Subscribe.
-
-
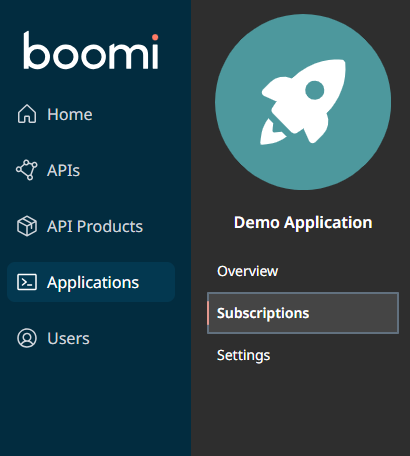
Retrieve your API credentials:
-
Click Applications in the left sidebar.
-
Click on your application name.
-
Click Subscriptions tab.
-
Click Secrets.

-
Copy the Product Key and save it somewhere accessible (you'll need it for every tool).
-
Copy the API Base URL and save it (you'll need this too).
-
You'll use the same API key and base URL for all four API tools you create. Consider saving them in a text file so you can easily copy and paste them as you build each tool.
Access Agentstudio
Let's start by navigating to the Boomi Agentstudio environment where you'll create your tools. Navigate to platform.boomi.com and login if necessary.
-
From the Boomi Platform, click the AI button in the top right corner.
 note
noteThis will open Agentstudio in a new window. Make sure pop-ups are enabled in your browser.
-
If this is your first time accessing Agentstudio, you'll see a welcome screen. Click Get Started and accept the Terms and Conditions.
-
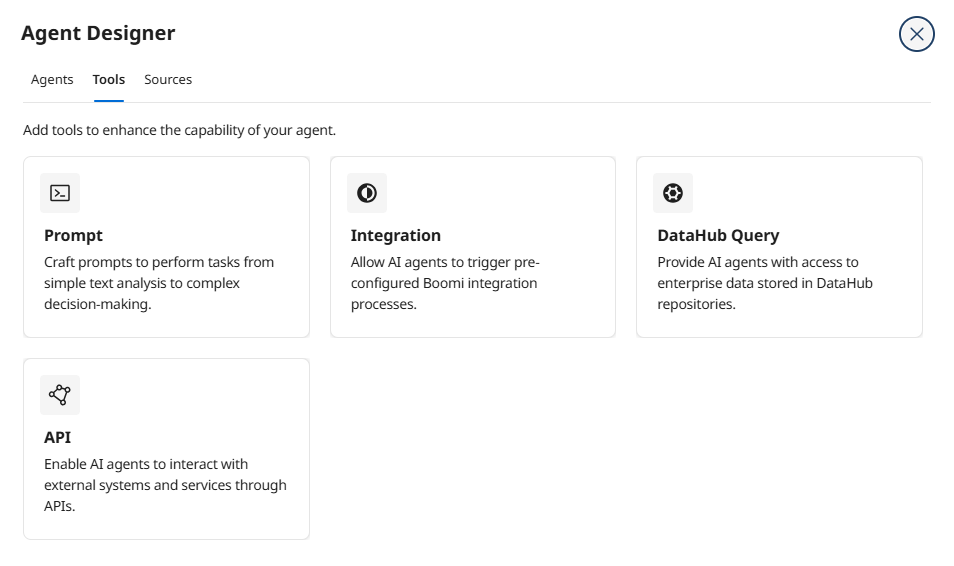
Click the Tools button on the left side of the screen.

Now you're ready to create your first API tool!
Tool 1: Get Product Information
This tool allows your agent to retrieve product details, specifications, troubleshooting information, and compatibility data. The optional parameters demonstrate role-based flexibility—the agent can query by product code, check compatibility information, or browse by category depending on what the customer needs.
Notice how this tool uses OPTIONAL parameters? This means the agent can:
- Look up a specific product:
productCode=FP-2100-GRD - Include compatibility info:
productCode=FP-2100-GRD&compatibilityCheck=true - Browse by category:
category=Power Systems
One tool, multiple use cases—that's role-based design!
-
Click Create New Tool.

-
Hover over API and click Add Tool.
-
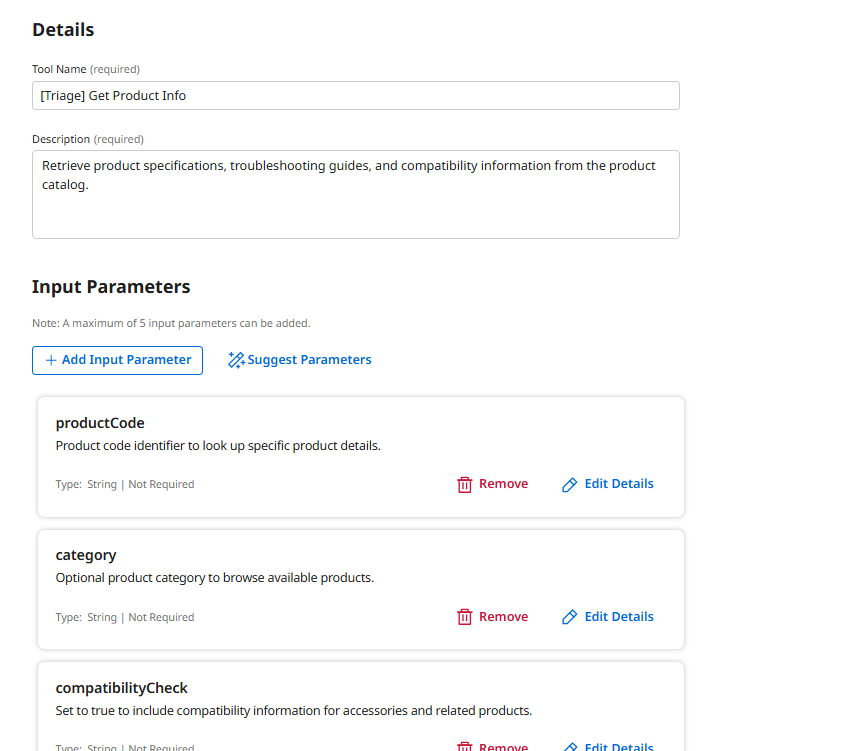
Enter the following tool details:
- Tool Name:
[builderInitials] Get Product Info - Description:
Retrieve product specifications, troubleshooting guides, and compatibility information from the product catalog.
 Why This Description Matters
The description tells your agent WHEN and HOW to use this tool. The AI model uses this description to decide if this tool is appropriate for the current task. Be specific about what data it returns and any optional capabilities.
- Tool Name:
-
Click + Add Input Parameter.
-
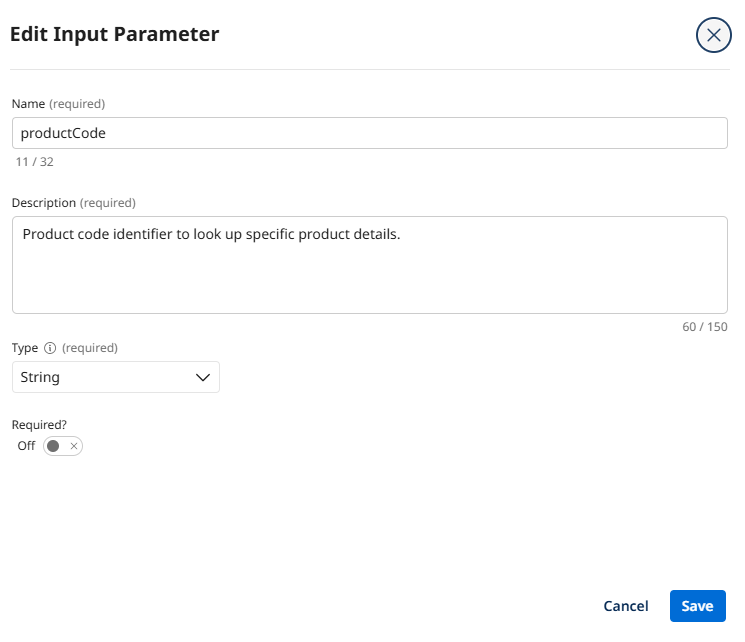
Configure the productCode parameter:
- Name:
productCode - Description:
Product code identifier to look up specific product details. - Type: String
- Required: False
 Why Make This Optional?
Sometimes the agent needs to look up a specific product (when the customer mentions a code), and sometimes it might browse by category. Making this parameter optional gives the agent the flexibility to decide based on context.
- Name:
-
Click Add Input Parameter.
-
Click + Add Input Parameter again.
-
Configure the category parameter:
- Name:
category - Description:
Optional product category to browse available products. - Type: String
- Required: False

- Name:
-
Click Add Input Parameter.
-
Click + Add Input Parameter again.
-
Configure the compatibilityCheck parameter:
- Name:
compatibilityCheck - Description:
Set to true to include compatibility information for accessories and related products. - Type: Boolean
- Required: False
- Name:
-
Click Add Input Parameter.
-
Click Save & Continue.
-
Configure the API connection. Click Add Manually and enter the following:
- Endpoint Base URL: Paste the API Base URL you copied from the API Academy portal.
- Method: GET
- Endpoint Path:
/productCatalog - Query Parameters:
- productCode:
{{productCode}} - category:
{{category}} - compatibilityCheck:
{{compatibilityCheck}}
- productCode:
- Request Type: None
-
Click + Add Header.
-
Configure the API authentication header:
- Key:
x-api-key - Value: Paste the Product Key you copied from the API Academy portal.
Understanding Dynamic Parameter InjectionThe
{{productCode}}syntax tells the agent to dynamically insert the parameter value when it calls this tool. If the agent doesn't provide a value for an optional parameter, the API will simply return broader results—perfect for flexible, role-based queries! - Key:
-
Click Save & Continue.
-
Click Deploy Tool, then confirm by clicking Deploy.
Great job! You've created a flexible API tool that your agent can use in multiple ways. This is the foundation of role-based agent design—giving the agent autonomy to choose how to use its tools based on the customer's needs.
Tool 2: Query Order Status
This tool enables your agent to check order and shipment status with remarkable flexibility. It can search by order ID, customer email, or tracking number—and it handles natural language variations like #12345 instead of rigid formats like Order Number: 12345.
Traditional integrations break when data doesn't match rigid formats. Agents, powered by LLMs, are designed to handle messy enterprise data. The agent can parse #12345, ORD-12345, or just 12345 and still find the right order. This is the Agentic Mindset in action!
-
Click Create New Tool.
-
Hover over API and click Add Tool.
-
Enter the following tool details:
- Tool Name:
[builderInitials] Query Order Status - Description:
Retrieve order status, tracking information, and delivery estimates using order ID, customer email, or tracking number.
- Tool Name:
-
Click + Add Input Parameter.
-
Configure the order_id parameter:
- Name:
order_id - Description:
Order ID or order number in any format. - Type: String
- Required: False
- Name:
-
Click Add Input Parameter.
-
Click + Add Input Parameter.
-
Configure the customer_email parameter:
- Name:
customer_email - Description:
Customer email address to find all associated orders. - Type: String
- Required: False
- Name:
-
Click Add Input Parameter.
-
Click + Add Input Parameter.
-
Configure the tracking_number parameter:
- Name:
tracking_number - Description:
Shipment tracking number to check delivery status. - Type: String
- Required: False
Multiple Ways to SearchALL three parameters are optional! This gives the agent incredible flexibility. It can search by order ID if it has one, or by customer email to find ALL orders, or by tracking number to check shipment status. One tool, multiple use cases—this is role-based design.
- Name:
-
Click Add Input Parameter.
-
Click Save & Continue.
-
Configure the API connection. Click Add Manually and enter:
- Endpoint Base URL: Paste the API Base URL you copied from the API Academy portal.
- Method: GET
- Endpoint Path:
/orders/query - Query Parameters:
- order_id:
{{order_id}} - customer_email:
{{customer_email}} - tracking_number:
{{tracking_number}}
- order_id:
- Request Type: None
-
Click + Add Header.
-
Configure the API authentication header:
- Key:
x-api-key - Value: Paste the Product Key you copied from the API Academy portal.
- Key:
-
Click Save & Continue.
-
Click Deploy Tool, then confirm by clicking Deploy.
You're building momentum! This tool demonstrates how agents can synthesize truth from multiple search methods—a key principle from Role-based Agentic Architecture.
Tool 3: Update Customer Information
This tool allows your agent to modify customer contact details including address, phone, and email. This is where your agent moves from "read-only analyst" to "active participant" in your business processes—demonstrating the power of Role-based Agentic Architecture.
Tools that CHANGE data require extra care. In Part 2, you'll add guardrails to your agent to ensure it only makes approved changes and escalates unusual situations to humans. This is governance by design.
-
Click Create New Tool.
-
Hover over API and click Add Tool.
-
Enter the following tool details:
- Tool Name:
[builderInitials] Update Customer Info - Description:
Update customer contact information including shipping address, phone number, and email address.
- Tool Name:
-
Click + Add Input Parameter.
-
Configure the customer_id parameter:
- Name:
customer_id - Description:
Customer identifier. - Type: String
- Required: True
Why This Parameter is RequiredUnlike the previous tools' optional parameters, a customer ID is REQUIRED because you can't update a customer record without knowing which one to modify. Required parameters ensure the agent always provides critical information.
- Name:
-
Click Add Input Parameter.
-
Click + Add Input Parameter.
-
Configure the address parameter:
- Name:
address - Description:
New shipping address. - Type: String
- Required: False
- Name:
-
Click Add Input Parameter.
-
Click + Add Input Parameter.
-
Configure the phone parameter:
- Name:
phone - Description:
New phone number. - Type: String
- Required: False
- Name:
-
Click Add Input Parameter.
-
Click + Add Input Parameter.
-
Configure the email parameter:
- Name:
email - Description:
New email address. - Type: String
- Required: False
Smart FlexibilityThe address, phone, and email are all optional—the agent can update just one field or all three depending on what the customer needs changed. This reduces the number of tools you need to build while maintaining full functionality.
- Name:
-
Click Add Input Parameter.
-
Click Save & Continue.
-
Configure the API connection. Click Add Manually and enter:
- Endpoint Base URL: Paste the API Base URL you copied from the API Academy portal.
- Method: POST
- Endpoint Path:
/customers/update - Query Parameters:
- customer_id:
{{customer_id}} - address:
{{address}} - phone:
{{phone}} - email:
{{email}}
- customer_id:
- Request Type: None
-
Click + Add Header.
-
Configure the API authentication header:
- Key:
x-api-key - Value: Paste the Product Key you copied from the API Academy portal.
- Key:
-
Click Save & Continue.
-
Click Deploy Tool, then confirm by clicking Deploy.
You're almost there! Each tool you create expands your agent's capabilities as a Customer Support Specialist.
Tool 4: Search Knowledge Base
The final API tool retrieves troubleshooting articles and technical documentation. This enables your agent to provide expert guidance by synthesizing product specs (Tool 1) with troubleshooting steps (Tool 4)—creating comprehensive responses that would take a human agent much longer to compile.
A key principle of Role-based Agentic Architecture: agents synthesize truth from multiple systems. Your agent might use the Product Info tool AND the Knowledge Base tool together to create a complete answer. It's thinking holistically, not just executing rigid steps!
-
Click Create New Tool.
-
Hover over API and click Add Tool.
-
Enter the following tool details:
- Tool Name:
[builderInitials] Search Knowledge Base - Description:
Search troubleshooting guides, installation instructions, and technical documentation by product, issue type, or keyword.
- Tool Name:
-
Click + Add Input Parameter.
-
Configure the product_code parameter:
- Name:
product_code - Description:
Filter articles by specific product code. - Type: String
- Required: False
- Name:
-
Click Add Input Parameter.
-
Click + Add Input Parameter.
-
Configure the issue_type parameter:
- Name:
issue_type - Description:
Type of issue such as installation, compatibility, or troubleshooting. - Type: String
- Required: False
- Name:
-
Click Add Input Parameter.
-
Click + Add Input Parameter.
-
Configure the keyword parameter:
- Name:
keyword - Description:
Search keyword or phrase to find relevant articles. - Type: String
- Required: False
- Name:
-
Click Add Input Parameter.
-
Click Save & Continue.
-
Configure the API connection. Click Add Manually and enter:
- Endpoint Base URL: Paste the API Base URL you copied from the API Academy portal.
- Method: GET
- Endpoint Path:
/knowledgeBase/search - Query Parameters:
- product_code:
{{product_code}} - issue_type:
{{issue_type}} - keyword:
{{keyword}}
- product_code:
- Request Type: None
-
Click + Add Header.
-
Configure the API authentication header:
- Key:
x-api-key - Value: Paste the Product Key you copied from the API Academy portal.
- Key:
-
Click Save & Continue.
-
Click Deploy Tool, then confirm by clicking Deploy.
Excellent work! You've now created a comprehensive toolbox for your Customer Support Agent—four flexible tools that work together to solve complex customer problems.
Tool 5: Update Case with Comment
Now let's create the Integration tool that allows your agent to write proposed resolutions back to the CRM system. This closes the automation loop—the agent can research a problem AND document its findings, just like a human support specialist would.
This is a perfect example of the Integration Layer and Reasoning Layer working together in Role-based Agentic Architecture:
- The agent operates in the Reasoning Layer - it thinks, plans, and decides what to do
- This Integration tool operates in the Integration Layer - it reliably writes data back to the CRM
The agent reasons, the integration executes. They're complementary!
-
Click Create New Tool.
-
Hover over Integration and click Add Tool.
-
Configure basic tool details:
- Tool Name:
[builderInitials] Update Case with Comment - Description:
Update the support case with a new comment or proposed resolution.
- Tool Name:
-
Click + Add Input Parameter.
Configure:
- Name:
Case ID - Description:
The Case ID - Type: String
- Required: True
- Name:
-
Click Add Input Parameter.
-
Click + Add Input Parameter.
Configure:
- Name:
Case Comment - Description:
The proposed resolution or comment to add to the case - Type: String
- Required: True
- Name:
-
Click Add Input Parameter.
-
Click Save & Continue.
-
Configure the integration environment based on your setup:
If you're in your own environment:
- Integration Environment: Agent Testing
- Runtime: Agent Testing Runtime
- Process: [builderInitials] Update Case with Comment
If you're in the shared environment:
- Integration Environment: Prod-Cloud
- Runtime: Select the available runtime
- Process: [builderInitials] Update Case with Comment
-
Click + Add Dynamic Process Property.
Configure:
- Name:
DPP_CASE_ID - Value:
{{Case ID}}
- Name:
-
Click Add Dynamic Process Property.
-
Click + Add Dynamic Process Property.
Configure:
- Name:
DPP_CASE_COMMENT - Value:
{{Case Comment}}
- Name:
-
Click Add Dynamic Process Property.
-
Click Save & Continue.
-
Click Deploy Tool, then confirm by clicking Deploy.
Outstanding! You've now created a complete toolbox for your Customer Support Agent.
What You've Built: A Digital Colleague's Toolbox
Take a moment to appreciate what you've accomplished. You've created five tools that give your agent the capabilities of a skilled customer support specialist:
- Get Product Info - Look up product specs, troubleshooting, and compatibility
- Query Order Status - Check orders with flexible search (handles messy real-world data!)
- Update Customer Info - Modify contact details with audit tracking
- Search Knowledge Base - Find troubleshooting articles and documentation
- Update Case with Comment - Document resolutions in the CRM
Key Design Principles You Applied
You didn't just build tools—you applied the fundamental principles of Role-based Agentic Architecture:
-
Optional Parameters: Most parameters are optional, giving the agent flexibility to use each tool in multiple ways based on context
-
Role-Based Design: Instead of building separate tools for every possible task ("check order by ID," "check order by email," "check order by tracking number"), you built ONE flexible "Query Order Status" tool that works multiple ways
-
Clear Descriptions: Each tool and parameter has a detailed description that helps the agent understand WHEN and HOW to use it—the AI model reads these to make intelligent decisions
-
Governance Readiness: Tools that modify data (like Update Customer Info and Update Case) are designed with audit trails and validation in mind
-
Synthesizing Truth: The agent can combine multiple tools (Product Info + Knowledge Base + Order Status) to create comprehensive responses—just like a human would check multiple systems
In Part 2, you'll bring these tools to life by attaching them to an intelligent agent that knows how to reason about when and how to use them. Let's go!