Part 2: Build Your Customer Support Agent with AI
In Part 1, you created five flexible tools—the "skills" your agent needs to do its job. Now it's time to bring those tools to life by using Boomi's powerful "Build with AI" feature to rapidly create a Customer Support Agent that thinks and acts like a skilled support specialist.
The traditional approach to building automation required you to manually define every decision point, every condition, and every step. With Build with AI, you simply describe the ROLE you want the agent to fill and the GOALS it should achieve—the AI generates the agent profile, tasks, and even conversation starters automatically. You'll then attach your tools to specific tasks, giving the agent the capabilities it needs to execute its role.
Remember: you're not building a rigid flowchart. You're designing a digital colleague with a clear role, access to the right tools, and the intelligence to decide how to use them. The agent will reason about which tools to call, in what order, based on the customer's needs—including handling multiple intents in a single conversation!
Designing for a Role, Not a Task
Remember the fundamental shift from Part 1? Traditional integrations are designed to perform a single, rigid task. Agents are designed to fill a business role.
When you design a Customer Support Agent, you're not asking: "How do I automate looking up product codes?"
You're asking: "What does a skilled Customer Support Specialist need to know and do to resolve a customer's problem—whatever it may be?"
This shift in perspective is what enables your agent to handle:
- Product questions
- Order status inquiries
- Address updates
- Troubleshooting requests
- All in a single conversation
This is the power of Role-based Agentic Architecture!
Start a New Agent with Build with AI
Let's begin by using AI to generate the foundation of your agent.
-
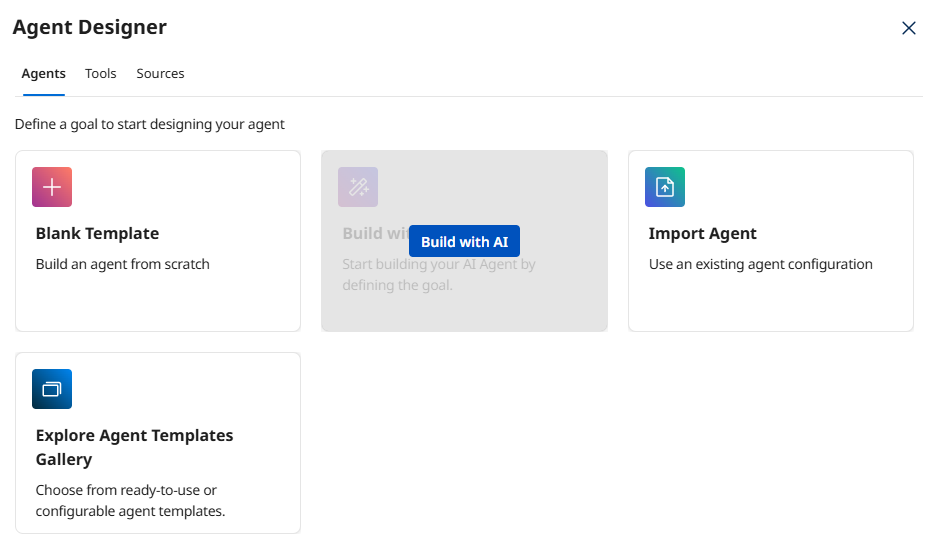
From Agent Designer, click the Agents tab (if not already selected).
-
Click Create New Agent.

-
Select Build with AI.
 Why Build with AI?
Build with AI analyzes your goal description and automatically generates an appropriate agent profile, personality settings, tasks, and instructions. This saves significant time and applies AI best practices. You can always customize the results afterward!
-
In the Goal field, paste the following complete prompt:
Goal: Act as a skilled Customer Support Specialist who helps customers with product questions, order status inquiries, address updates, and troubleshooting. Provide clear, accurate, and helpful responses that resolve the customer's complete problem—including when customers ask multiple questions in a single message.
Task Breakdown and Instructions
Task: Research Products and Orders
Objective: Gather comprehensive information from multiple systems to understand the customer's situation.
Instructions:
- Look up product specifications, features, and compatibility information
- Check order status and shipment tracking details
- Search knowledge base for troubleshooting articles and guides
- Handle natural language variations (e.g., "#12345", "ORD-12345", "order 12345")
- Synthesize information from multiple sources to provide complete context
Task: Update Customer Information
Objective: Modify customer contact details when explicitly requested with proper governance.
Instructions:
- Only update customer information when the customer explicitly requests a change
- Always confirm what information is being updated before making changes
- Mention any impacted orders (e.g., orders already in transit cannot have shipping address changed)
- Provide transparency about what was changed and any implications
- Create audit trail of all updates made
Task: Generate Comprehensive Response
Objective: Create complete responses that address ALL customer concerns in one message.
Instructions:
- Your response must address ALL issues the customer mentioned in their message
- If they asked about an order AND an address update, respond to BOTH
- Use a professional but friendly tone
- Start with a personalized greeting if you know the customer's name
- Format troubleshooting steps as numbered lists for clarity
- Always close with an offer to help further if needed
- This is where you demonstrate multi-intent handling—the key capability from Role-based Agentic Architecture!
Task: Update Support Case
Objective: Write the proposed resolution to the CRM case for support team review.
Instructions:
- Write the complete proposed response as a comment on the CRM support case
- Include summary of which tools were used and what information was gathered
- This creates an audit trail and keeps the support team informed
- Support team can review before sending to customer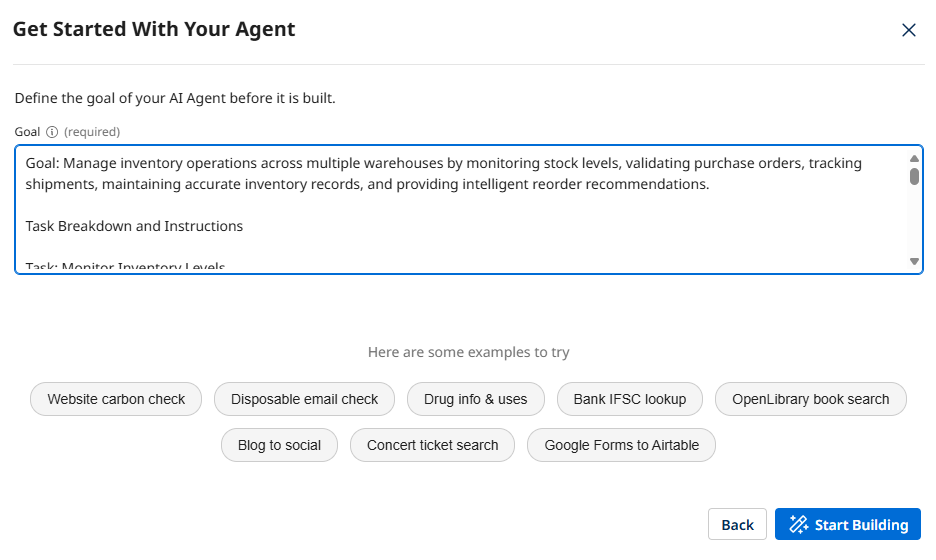 Understanding the Prompt Structure
Notice how the prompt defines the agent's ROLE (Customer Support Specialist) and then breaks down the key TASKS with specific objectives and instructions. This structure helps the AI generate focused, well-organized agent tasks.
Pay special attention to the "Generate Comprehensive Response" task—this is where we explicitly tell the agent to handle multiple intents in a single conversation, demonstrating the power of Role-based Agentic Architecture!
-
Click Start Building and wait for the AI to create your agent profile and tasks.
 Generation Time
The AI typically takes 10-20 seconds to analyze your prompt and generate the agent structure. It's analyzing the goal, identifying key capabilities, and creating appropriate task definitions and instructions.
Define the Agent's Profile
Now let's review and customize the agent profile that was generated.
-
Review the Goal field. The AI should have generated something similar to:
Act as a skilled Customer Support Specialist who helps customers with product questions, order status inquiries, address updates, and troubleshooting. Provide clear, accurate, and helpful responses that resolve the customer's complete problem.Why the Goal MattersThe goal defines your agent's PURPOSE. Unlike a task-based integration ("move data from A to B"), this goal describes a ROLE ("Customer Support Specialist"). The agent will use this goal to evaluate whether it's achieved success—which includes addressing ALL of the customer's concerns, not just one!
-
In the Agent Name (required) field, update the name to include your initials:
[builderInitials] Customer Support Agent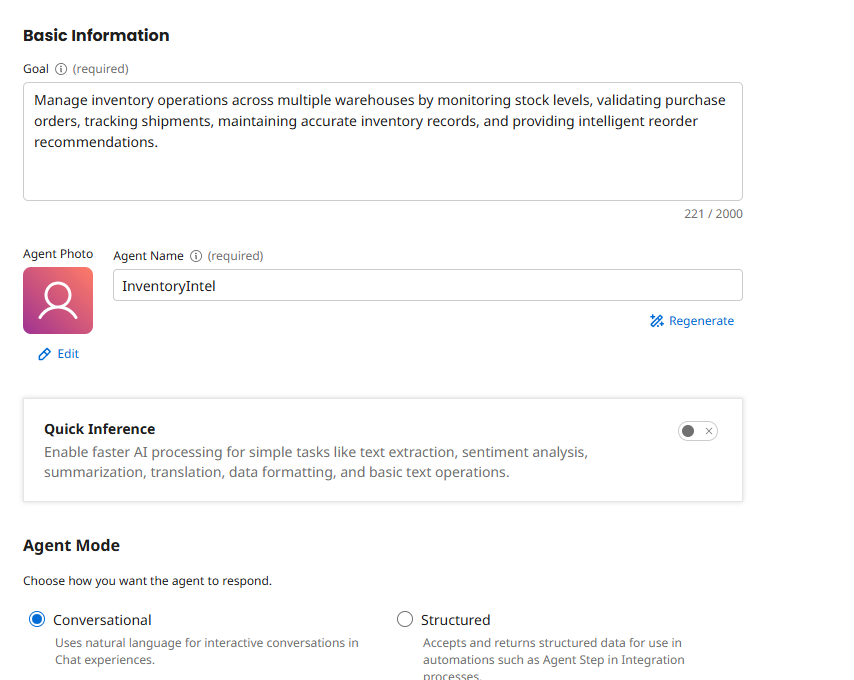 Naming Convention
Including your initials helps identify your agent in a shared workshop environment. In production, you'd use a descriptive name that clearly indicates the agent's role and scope.
-
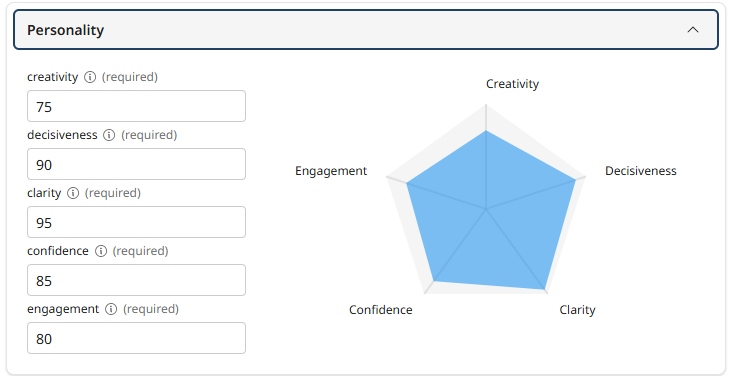
Scroll down to the Personality section and review the auto-generated settings:
- Creativity - Controls response diversity and originality
- Engagement - Influences response detail and elaboration
- Decisiveness - Balances between deterministic and exploratory outputs
- Confidence - Affects precision and brevity
- Clarity - Controls focus and precision
 Personality Settings
These sliders tune your agent's behavior. For customer support, you typically want HIGH engagement (detailed, helpful responses), HIGH clarity (clear explanations), MODERATE creativity (flexible problem-solving), and HIGH confidence (authoritative answers). The AI has likely chosen appropriate defaults.
-
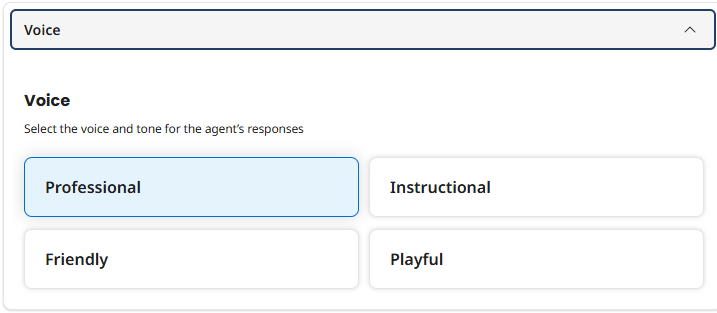
Review the Voice selection. The AI probably selected Professional, which is appropriate for customer support. You can change this if needed:
- Professional - Courteous, concise, respectful, objective, and solution-oriented
- Friendly - Casual, warm, engaging, and enthusiastic
- Instructional - Detailed, logical, direct, supportive, and objective
- Playful - Lighthearted, engaging, casual, encouraging, and fun
-
Delete the Conversation Starters that were generated. These appear as clickable prompts when interacting with your agent. Replace the generated starters with the following:
-
Tell me about the FP-2100-GRD. -
What's the status of my order #12345? Also, my new address is 456 Main St. -
My FP-2100-GRD shows a grid disconnect error. Can you help troubleshoot?
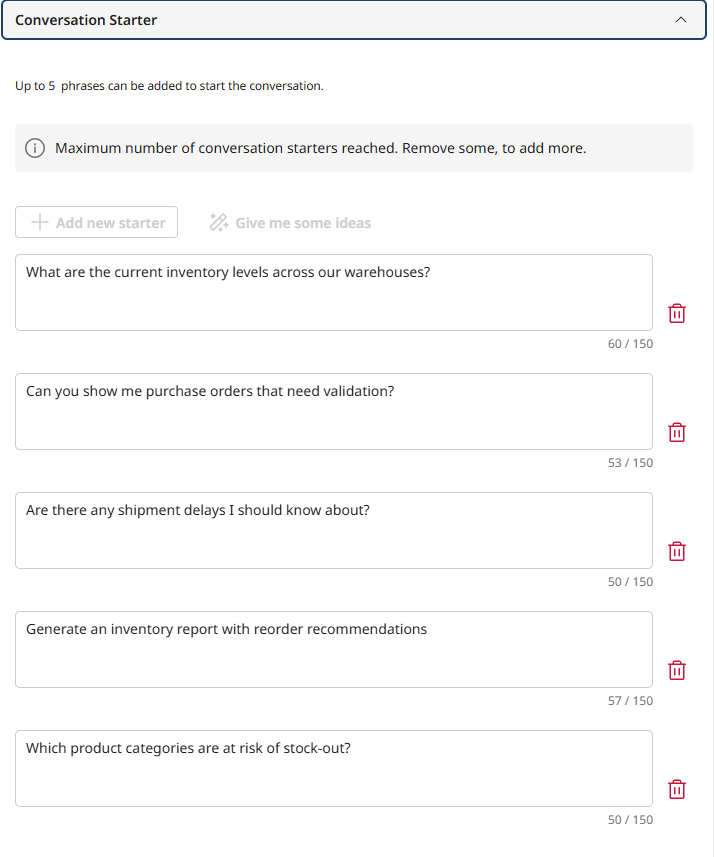 Multi-Intent Demonstration
Notice the second conversation starter? "What's the status of my order #12345? Also, my new address is 456 Main St."
This demonstrates exactly the power of Role-based Agentic Architecture—a customer asking about MULTIPLE things in one message. A task-based automation would fail here. A role-based agent will understand both intents and handle them appropriately.
This is the Agentic Mindset in action!
-
-
Click Save and Continue > to proceed to the Tasks screen.

Review and Enhance AI-Generated Tasks
The AI has created tasks based on your prompt. Now you'll attach your tools to specific tasks, giving the agent the capabilities it needs.
-
On the Tasks screen, review the tasks that were automatically created. You should see four tasks:
- Product and Order Research
- Customer Information Management
- Multi-Intent Response Generation
- Support Case Documentation
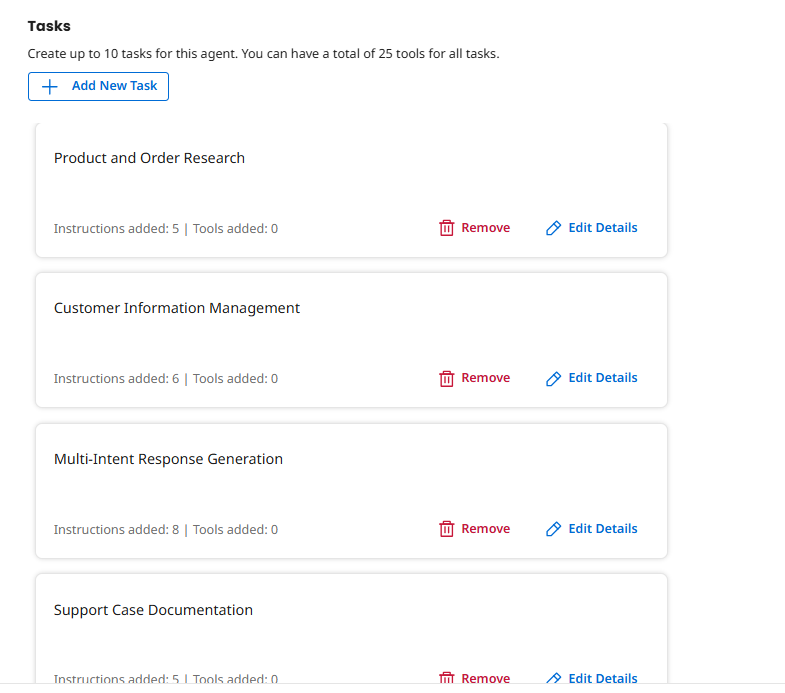 Task Variations
The AI might have used slightly different task names or created additional tasks. That's fine! The key is that tasks represent CAPABILITIES, not rigid steps. The agent decides which tasks to execute based on the customer's needs.
Attach Tools to Tasks
Now comes the crucial step: connecting your tools to the appropriate tasks. This is what transforms your agent from "able to talk about customer support" to "able to actually DO customer support."
Task 1: Product and Order Research
This task gives your agent the ability to gather information from multiple sources—product catalog, order system, and knowledge base.
-
Click on the Product and Order Research task to expand it.
-
Review the Description. The AI should have generated an appropriate description for this task.
-
Review the Instructions. The AI should have generated appropriate guidance that tells the agent HOW to execute this task.
-
Click the Manage Tools button for this task.
-
Click + Add New Tool.
-
Search for and check the boxes for the following tools:
- [builderInitials] Get Product Info
- [builderInitials] Query Order Status
- [builderInitials] Search Knowledge Base
Why These Three Tools?We're grouping the research tools into one task. This gives the agent flexibility to use whichever tools it needs based on the customer's question.
A human support specialist doesn't think: "I will only check product info in this step." They think: "Let me gather all the information I need to help this customer."
Your agent works the same way—it reasons about which tools to use based on context. This is role-based design in action!
-
Click Add Tool, and then Save.
Task 2: Customer Information Management
This task enables your agent to modify customer records. This is where governance becomes critical—we're giving the agent the ability to change data, not just read it.
-
Click on the Customer Information Management task.
-
Review the Description and Instructions. The AI should have generated instructions about only updating when explicitly requested and confirming changes.
Governance by DesignThese instructions implement Human-in-the-Loop (HITL) concepts Role-Based Agentic Architecture. The agent is told to:
- Only act on explicit requests (confidence threshold)
- Confirm changes (transparency)
- Explain implications (context-aware decision making)
This turns the agent into a collaborator, not just an autonomous actor. It's governance by design!
-
Click the Manage Tools button for this task.
-
Click + Add New Tool.
-
Search for and check the box for the tool: [builderInitials] Update Customer Info.
Write Operations Require GovernanceThis tool can modify customer data, so it's critical that the agent only uses it when explicitly requested. The instructions in this task create that governance layer, ensuring the agent acts responsibly.
-
Click Add Tool, and then Save.
Task 3: Multi-Intent Response Generation
This task allows the agent to create a draft response that addresses all of the customer's concerns. This is where the agent synthesizes everything it learned from its research tools.
-
Click on the Multi-Intent Response Generation task.
-
Review the Description and Instructions. The AI should have generated instructions about addressing ALL customer concerns, using professional tone, and formatting troubleshooting steps clearly.
Multi-Intent Response GenerationThese instructions ensure the agent creates responses that handle multiple concerns in one reply—just like a human customer support agent would address both the order status AND the address update.
Compare this to a task-based automation that would generate a rigid template like: "Your order #12345 is pending." (Completely missing the address update!)
-
Leave Tools empty for this task—this is a pure reasoning task where the agent synthesizes information it already gathered. No API calls needed here!
Reasoning vs Action TasksNot every task needs tools! Some tasks are about reasoning (like generating a comprehensive response) while others are about action (like calling APIs). This separation is intentional and mirrors how humans work—we gather information, then think about it, then communicate our conclusions.
-
Click Save.
Task 4: Support Case Documentation
The final task closes the loop by writing the proposed resolution back to the CRM, creating an audit trail and keeping the support team informed.
-
Click on the Support Case Documentation task.
-
Review the Description and Instructions.
-
Click the Manage Tools button for this task.
-
Click + Add New Tool.
-
Search for and check the box for the tool: [builderInitials] Update Case with Comment.
Integration Layer in ActionRemember from Part 1: this Integration tool operates in the Integration Layer—it reliably writes data to the CRM. The agent (operating in the Reasoning Layer) decides WHAT to write based on its research and reasoning. The layers work together perfectly!
-
Click Add Tool, and then Save.
-
Click Save and Continue to proceed to the Guardrails screen.
Configure Agent Guardrails
Guardrails are safety mechanisms that prevent your agent from taking inappropriate actions or providing sensitive information. This is especially important for agents that can modify data (like the Update Customer Info tool you created in Part 1).
Governance is the FOUNDATION for resilience. Before your agent can operate autonomously, you need to clearly define what it CAN'T do and how it should handle edge cases.
-
On the Guardrails screen, review the Blocked message field. Enter:
I'm sorry, I can only assist with product information, order status, and general customer support questions. For other inquiries, please contact our main support line.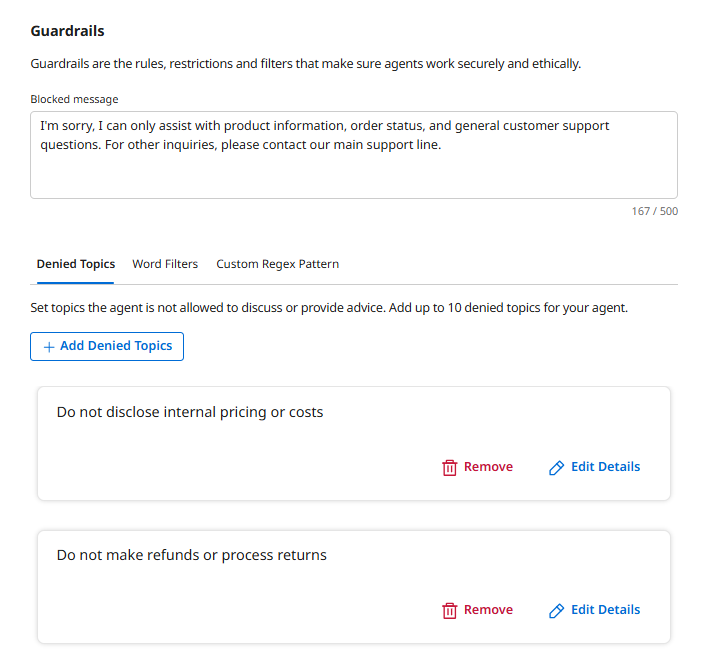 The Blocked Message
This message is shown to users when the agent's guardrails are triggered. Make it informative so users understand WHY the agent refused their request.
-
Click + Add Denied Topics.

-
Configure the first denied topic:
- Name:
Do not disclose internal pricing or costs - Description:
Never reveal internal cost structures, profit margins, or wholesale pricing
- Name:
-
Under Sample Phrases, add:
What does this product cost the company to produce?How Denied Topics WorkThe agent's underlying language model uses these sample phrases to understand the TYPE of requests it should refuse. You don't need to list every possible variation—the AI generalizes from your examples. For instance, it will also block "What's our wholesale price?" even though that's not listed.
-
Click Add Denied Topic.
-
Click + Add Denied Topics again.
-
Configure the second denied topic:
- Name:
Do not make refunds or process returns - Description:
Do not authorize refunds, process returns, or cancel orders. Direct customers to proper channels.
- Name:
-
Under Sample Phrases, add:
Just cancel my order and refund my money. -
Click Add Denied Topic.
Governance is CriticalGuardrails limit the agent's "blast radius" and create a "human-in-the-loop" safety net.
These guardrails ensure that:
- The agent doesn't make financial decisions beyond its authority
- Sensitive information stays protected
- The agent escalates to humans when appropriate
This is Governance by Design—building safety into the architecture from the beginning!
-
Click Save and Continue to proceed to the Review screen.
Test Your Agent
Before deploying, let's test your agent's multi-intent intelligence through the Chat interface to verify it's working correctly.
-
Click Chat from the left navigation menu.
-
Select your Customer Support Agent [builderInitials] agent from the dropdown in the top left.
-
Try the multi-intent conversation starter:
Hey, my order #12345 hasn't arrived. The tracking link says 'pending' but it's been a week. Can you help? Also can you give me compatibility information about the products in my order? I want to make sure they're going to be compatible.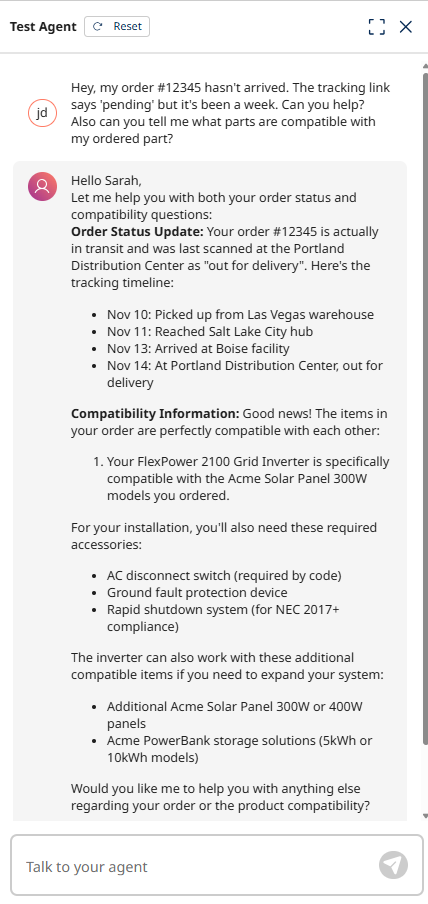 What to Watch For
As the agent works, observe how it:
- Identifies multiple intents: Order status + product compatibility
- Uses appropriate tools: Calls Query Order Status, then Knowledgebase Search
- Synthesizes results: Creates ONE response addressing BOTH issues
- Handles natural language: Parses
#12345despite variations in format - Provides context: Explains that the order is already shipped, and provides the additional compatibility information.
This is role-based intelligence in action—far beyond what task-based automation could achieve! You'll see a Tool Calls section showing which tools the agent chose to use and in what order.
Review the Agent Trace
Now let's examine the agent's reasoning process by reviewing its trace.
-
Click Show Trace in the Chat interface.
-
Click through each step in the trace to see how the agent reasoned about the customer's request, which tools it chose to use, and how it synthesized the results.
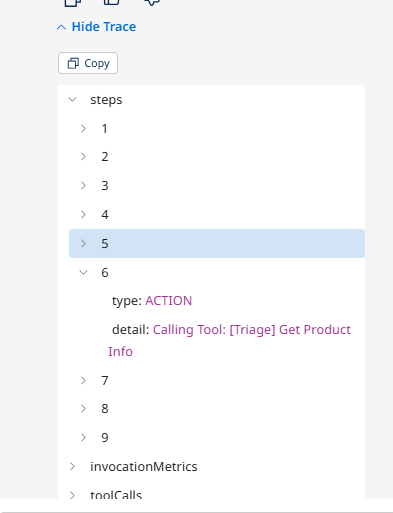 Understanding the Trace
The trace shows the agent's decision-making process step by step. You'll see:
- How it identified the customer's intents
- Which tasks it decided to execute
- Which tools it called and in what order
- How it combined the results into a comprehensive response
This transparency is critical for debugging, governance, and understanding agent behavior!
Deploy the Agent
Now that you've tested your agent and verified it's working correctly, let's deploy it to make it available for use.
-
Click Save and Continue to proceed to the Review screen.
-
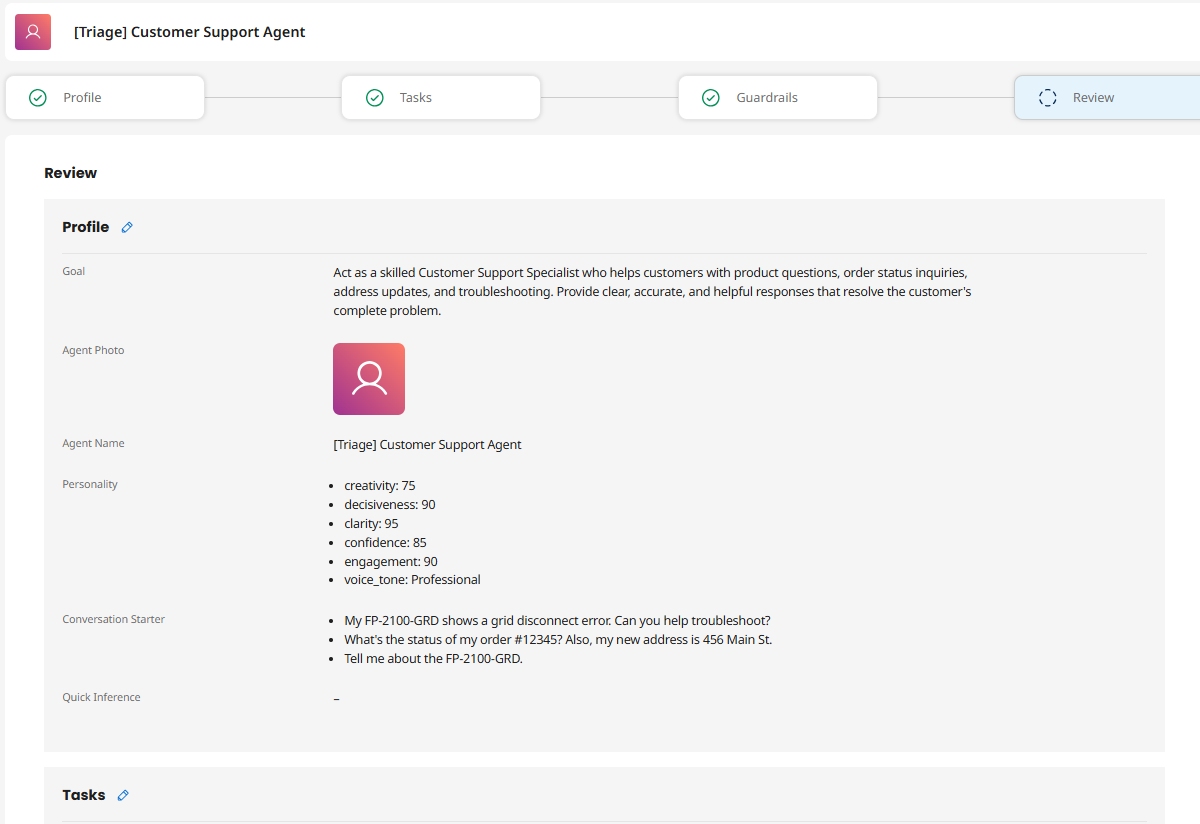
On the Review screen, verify your agent's configuration:
- Goal is clear and describes the agent's role
- Agent Name includes your initials
- Personality settings are appropriate
- Conversation Starters demonstrate multi-intent handling
- Tasks represent capabilities (Research, Update, Respond, Document)
- Guardrails are in place for safe operation
-
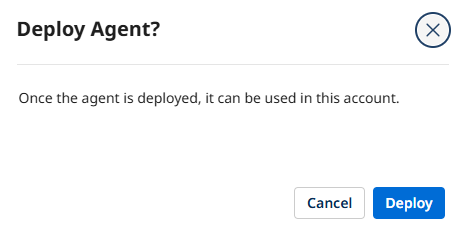
Click Deploy Agent.

-
In the confirmation dialog, review the deployment summary and click Deploy.
 Deployment Process
Deploying makes your agent active and available for use. The deployment process typically takes 10-15 seconds as the configuration is propagated to the Agentstudio runtime environment.
Congratulations! You've created an intelligent Customer Support Agent that can reason about customer problems and use multiple tools to accomplish its goals—including handling multiple intents in a single conversation! In Part 3, you'll embed this agent into an automated business process!
What You've Accomplished
In this part, you:
- ✅ Used Build with AI to rapidly generate an agent profile and tasks
- ✅ Customized the agent's personality and voice for customer support
- ✅ Attached your five tools to appropriate tasks
- ✅ Configured guardrails to ensure safe, compliant operation
- ✅ Tested the agent and reviewed its reasoning trace
- ✅ Deployed a fully functional Customer Support Agent
Your agent now embodies the Agentic Mindset principles from Role-based Agentic Architecture:
- Role-Based Design: It's a Customer Support Specialist with a clear role, not a task executor
- Multi-Intent Handling: It can address multiple customer concerns in one conversation
- Flexible Tool Use: It can dynamically decide which tools to use based on context
- Synthesized Truth: It combines data from product, order, and knowledge base systems
- Governed Autonomy: It has guardrails that prevent inappropriate actions
What Makes This Agent Different?
Take a moment to appreciate what you've built. This isn't a simple automation—it's a digital colleague designed using the Agentic Mindset:
Role-Based Design
- Not: "An automation that looks up product codes"
- But: "A Customer Support Specialist that resolves customer problems"
Multi-Intent Handling
- Can address multiple customer concerns in one conversation
- Parses natural language variations (
#12345vsOrder Number: 12345) - A powerful demonstration of Role-based Agentic Architecture!
Intelligent Tool Selection
- Decides which tools to use based on customer needs
- Can combine multiple tools (Product Info + Order Status + Knowledge Base)
- Synthesizes information from multiple systems to create comprehensive responses
Governance by Design
- Guardrails limit authority and protect sensitive information
- Instructions ensure transparency and confirmation
- Escalation patterns built into denied topics
Flexibility with Structure
- The agent can adapt to different customer requests
- But operates within defined business rules and safety boundaries
- This is the balance between autonomy and control!
In Part 3, you'll complete the transformation by embedding this agent into a Boomi integration process—creating an event-driven, autonomous support system that monitors for new cases and automatically provides resolution drafts. Let's finish strong!