Prerequisites
Generate a Platform API Token
You'll need a Boomi Platform API Token and Account ID to configure the Agent step in Part 3 when embedding your agent into an integration process.
-
Log in to your Boomi account at https://platform.boomi.com.
-
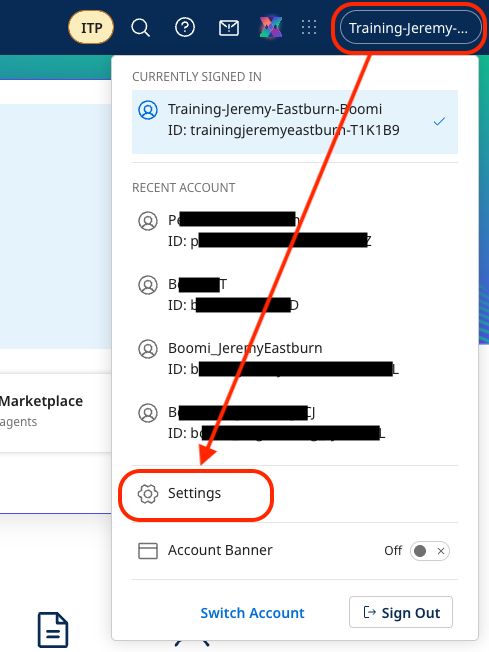
Select (Account Name) → Settings from the top-right menu.
-
Select Platform API Tokens. Create a new token named
Agentstudioand save it in a text editor (Notepad, TextEdit or VS Code).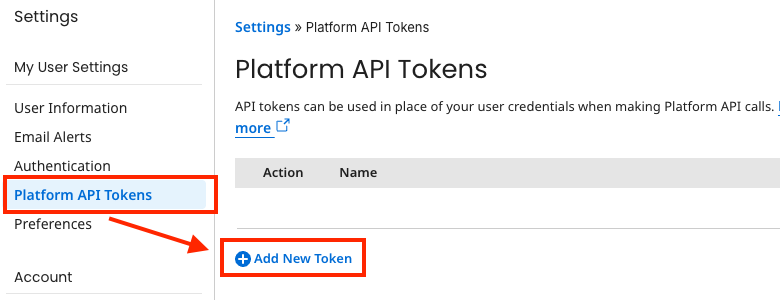 Save Your Token
Remember to save your Platform API Token to a text editor for later use in Part 3.
-
Select Account Information to copy the Account ID and save it in your text editor.
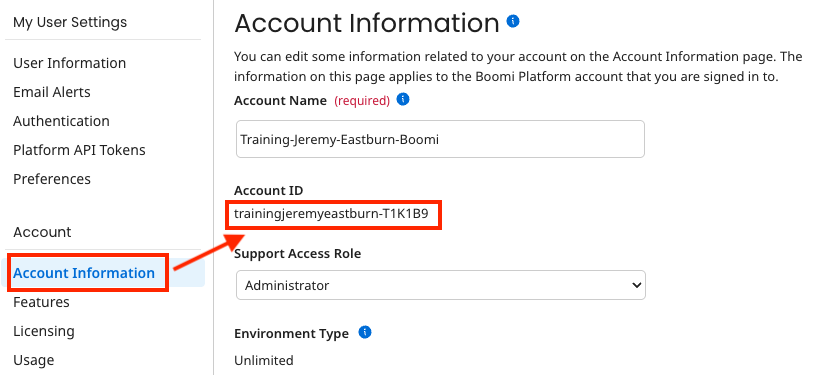 Save Your Account ID
Remember to save your Account ID to a text editor for later use in Part 3.
Create an Integration and Deploy It
For this lab, we will simulate the update of a CRM via an existing Boomi Integration. To do this, we will need to create an environment and an integration that will simulate this action.
Create an Environment
If you already have a Boomi environment with a runtime, you can skip this section and move on to the next section.
-
Log in to your Boomi account at https://platform.boomi.com.
-
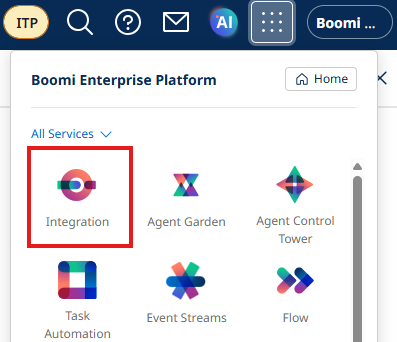
After logging in, click on Integration.

-
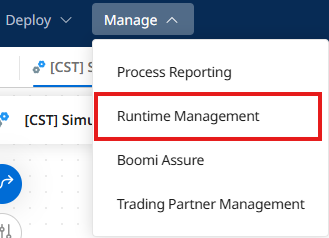
Click on Manage > Runtime Management.
-
In Runtime Management, click + New ▼.

-
Select Environment.
-
Configure your environment:
- Name:
Agent Testing
- Name:
-
Set the Environment Classification to Production.
-
Click Save.
-
Click + New ▼.
-
Select Basic Runtime.
-
Configure the runtime:
- In the Cloud: selected
- Choose a Cloud: USA East Integration Cloud (if you aren't in the US, choose whatever option is there)
- Attachment Name:
Agent Testing Runtime
-
Click OK.
-
Locate your runtime in the left navigation pane.
-
Click and drag Agent Testing Runtime to your Agent Testing environment.
-
Click Build at the top of the page to return to Boomi Integration.
Create a Sample Integration to Update our CRM
-
Navigate to Integration by clicking the menu, and selecting Integration.
-
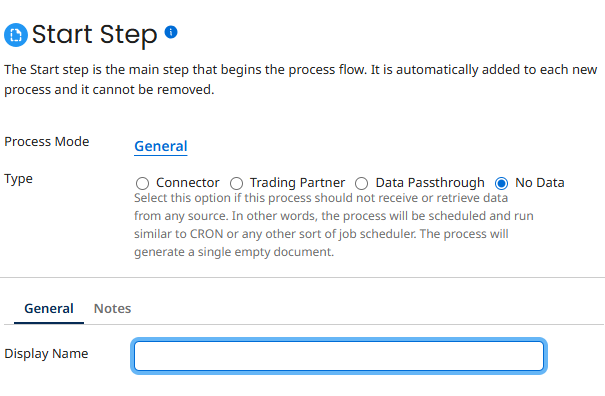
Click the + button on the left hand side of your screen and select Process from the dropdown.

-
Click Create.
-
Choose No Data and click OK.
-
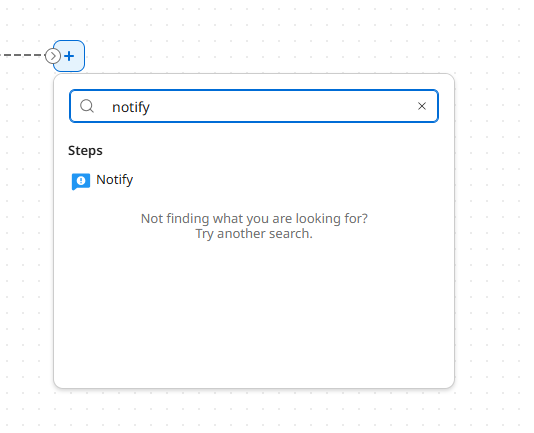
Click the + button on the canvas, search for Notify and select it.
-
Configure the Notify step as follows:
Display Name:
Simulated CRM Update OperationMessage:
CASE_ID: {1}
CASE_COMMENT: {2}Variables:
-
Click the + button next to Variables
- Type: Dynamic Process Property
- Property Name:
DPP_CASE_ID
-
Add another Variable
- Type: Dynamic Process Property
- Property Name:
DPP_CASE_COMMENT
-
-
Click OK.
-
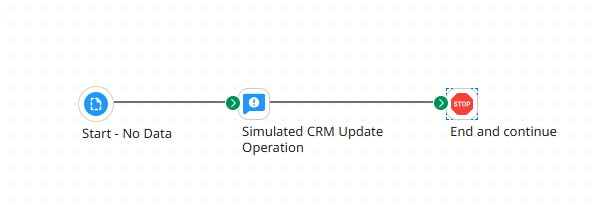
Add a Stop step to the canvas.
Your final process should look like this:
-
Name your process
[builderInitials] Simulated CRM Update -
Click Save in your process.
-
Click Create Packaged Component.
-
Click Next: Add Details.
-
Click Create Packaged Component.
-
Click Deploy.
-
Choose your Agent Testing environment from the dropdown.
-
Click Next: Select Versions.
-
Click Next: Review.
-
Click Deploy.
You've successfully created and deployed your test environment and simulated CRM integration. You're now ready to build your AI Agent tools!