Part 1: Build your Tooling
1. Build a Web Service Listener
The Web Service Listener will be used as a mock endpoint for the API Tool that will be created in Section 2 and later used within the Agent. This API will offer sample product information for the agent.
Create new folder for Integration processes
-
Navigate to the Integration service and click on the Build tab.

-
Create a folder named
Agentstudio.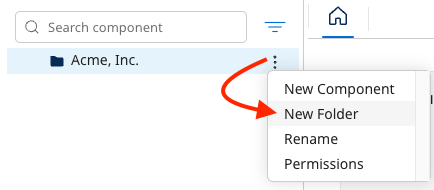
-
The new folder will appear:

-
Install pre-built process bundle
This lab walks you through building multiple Boomi Integration processes. Some of the processes have been pre-built and will be installed as part of a bundle. Follow the steps below to install the pre-built process bundle.
-
Click on the following link to access the bundle that contains the pre-built processes: https://boomi.to/5174.
-
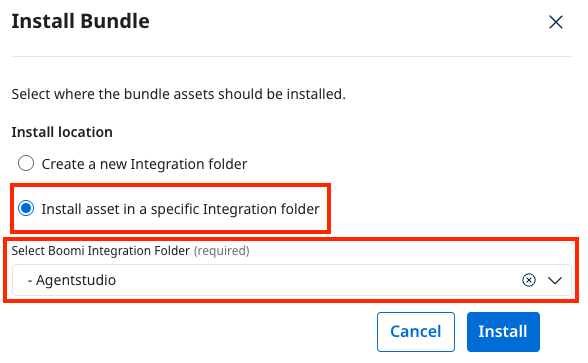
Click the Install button, then choose where to install the process:
-
Set Install Location to: Install asset in a specific Integration folder
-
Choose the
Agentstudiofolder where your processes will be saved for this workshop. -
Click Install, then Done.
-
-
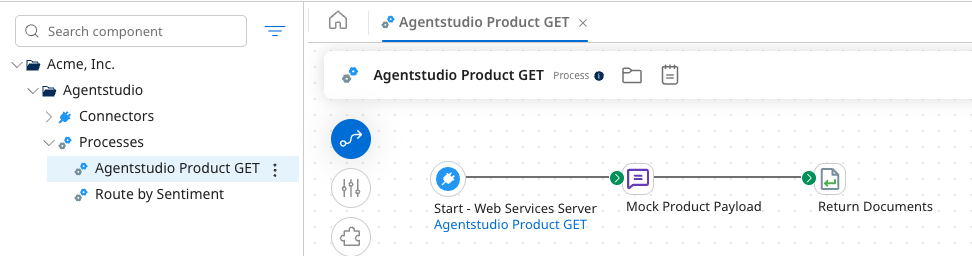
Return to Services → Integration.
- Expand the Agentstudio → Processes folder to see the newly installed processes. Open the Agentstudio Product GET process to review the process and how it includes an API endpoint that returns mock product data.
Package and Deploy
With the Agentstudio Product GET process open, you will create a Packaged Component and Deploy it to your test environment created in the prerequisites section.
-
Select Create Packaged Component → Next: Add Details → Create Package Component → Deploy → Deployment Environment: Test Env (from prerequisites) → Next: Select Versions → Next: Review → Deploy → Close.
-
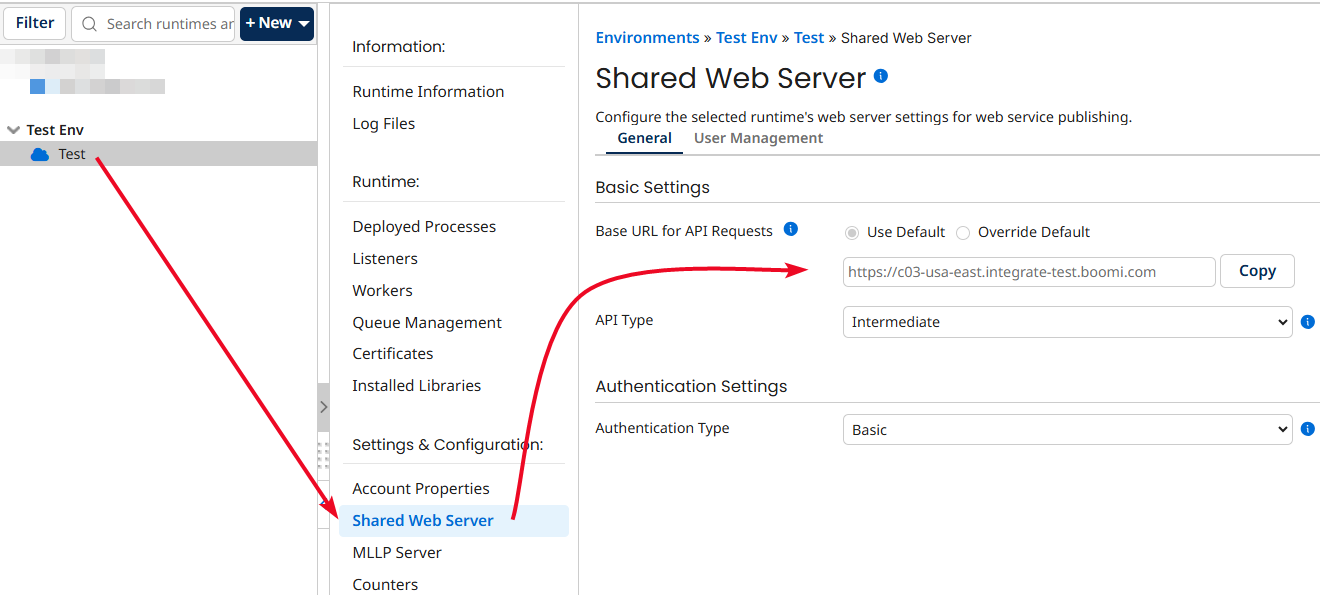
Navigate to Manage → Runtime Management.
-
Select the Test runtime → Shared Web Server.
-
Copy the Base URL for API Requests to your text editor.
 Reminder
Remember to save your
Base URLto a notepad for later use. -
Ensure API Type is Intermediate and Authentication Type is Basic. If not, set both and select Save.
dangerChanging Authentication Type on an existing runtime might cause breaking changes to existing processes. Proceed with caution, or create a new runtime for testing purposes.
-
-
Select User Management tab → the default username.
-
If you see the Show Token button, click it to reveal your token. If not, click Generate Token → Save.
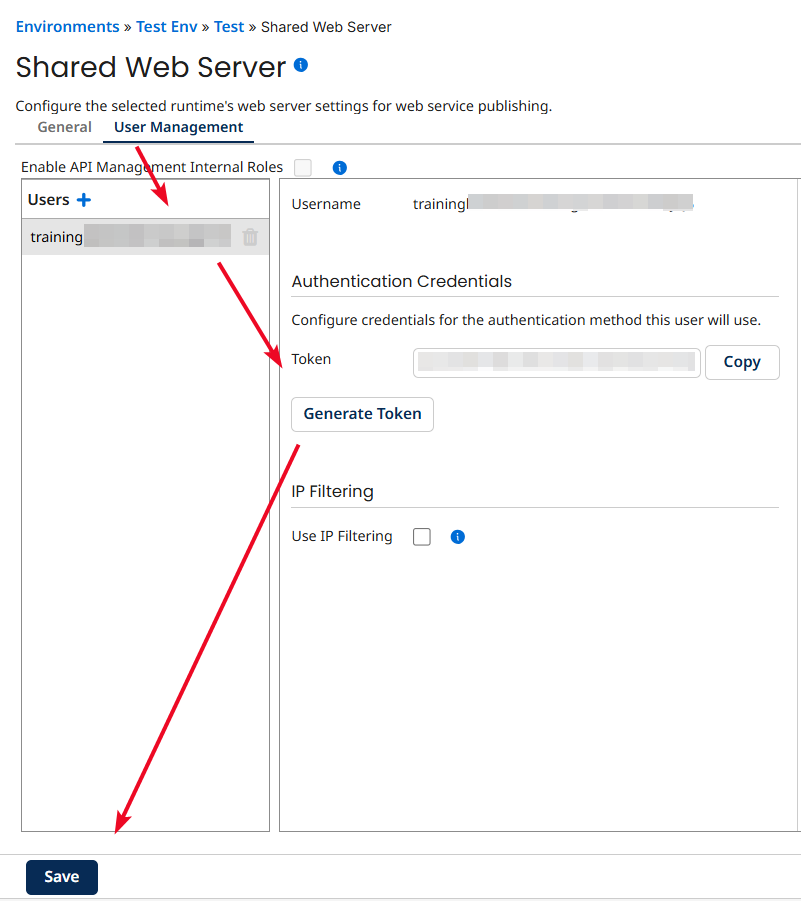
-
Copy and paste the Username and Token to your text editor.
noteThis API authentication token is different from the Account API Token created at the beginning of this lab.
ReminderRemember to save your
UsernameandTokento a notepad for later use.
-
-
At this point you should have saved a Platform API token, Account ID, Base URL, Username, and Token to your text editor.
2. Build API Tool in Agentstudio
The API Tool will be created within Agentstudio and will execute the process created in the previous section in order to retrieve product data based on a given product code. This tool will be used by the agent you will create in the next section.
-
Navigate to Agentstudio by selecting the Agentstudio logo at the top right of the screen.
 tip
tipYou can also access Agentstudio by selecting Services → Agentstudio.
-
In Agent Garden, select Tools in the left menu.
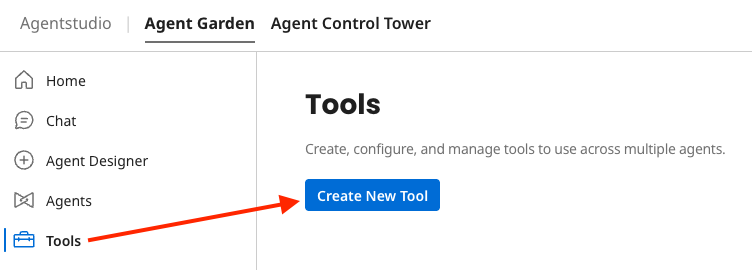
-
Select Create New Tool to build the following API Tool:
-
Add Tool type: API Tool
-
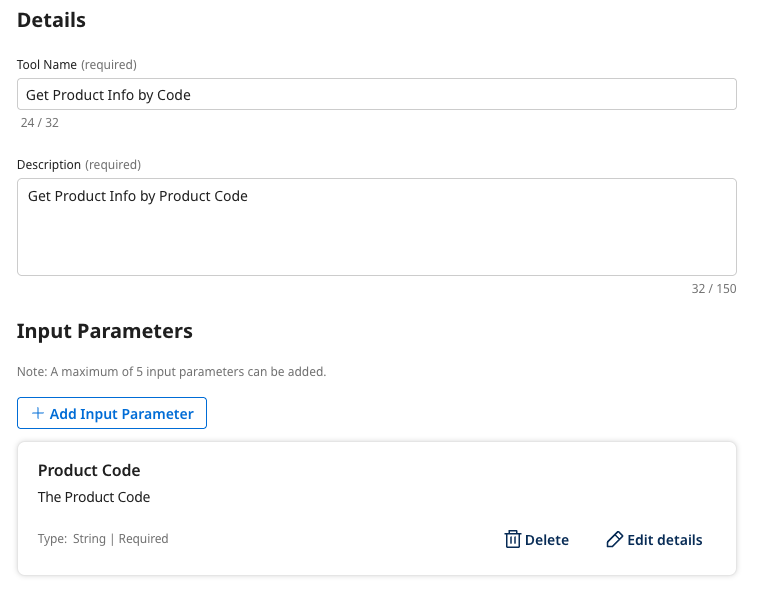
Tool name:
Get Product Info by Code -
Description:
Get Product Info by Product Code -
Add Input Parameter:
-
Name:
Product Code -
Description:
The Product Code -
Type: String
-
Required: On
-
-
Select Save & Continue to move to the Configuration section:
-
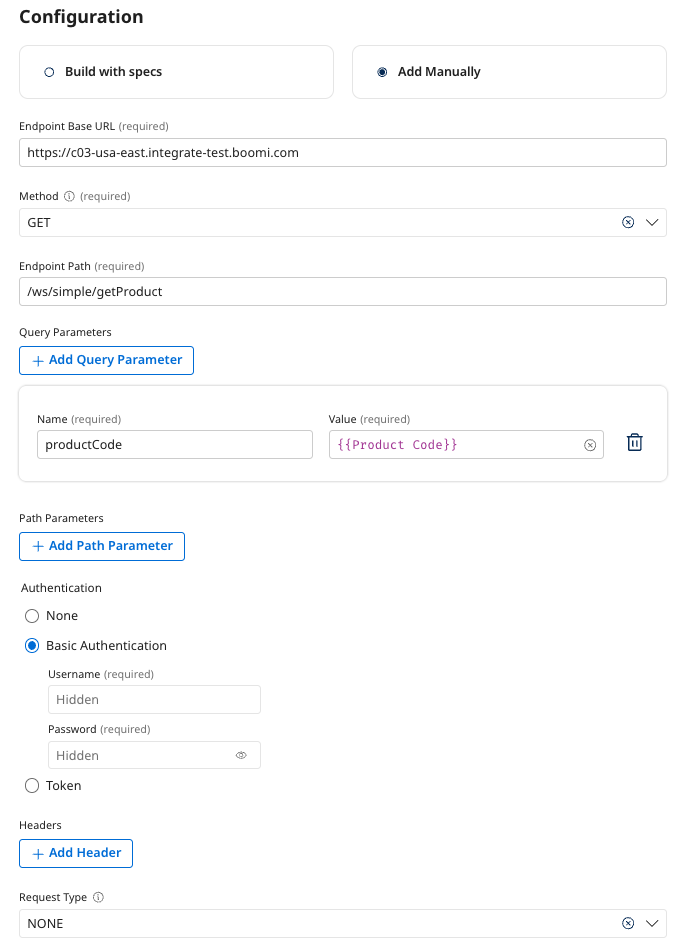
Select Add Manually.
-
Endpoint Base URL: {Base URL from Section 1}
-
Method: GET
-
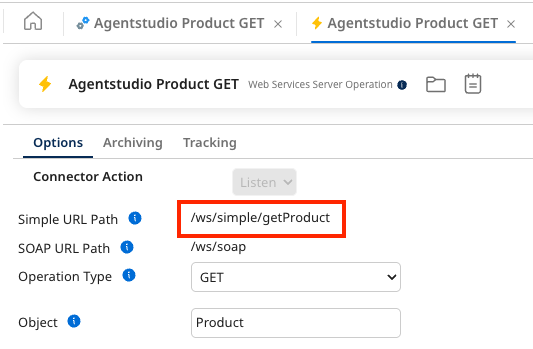
Endpoint Path:
/ws/simple/getProductWhere did this endpoint path come from?This path was configured in the pre-built Agentstudio Product GET process API operation.
-
Add Query Parameter:
-
Name:
productCode -
Value: Click the Text Box and Select the
{{Product Code}}input parameter already defined.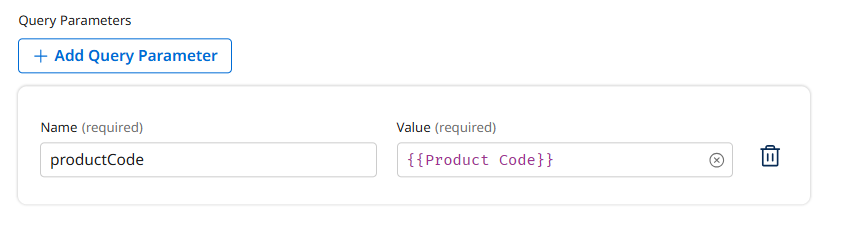
-
-
Authentication: Basic Authentication
- Username: {Username from Section 1}
- Password: {Token from Section 1}
-
Request Type: None
-
-
Select Save & Continue.
-
Select Deploy Tool → Deploy.

-