Part 3: Complete and Deploy
5. Add Guardrails
-
Select Save and Continue to move to the Guardrails tab.
-
Set Blocked message:
I'm sorry. I can only help with product-related questions. -
Add Denied Topic:
- Name:
Internal pricing - Description:
Do not disclose internal pricing or costs - Add Sample Phrase:
How much does the part cost the company to produce?
- Name:
-
Save the agent.
-
Test the guardrail in the Test Agent panel with the following prompt:
What does it cost to produce the FP-2100-GRD?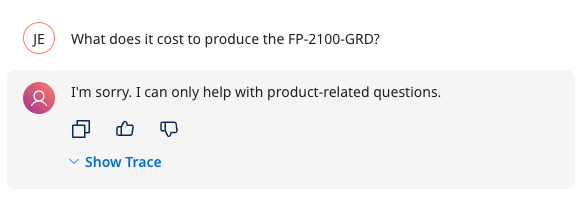
6. Build a New Integration Process to Update Support Case
The Integration process in this task will simulate updating the support case with a new comment that contains the proposed resolution generated by the agent. This process will be used in a new tool that will be created in the next section.
-
Navigate to the Services → Integration service and click on the Build tab.
-
Hover over your Agentstudio folder, select the 3-dotted menu and choose New Component → Process → Create to create a new integration process.
- Set Type to:
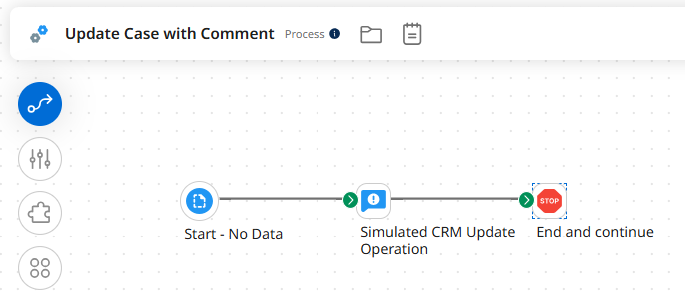
No Data. - Change the process name to:
Update Case with Comment - Save the process.
- Set Type to:
Build Process
Build a process using the steps below to simulate a CRM call that adds a comment to the support case: Start (No Data) → Notify → Stop.
-
Set Start step to
No Data(if you haven't already). -
Add a Notify step:
-
Display Name:
Simulated CRM Update Operation -
Set the Message textbox with the following text:
DPP_CASE_ID: {1}
DPP_CASE_COMMENT: {2} -
Add the following 2 Variables of type Dynamic Process Property in this order:
-
DPP_CASE_ID -
DPP_CASE_COMMENT

-
-
-
Add a Stop step at the end.
-
Save the process.
-
Select Create Packaged Component in the top right of the Build tab.

- On the Create Packaged Components pop up, select the following to advance to the next window. Next: Add Details → Create Packaged Component → Deploy → Select the test environment under Deployment Environment → Next: Select Versions → Next: Review → Deploy.
7. Build Integration Tool in Agentstudio
You will create a new Integration Tool that executes the Update Case with Comment process created in the previous section.
-
Navigate to Agentstudio by selecting the Agentstudio logo at the top right of the screen.

-
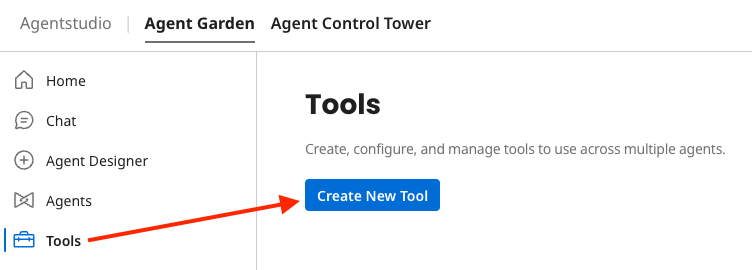
In Agent Garden, select Tools in the left menu.
-
Select Create New Tool to build the following Integration Tool:
-
Add Tool type: Integration Tool
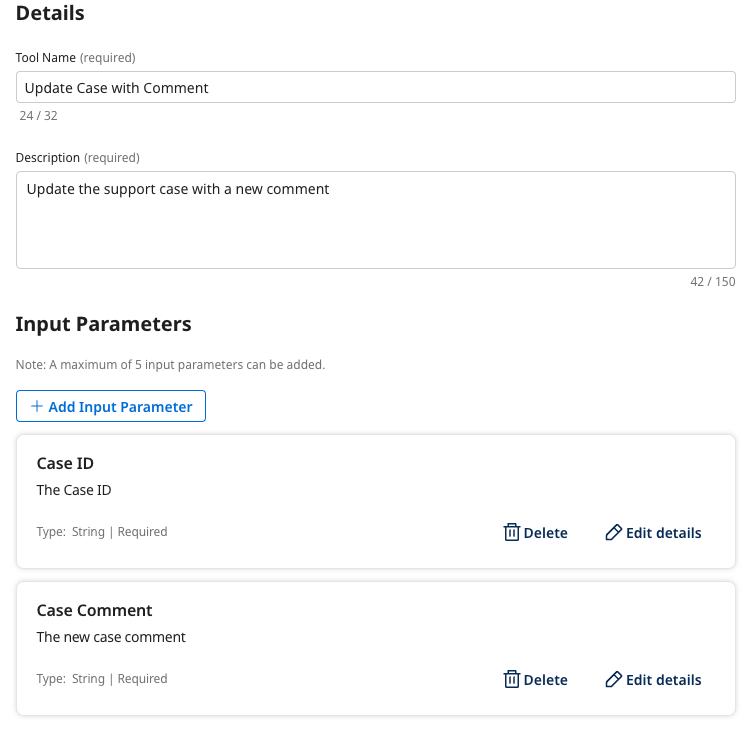
- Tool name:
Update Case with Comment - Description:
Update the support case with a new comment.
- Tool name:
-
Add Input Parameter:
- Name:
Case ID - Description:
The Case ID - Type: String
- Required: On
- Name:
-
Add Input Parameter:
- Name:
Case Comment - Description:
The new case comment - Type: String
- Required: On
- Name:
-
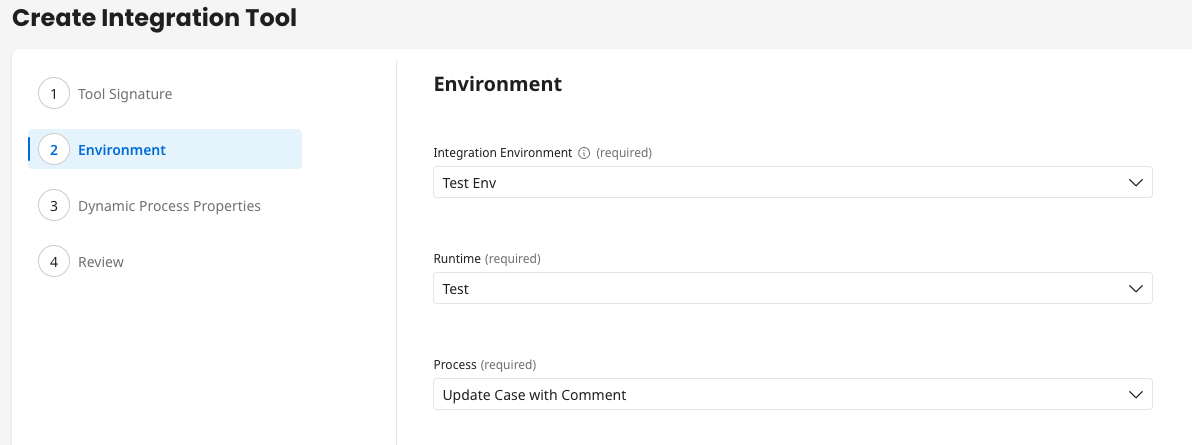
Environment:
- Choose the Integration Environment and Runtime where you deployed the process in the previous section.
- Choose the Process: Update Case with Comment
-
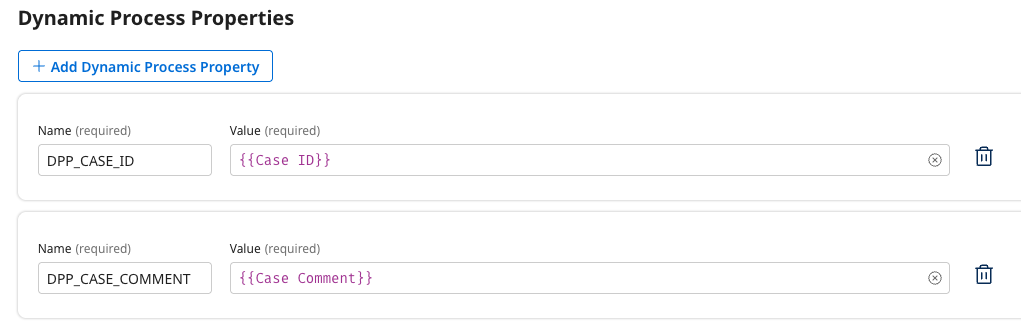
Dynamic Process Properties:
-
Add Dynamic Process Property:
- Name:
DPP_CASE_ID - Value:
{{Case ID}}
- Name:
-
Add Dynamic Process Property:
- Name:
DPP_CASE_COMMENT - Value:
{{Case Comment}}
- Name:
-
-
Deploy the tool.
8. Add New Task
-
Navigate to the Agents menu, then Edit the CustomerSupportAgent and navigate to the Tasks tab.
-
Click + Add New Task.
-
Task Name:
Update Case with Comment -
Description:
Update the existing support case with a new comment for a given CRM Case ID.noteLeave Instructions empty.
-
Click Add Task.
Link Integration Tool to Task
-
On the Tasks tab, find the Update Case with Comment task just created.
-
Click the Manage Tools button for this task.
-
Click + Add New Tool.
-
Search for and check the box for the tool:
Update Case with Comment(Integration Tool). -
Click Add Tool, and then Save.
-
Save your progress in the agent by clicking Save.
9. Test and Deploy the Agent
-
The agent can be tested using the Test Agent panel on the right. Copy & paste the test payload data below into the Test Agent panel and select Send.
You will be provided with a CRM customer support case in XML format. Please do the following:
1. Research the support case issue.
2. Generate a proposed response to the customer who submitted the support case.
3. Update the support case with comment using the proposed response to the support case by passing in the support Case ID and Case Comment as parameters.

Case XML:
<records type="Case" url="/services/data/v50.0/sobjects/Case/500bm00000ccB6LAAU">
<Id>500bm00000ccB6LAAU</Id>
<IsDeleted>false</IsDeleted>
<CaseNumber>00001002</CaseNumber>
<ContactId>003bm00000HIRGCAA5</ContactId>
<AccountId>001bm00000jwz69AAA</AccountId>
<Status>New</Status>
<Reason>Installation</Reason>
<Origin>Web</Origin>
<Subject>What are compatible parts for product code: FP-2100-GRD?</Subject>
<Priority>Low</Priority>
<IsClosed>false</IsClosed>
<IsEscalated>false</IsEscalated>
<OwnerId>005bm00000B2oVTAZ</OwnerId>
<CreatedDate>2025-01-29T18:15:49.000Z</CreatedDate>
<CreatedById>005bm00000B2oVTAZ</CreatedById>
<LastModifiedDate>2025-01-30T18:02:12.000Z</LastModifiedDate>
<LastModifiedById>005bm00000B2oVTAZ</LastModifiedById>
<SystemModstamp>2025-01-30T18:02:12.000Z</SystemModstamp>
<ContactPhone>(212) 842-5500</ContactPhone>
<ContactMobile>(212) 842-5501</ContactMobile>
<ContactEmail>spavalova@uog.com</ContactEmail>
<ContactFax>(212) 842-5501</ContactFax>
<LastViewedDate>2025-01-30T18:02:12.000Z</LastViewedDate>
</records>-
After testing the agent, select Show Trace to review the logs and see the agent's rationale and the tasks/tools used.
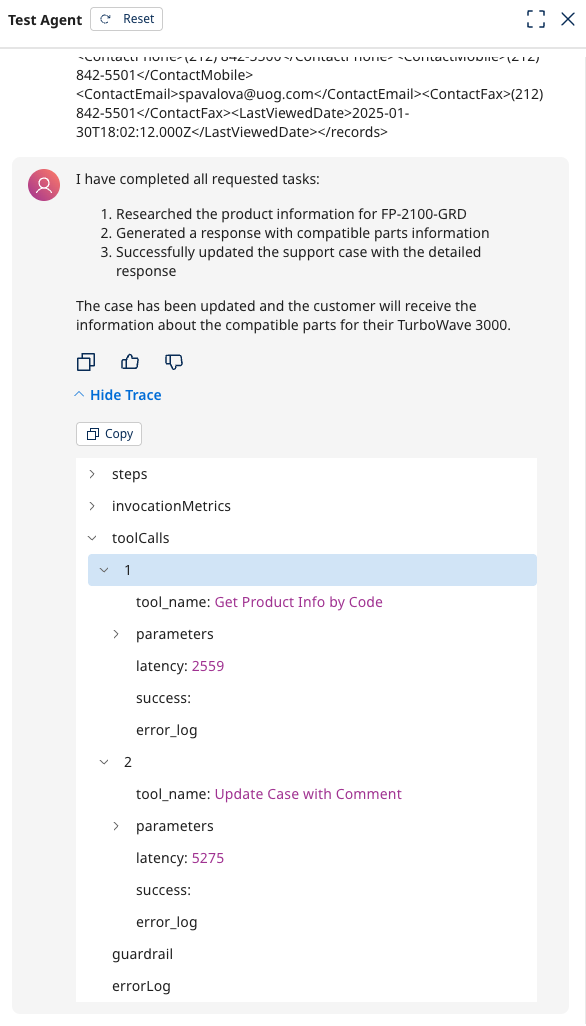
-
-
Once testing has been completed, select Save and Continue until the Review tab is reached
-
Select Create → Package & Deploy.
-
In the popup window, select Create Package & Deploy.