Part 4: Use Agents in Processes
10. Configure Boomi Control Tower
In the next section you will invoke (call) your Agent from within a Boomi Integration process, but first in this section you must add your Boomi account as an Agent Provider in Agent Control Tower.
-
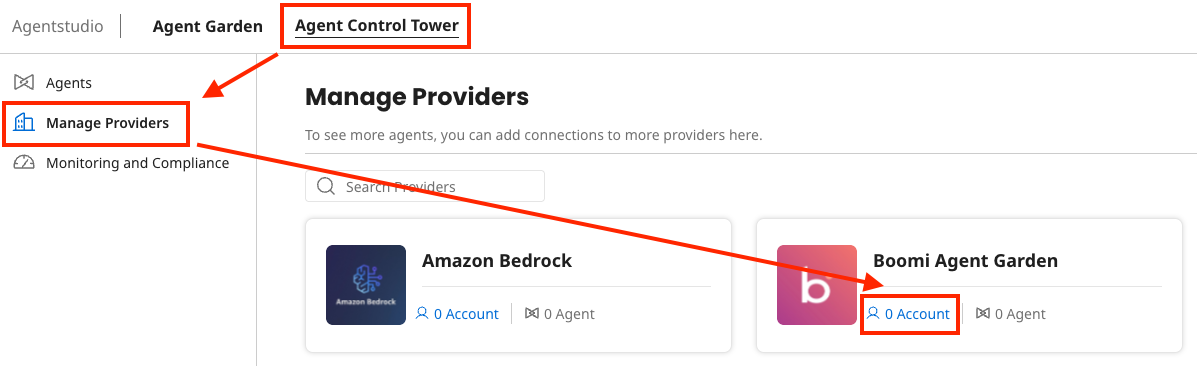
Within Agentstudio, navigate to Agent Control Tower.
-
Select Manage Providers on the left.
-
Select the Account link under Boomi Agent Garden.
-
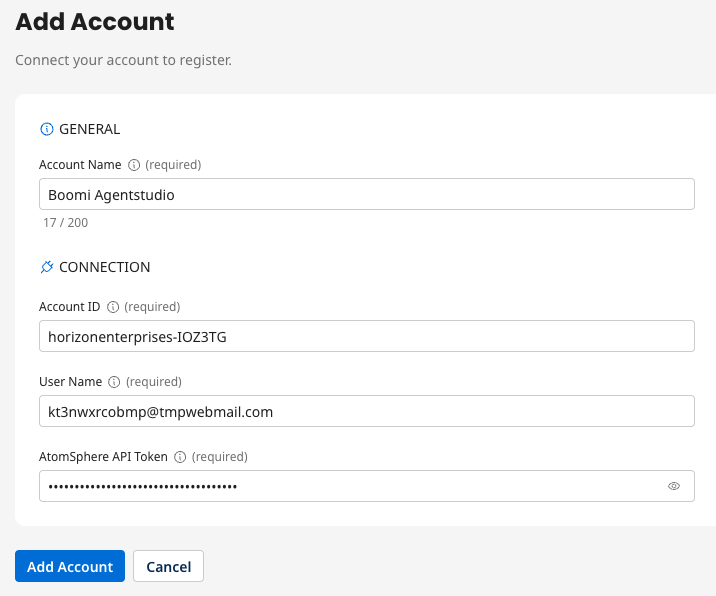
Select Add Account and populate the fields as follows:
- Account Name:
Boomi Agentstudio - Account ID: {Enter Account ID from prerequisites}
- User name: {Enter your platform email address}
- AtomSphere API Token: {Enter Platform API Token from prerequisites}
 info
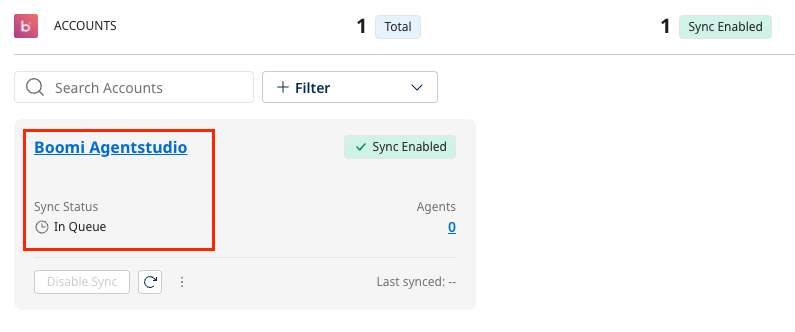
infoAfter adding your account it will synchronize momentarily, after which your agents will display. You can continue on in the lab without waiting for the sync to complete.
- Account Name:
11. Build an Integration process to simulate new support case
In this section you will build a main Integration process that will act as a simulated "listener" process. This process simulates listening for new support cases and (using a mock data payload) triggers the Agentstudio agent to research the issue, generate a proposed response, add a comment to the support case, and then detect sentiment and route the case accordingly.
-
Return to Boomi Integration and create a new process in your Agentstudio folder named:
[MAIN] Listen for Support Cases and Generate Responses.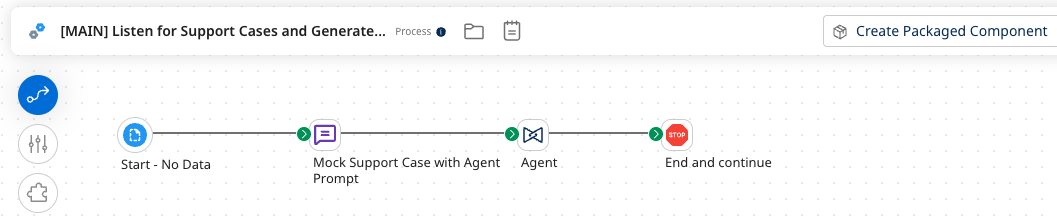
-
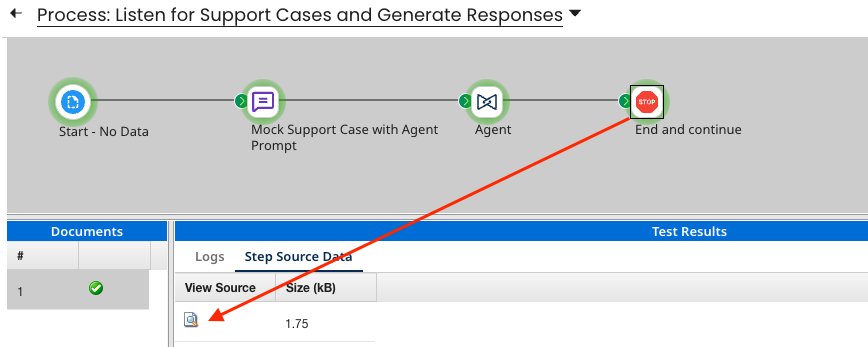
Build out the process with the following steps (should look like the screenshot above):
-
Start (No Data)
-
Message step:
-
Name:
Mock Support Case with Agent Prompt -
Message:
 You will be provided with a CRM customer support case in XML format. Please do the following:
 1. Research the support case issue.
 2. Generate a proposed response to the customer who submitted the support case.
 3. Update the support case with comment using the proposed response to the support case by passing in the support Case ID and Case Comment as parameters.

 Case XML:
 <records type="Case" url="/services/data/v50.0/sobjects/Case/500bm00000ccB6LAAU">
 <Id>500bm00000ccB6LAAU</Id>
 <IsDeleted>false</IsDeleted>
 <CaseNumber>00001002</CaseNumber>
 <ContactId>003bm00000HIRGCAA5</ContactId>
 <AccountId>001bm00000jwz69AAA</AccountId>
 <Status>New</Status>
 <Reason>Installation</Reason>
 <Origin>Web</Origin>
 <Subject>What are compatible parts for product code: FP-2100-GRD?</Subject>
 <Priority>Low</Priority>
 <IsClosed>false</IsClosed>
 <IsEscalated>false</IsEscalated>
 <OwnerId>005bm00000B2oVTAZ</OwnerId>
 <CreatedDate>2025-01-29T18:15:49.000Z</CreatedDate>
 <CreatedById>005bm00000B2oVTAZ</CreatedById>
 <LastModifiedDate>2025-01-30T18:02:12.000Z</LastModifiedDate>
 <LastModifiedById>005bm00000B2oVTAZ</LastModifiedById>
 <SystemModstamp>2025-01-30T18:02:12.000Z</SystemModstamp>
 <ContactPhone>(212) 842-5500</ContactPhone>
 <ContactMobile>(212) 842-5501</ContactMobile>
 <ContactEmail>spavalova@uog.com</ContactEmail>
 <ContactFax>(212) 842-5501</ContactFax>
 <LastViewedDate>2025-01-30T18:02:12.000Z</LastViewedDate>
 </records>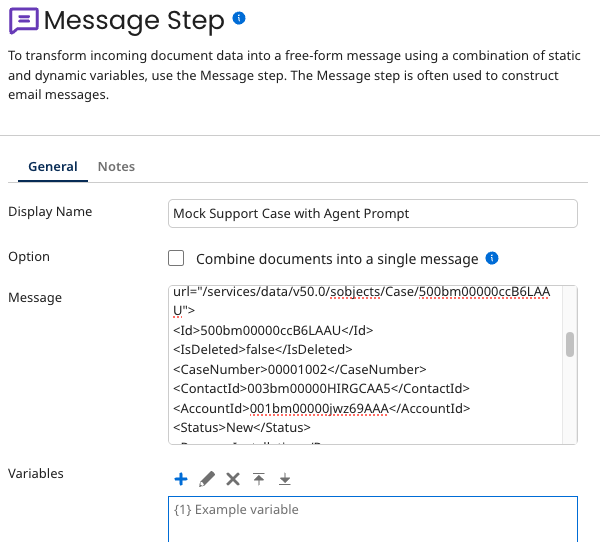
-
-
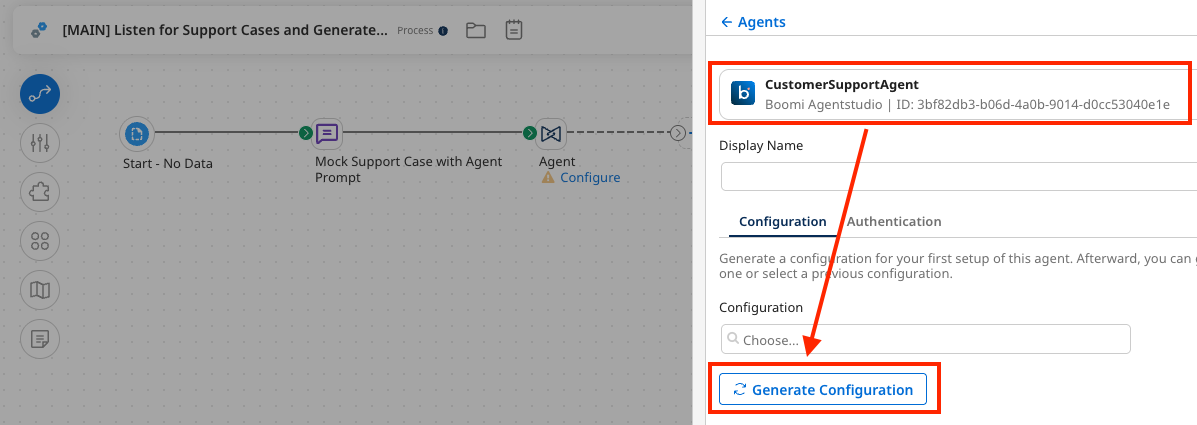
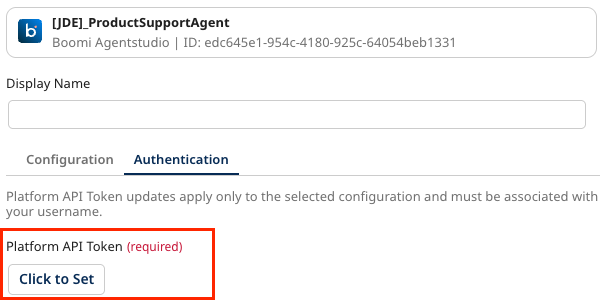
Agent step:
-
Select the CustomerSupportAgent agent. Then select Generate Configuration.
-
Select the Authentication tab and copy & paste the Platform API Token from the prerequisites section.
-
-
Finally, add a Stop step.
-
Save the process.
-
12. Test the Integration Process
-
Test the process. While viewing the test results, select the final Stop step.
-
Select View Source Data to view the raw payload the agent returned.
-
In the Document Viewer, scroll down to see how the raw payload contains ALL of the events from the agent (action, thinking, etc), similar to the trace log shown while testing the agent in Agentstudio.

-
-
Confirm that the API Tool was used by the agent. Navigate to Manage → Process Reporting.
-
Notice that the Agentstudio Product GET process tool was called by the agent first. Open the process logs for: Update Case with Comment.

-
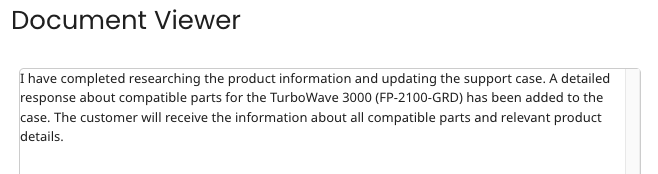
To view the full comment and resolution that was added to the support case, click on the Notify step's message entry that starts with:
DPP_CASE_ID: ...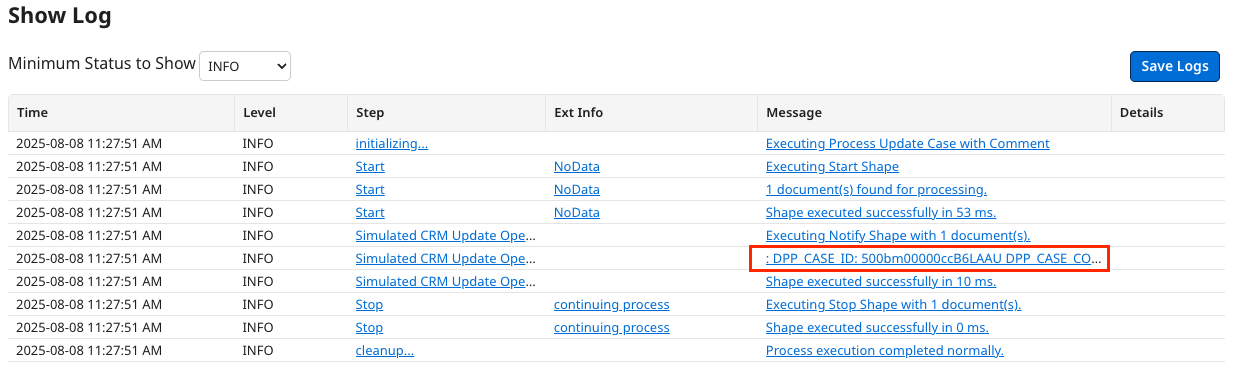
-
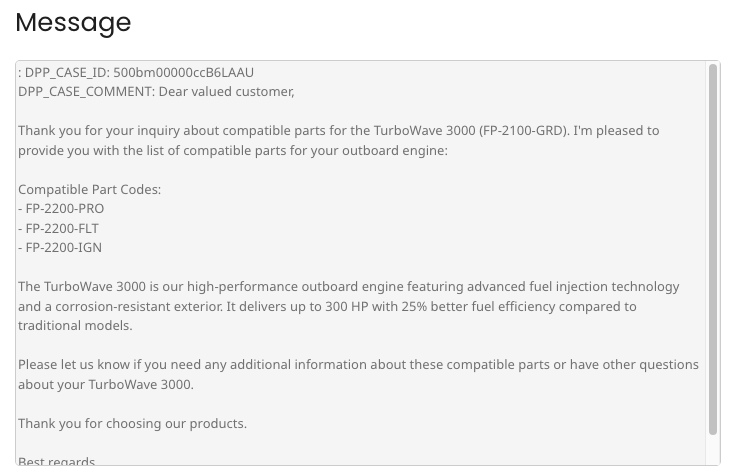
The message shows both the Case ID and Case Comment that was sent into the process to simulate updating the CRM Support Case.
-
13. Extract final response from Agent
Next, you will modify your main Integration process to extract only the final agent response from the raw detailed agent response viewed in the last section, in order to perform further processing.
-
Select the Build tab, then open the process: [MAIN] Listen for Support Cases and Generate Responses.
-
Remove the final Stop step.
-
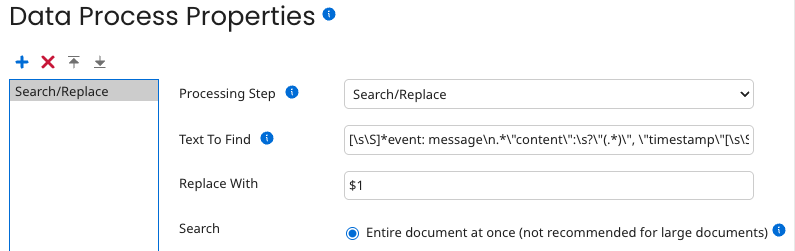
Add a Data Process step to the canvas after the Agent step and configure the step.
-
Under Data Process Properties, click the plus icon to add a new property and use the following configuration:
-
Processing Step: Search/Replace
-
Text to Find:
[\s\S]*event: message\n.*\"content\":\s?\"(.*)\", \"timestamp\"[\s\S]* info
infoThis regular expression searches the output of the Agent step and returns only the final message.
-
Replace With:
$1 -
Search: Entire document at once
-
-
-
Add a Stop step.

-
Select Save, then Test the process again. With the final Stop step selected, View Source Data.
successAdding the Data Process step searches the Agent step's output and returns only the message in an easy-to-read format: